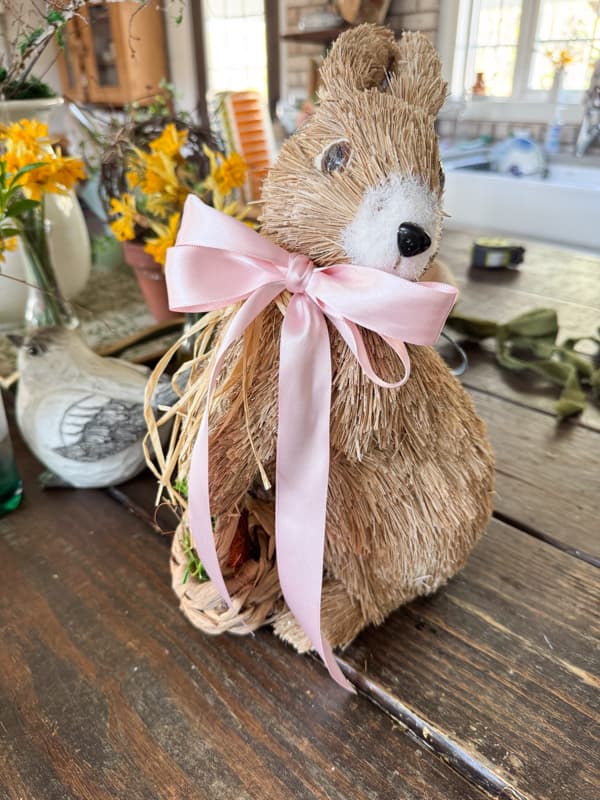
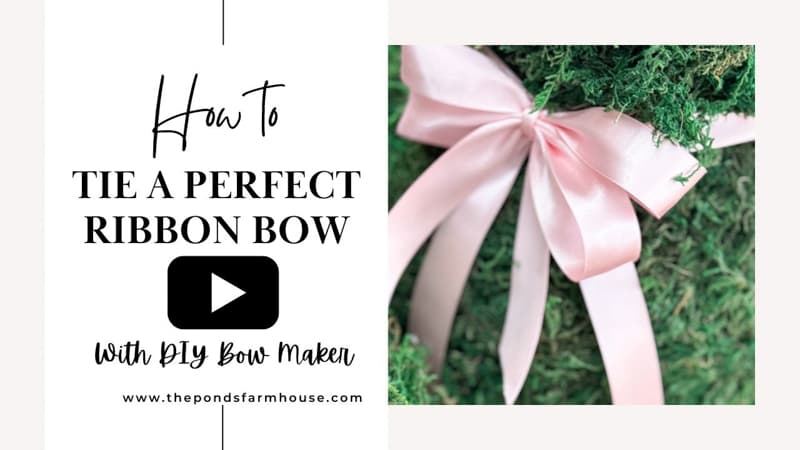
Ribbon Bow Making Made Simple: Using a DIY Bow Maker
There’s nothing quite like a perfectly tied ribbon bow to add a touch of elegance to any project. But let’s be honest: wrestling with ribbons can be challenging. Whether you’re decorating gifts, wreaths, or home decor, a beautiful bow adds that perfect finishing touch, and I’ve got you covered. Today, I’m sharing how to use a DIY bow maker to easily create flawless ribbon bows. This simple tool will revolutionize your crafting, allowing you to create professional-looking bows every time. I’ll take you step by step through the process.
(Posts on The Ponds Farmhouse may contain affiliate links. As an Amazon Associate, I earn from qualifying purchases. See the full disclosure details here.)
How To Make DIY Bow Maker
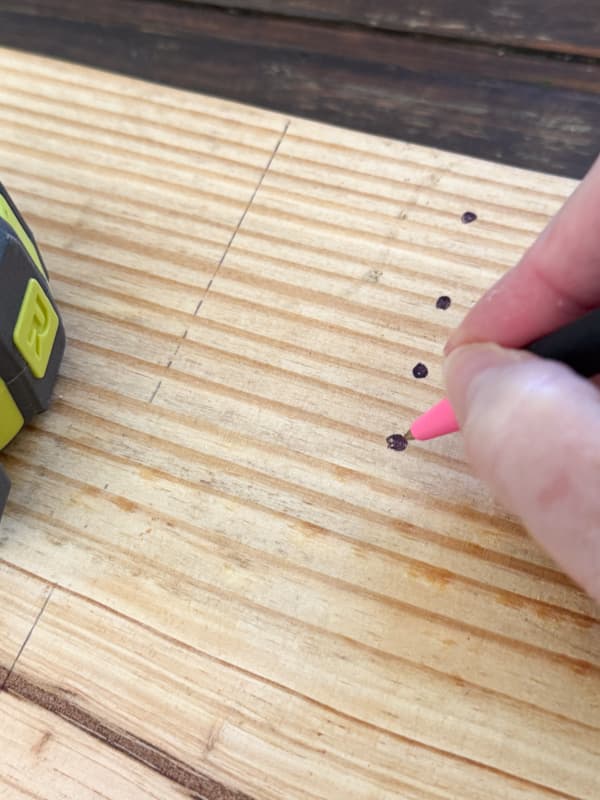
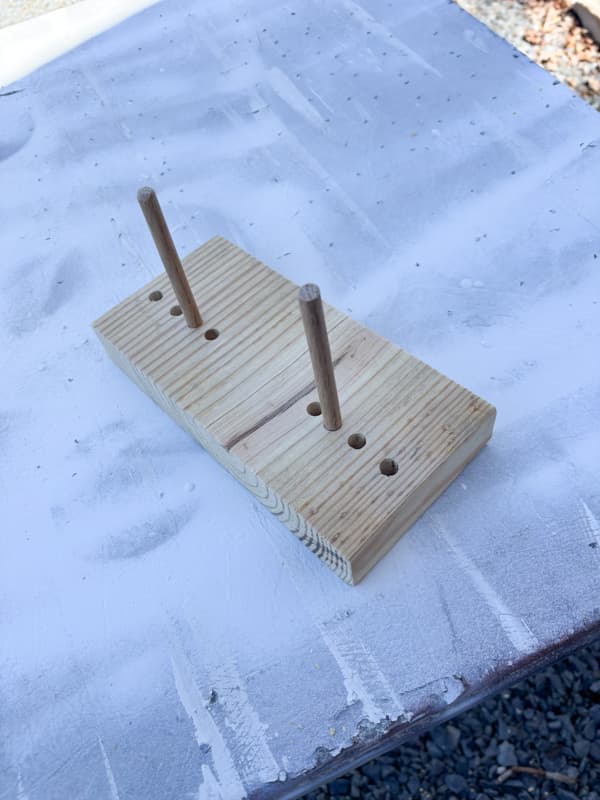
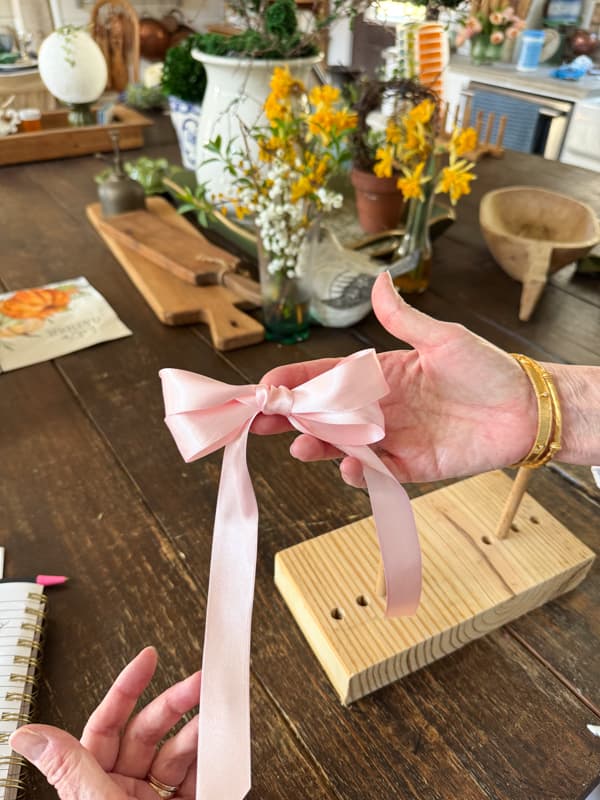
If you are tired of making bows with your fingers, you will love this easy-to-make bow maker. I had Brad find a piece of scrap wood and a couple of dowel rods to create this simple project.
To create the wood bow maker, I measured the distance I wanted to create different-sized bows. After I had designated the areas, Brad drilled the holes using a drill bit the size of the dowel rods I planned to use.
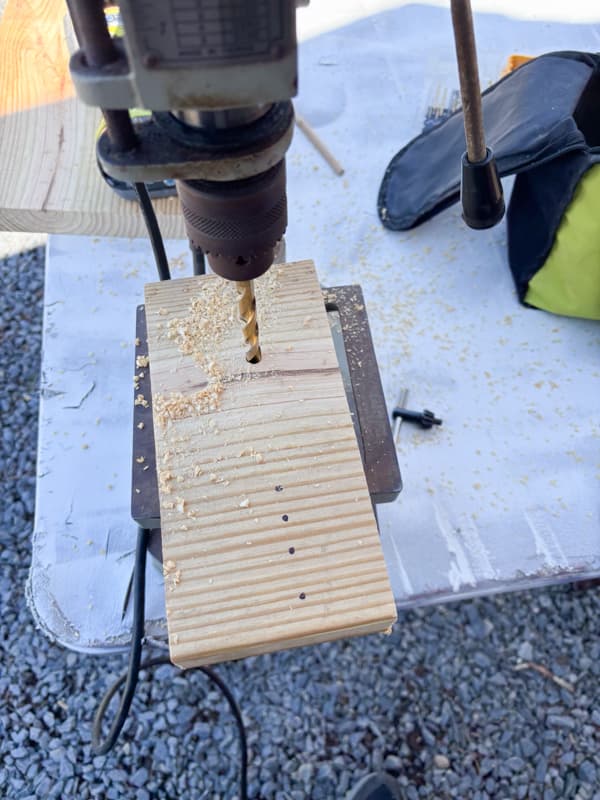
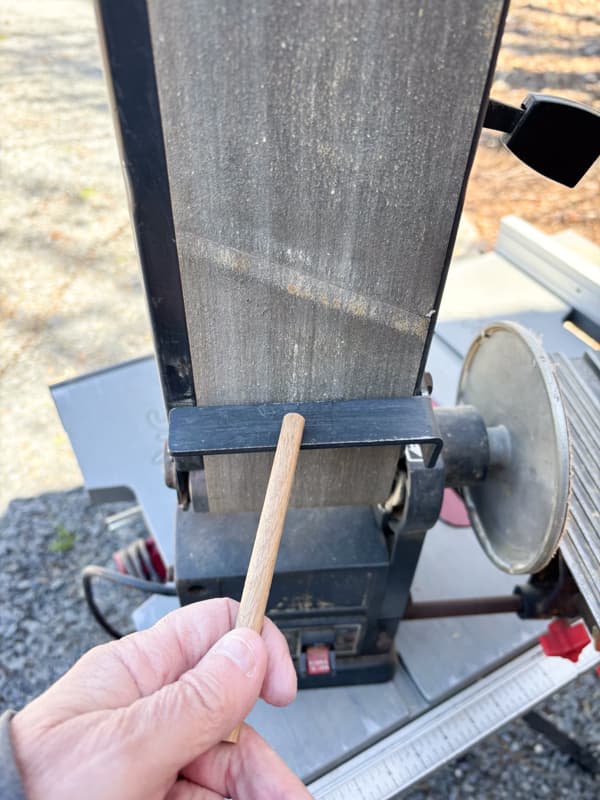
Next, he cut the dowel rods and sanded everything smooth. The dowel rods can be moved from hole to hole to create different-sized bows. (Note: I’m having him make more rods for more bow options.)
How To Make A Ribbon Bow
Now that you have your bow maker, you are ready to make your ribbon bow. It’s difficult to see each step, but I’ll try to explain, and I’ve also included a video for your convenience.
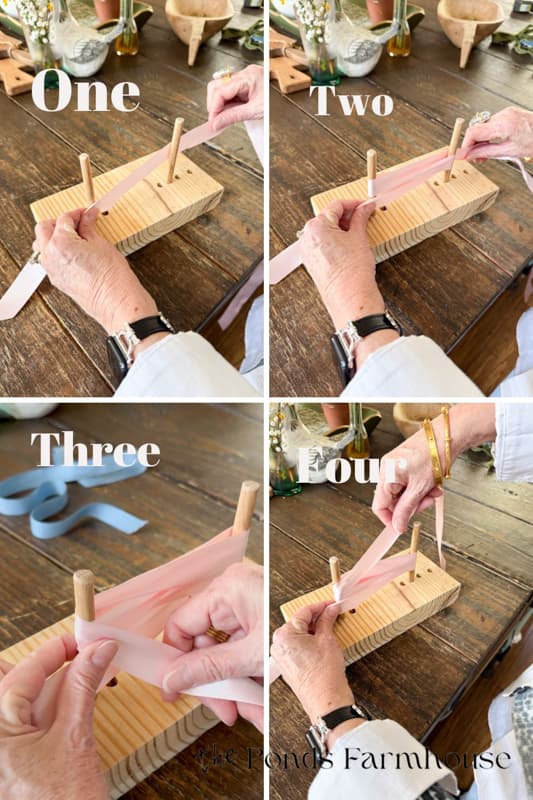
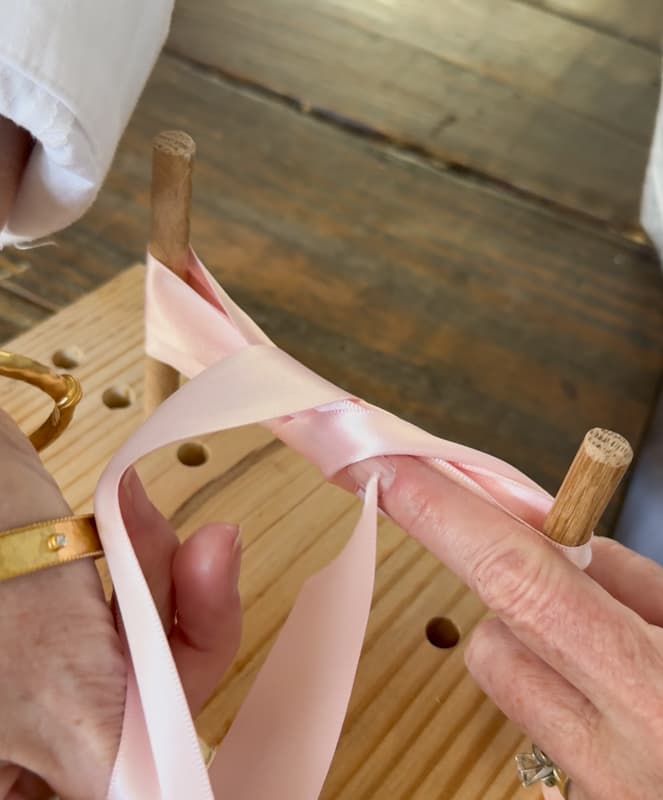
- Facing the DIY Bow Maker, hold the ribbon with a length of tail against the front of the left-hand dowel rod. This end will remain steady during the whole process. (I leave approximately 6 inches, but if you want a longer tail, leave more beyond the rod.) Pull the other end of the ribbon between the rods and behind the right-hand side.
- Wrap the ribbon around that rod and back between the two rods, wrapping around the backside of the left dowel.
- Pull the ribbon around and repeat steps 1-2. You will have a tail from the beginning, and both rods will be wrapped twice.
- Hold the ribbon at the left-hand rod and bring the end over the top center of the wrapped ribbon.
Now, you are ready to make the bow center.
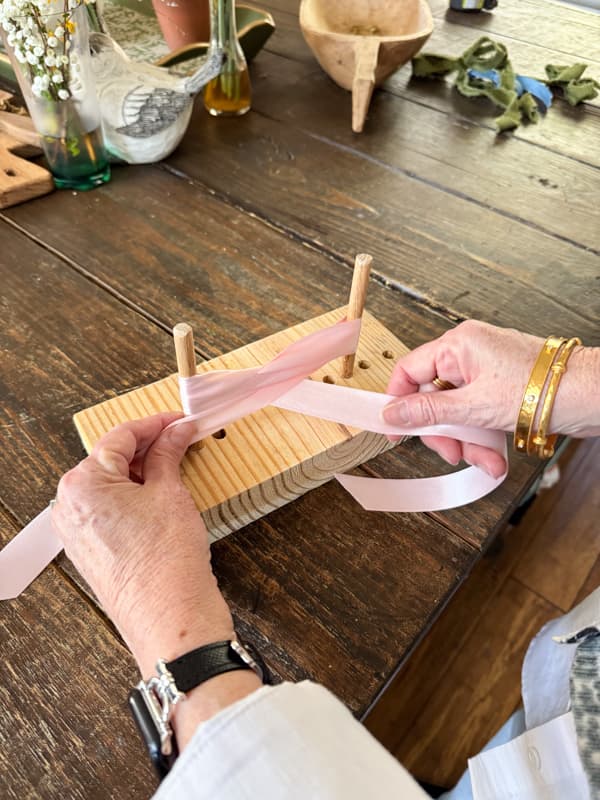
5. After wrapping over the top, bring the ribbon under the center.
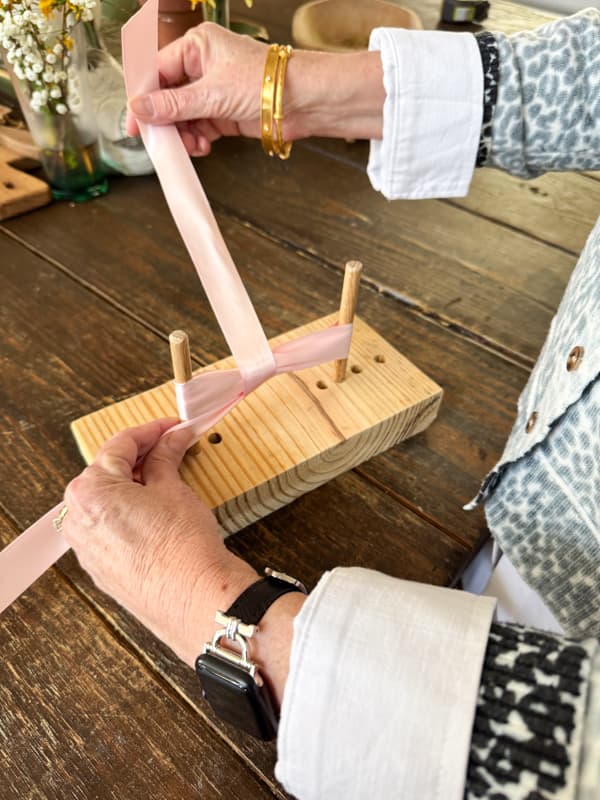
6. Then pull back over the top from the front.
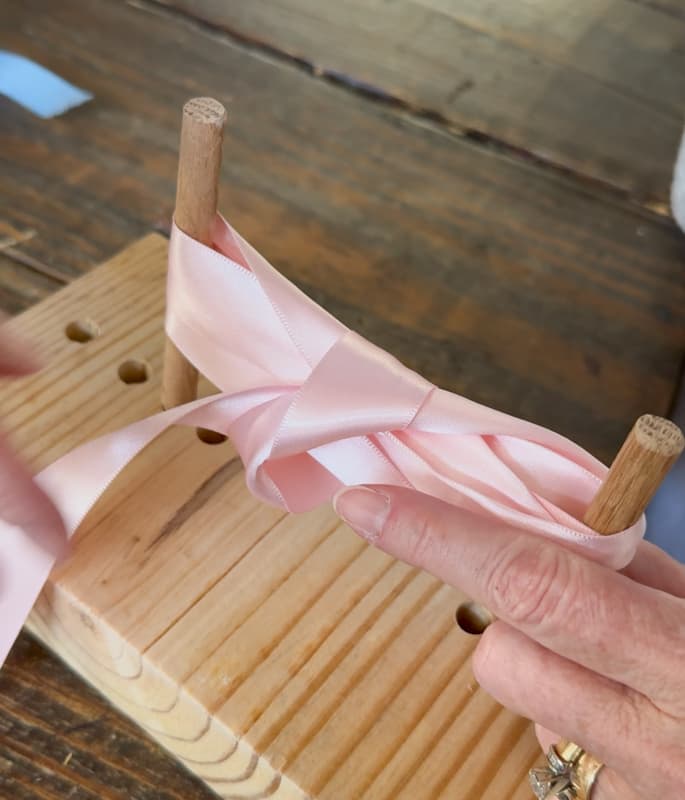
7. Find the loop on the backside and loosen it so that you can pull the ribbon under the loop from the left-hand side.
8. Keep the loop centered and tighten the knot.
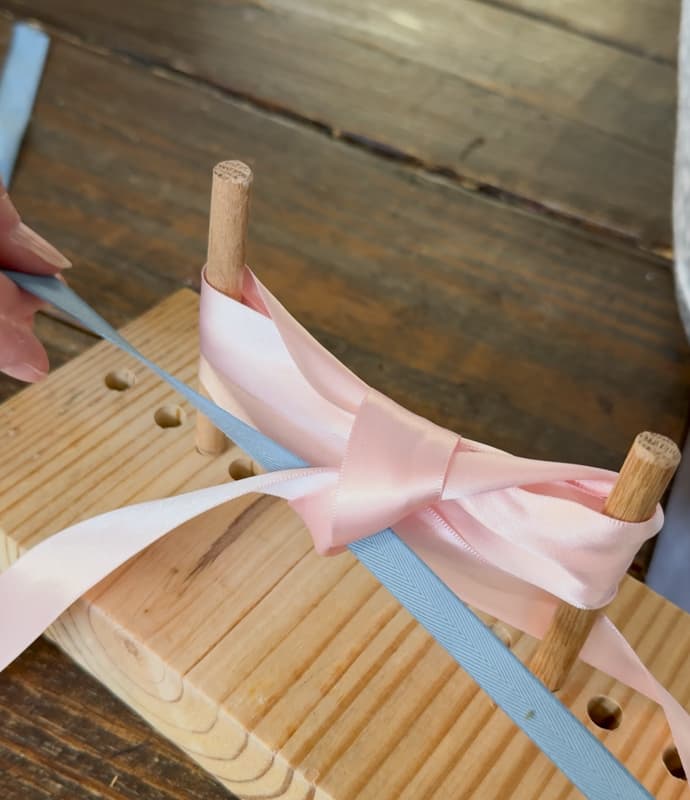
9. Before securing with a tight knot, add additional ribbon for tying to an object if needed. Slip the ribbon under the loop and center it.
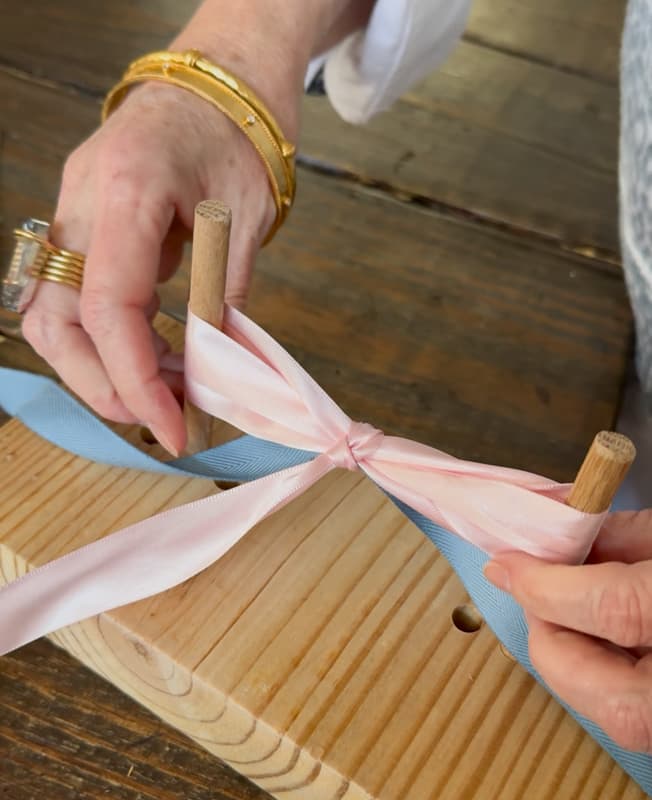
10. Tighten the original ribbon into a secure knot and slide the ribbon off the ribbon maker.
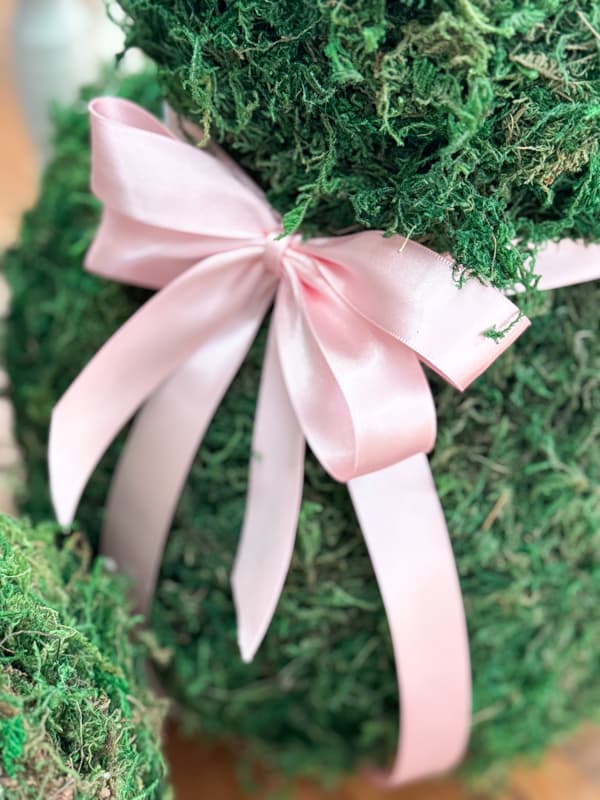
Finally, shape your ribbon and cut the tails if needed.
Following these instructions will result in a perfect bow every time. You can add additional loops and tails if you desire.
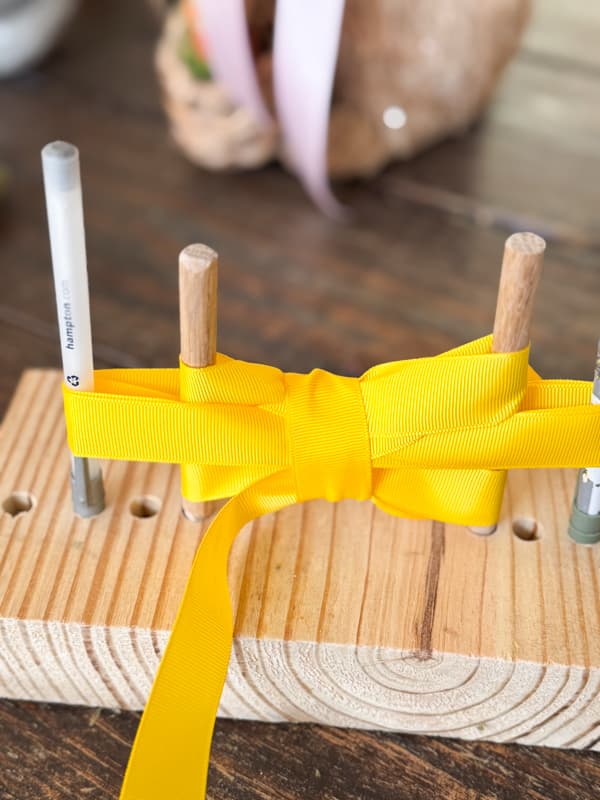
How To Make A More Complex Bow
If you want to add more dimension to your bow, you can use multiple rods and interchange the looping. I need Brad to make more dowel rods to fit, but these ink pens worked in a pinch.
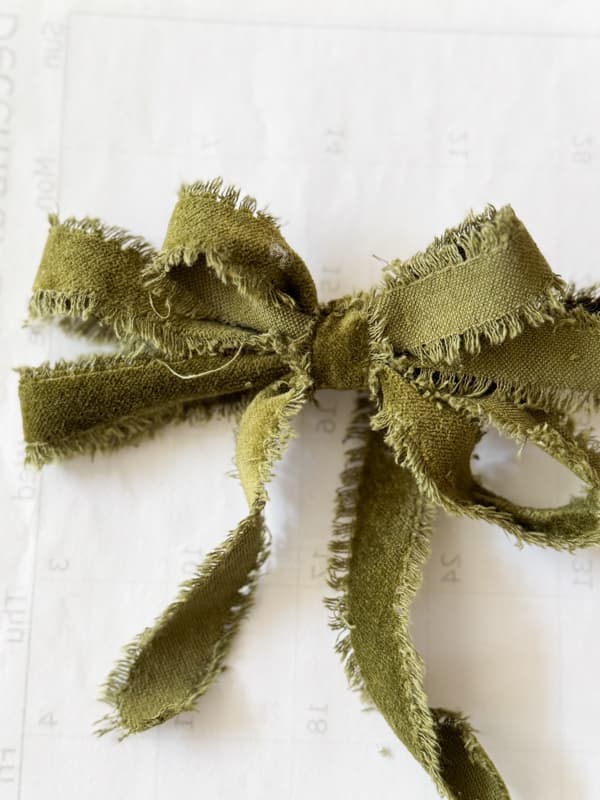
If you plan to make larger, more complex bows, it is best to work with thin, soft ribbon.
Both of the bows below have an extra, smaller loop. The green bow’s soft material works better than the stiff grosgrain ribbon.
I recommend experimenting with different combinations to achieve the desired look.

Insider Tip
The key to a successful bow maker is using dowel rods that a smooth so that the ribbon can slip off easily. The size of the rod isn’t important as long as you can remove it from the drilled holes to create different size bow.
Video
Thank you for stopping by.


That’s fantastic. Thank you!
Betty,
Thank you for stopping by. I’m so glad you found this helpful. Have the best day!