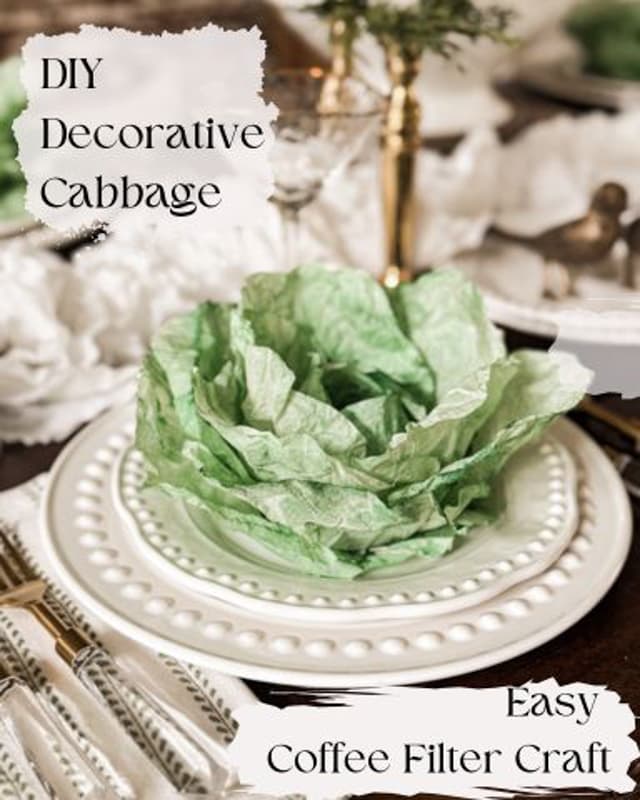
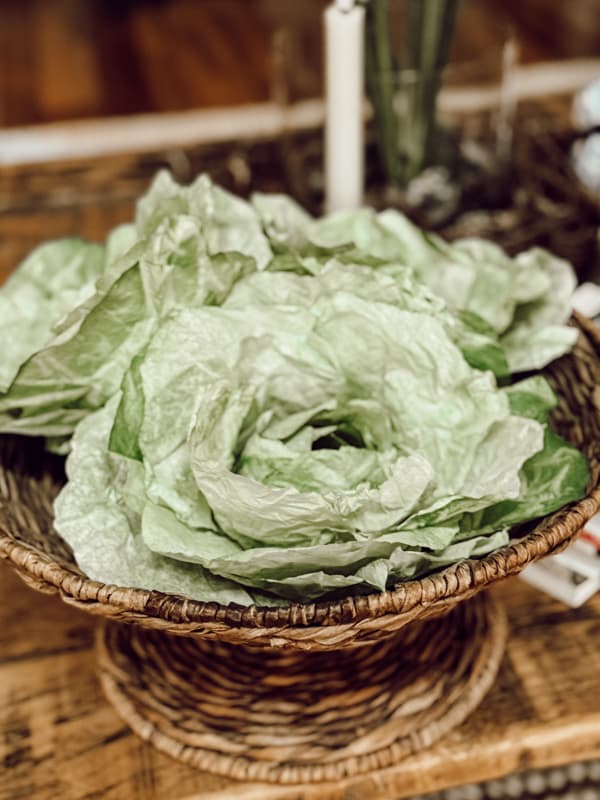
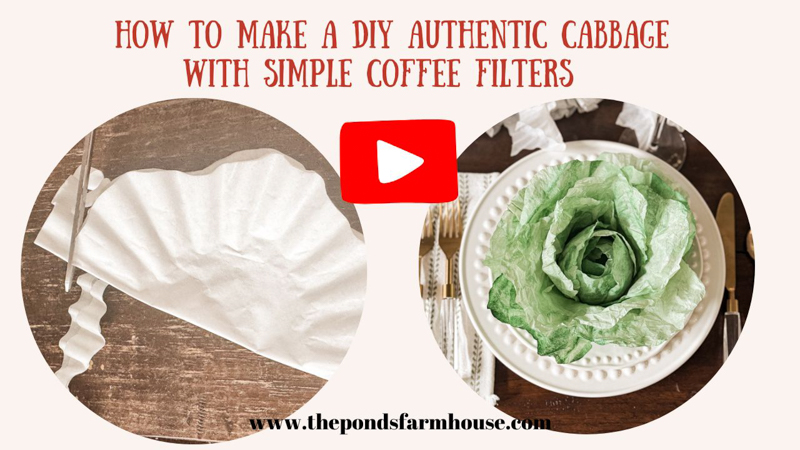
How To Make A Decorative Cabbage With Coffee Filters
I spotted the most adorable paper cabbages in a boutique the other day and was immediately smitten. But the price tag, Ouch! That’s when I decided to get crafty. I’m always looking for unique and budget-friendly ways to decorate my home, and these charming cabbages were too tempting to resist. I decided to recreate the look with an easy coffee filter craft technique– yes, coffee filters! I was amazed at the realistic textures and colors I could create. Plus, you can make a whole bunch for just a few pennies. Let me show you how!
(Posts on The Ponds Farmhouse may contain affiliate links. As an Amazon Associate, I earn from qualifying purchases. See the full disclosure details here.)
How To Make Decorative Cabbage Leaves
If you’re looking to add a touch of spring or Easter décor, these DIY cabbages will add a lovely touch to any space. And I promise you they are so easy to make. The first step is to create what appears to be cabbage leaves from coffee filters. I have never tried this project but was pleasantly surprised with how authentic the cabbage leaves appear. I purchased the coffee filters from Dollar Tree and some green craft paint. Here is the complete list of supplies.
Supply List
- Coffee Filters
- Green Craft Paint
- Green Food Coloring
- Coffee Stained Water (optional)
- Hot Glue Gun
- Cup, glass, or tin can
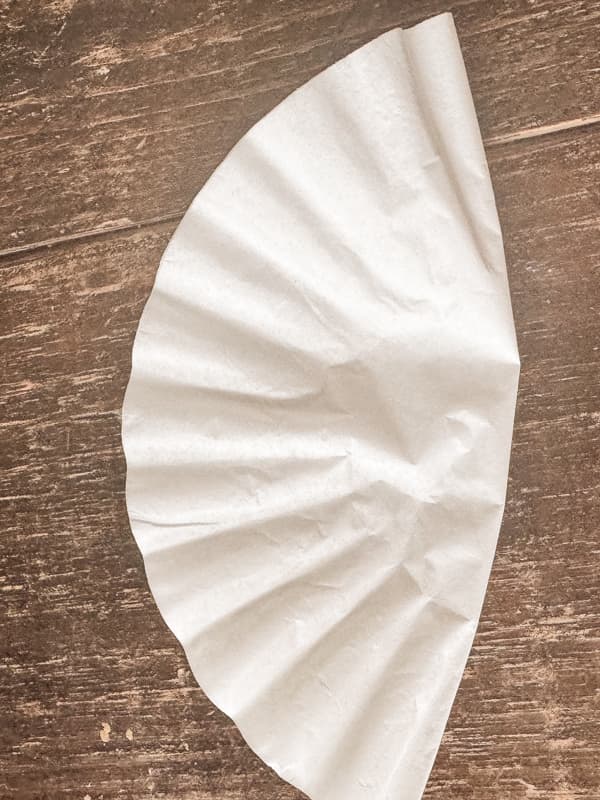
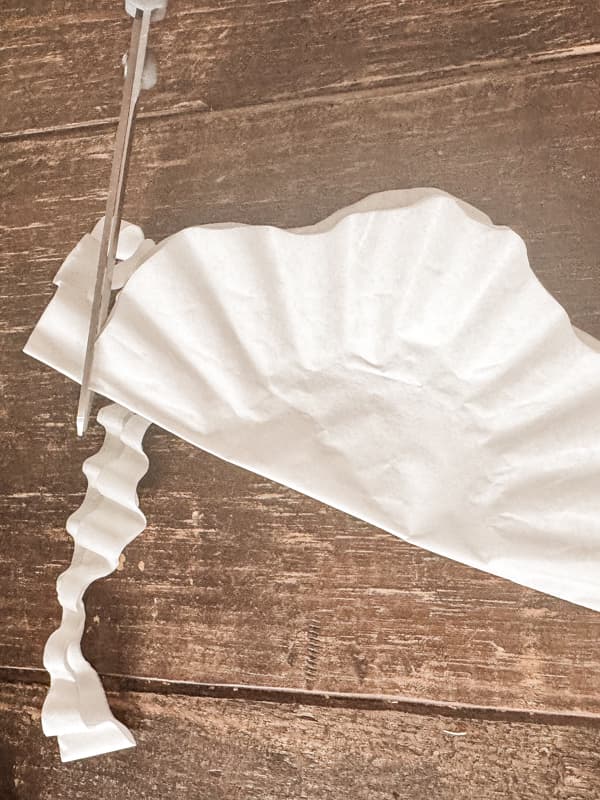
Step 1: Trim Coffee Filters To Look Like Cabbage Leaves
I began by taking a small stack of coffee filters and folding them in half. Then, I used scissors to trim a curvy edge to the entire stack. So easy!
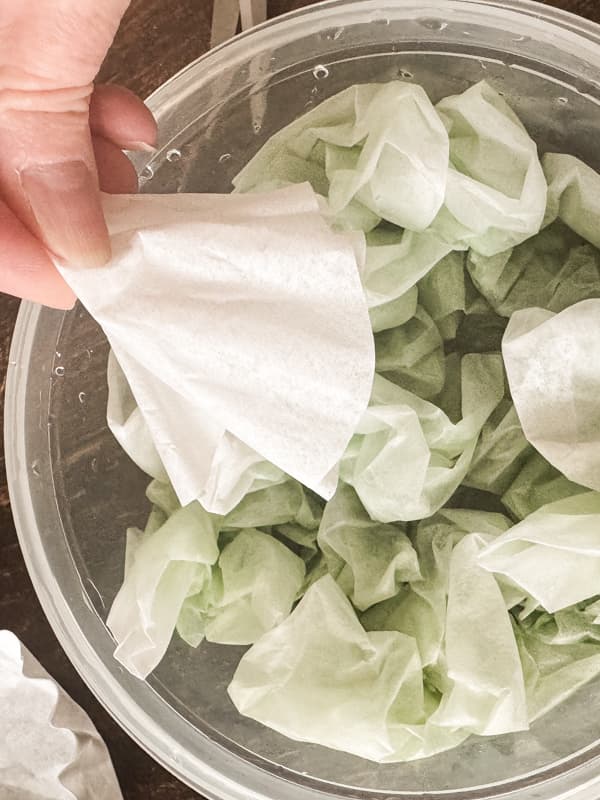
Step 2: Stain Coffee Filters
Next, I made a green stain mixture using coffee-stained water and green food coloring. I began adding the individual coffee filters into the stain. I realized quickly that the food coloring and coffee alone wouldn’t give them the decorative cabbage color I desired. So, I added some of the green craft paint to the mixture. This method created a more realistic appearance, allowing for dark stained and light areas on each coffee filter.
Step 3: How To Dry Stained Coffee Filters
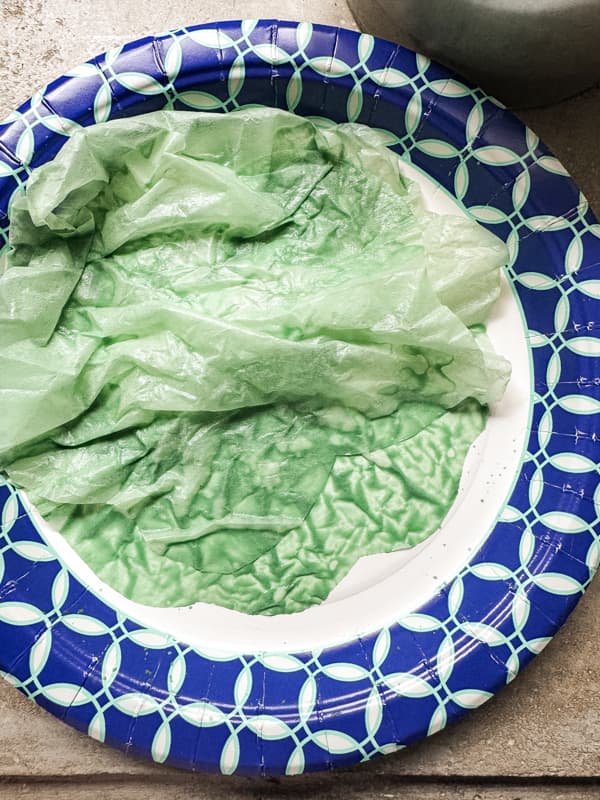
You have two options for drying the stained coffee filters. You can spread them out to dry naturally, or you can dry them in an oven or microwave. Because I wanted to complete the project quickly, I opted to dry the decorative cabbage leaves in the microwave and even a few in the oven. Either method works quickly.
To dry in the microwave, place 4-5 coffee filters on a paper plate and ensure the stain is heavier in some areas. Also, keep the filters slightly wrinkled. Place in microwave on high for 1 minute at a time. Rearrange and repeat until they are completely dry.
You can also dry in your oven with an oven-safe pan and follow the same placement suggestions. Keep the oven temperature low, 200-250 degrees, and only leave it for 5 minutes or less. Do not leave the stove unattended with the paper coffee filters inside.
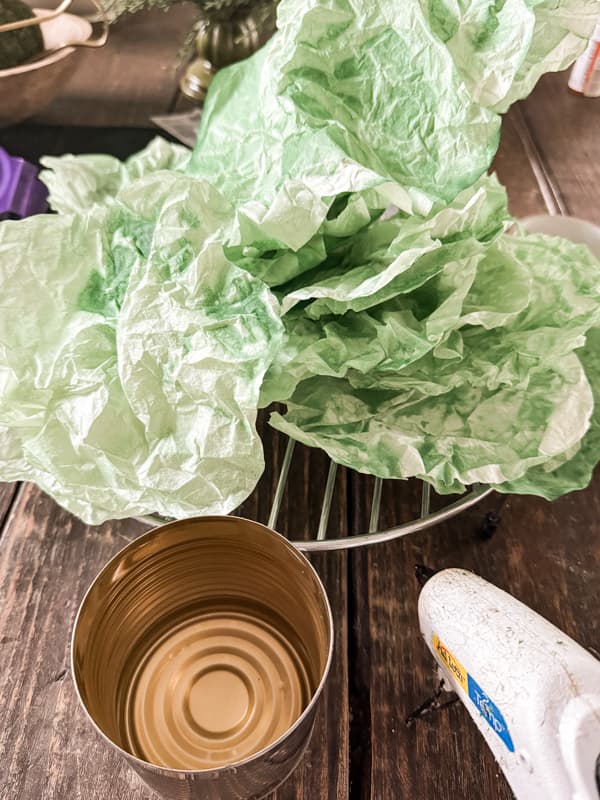
Step 4: Assemble Decorative Cabbage
Once all your coffee filter craft leaves are dry, you can assemble your decorative cabbage.
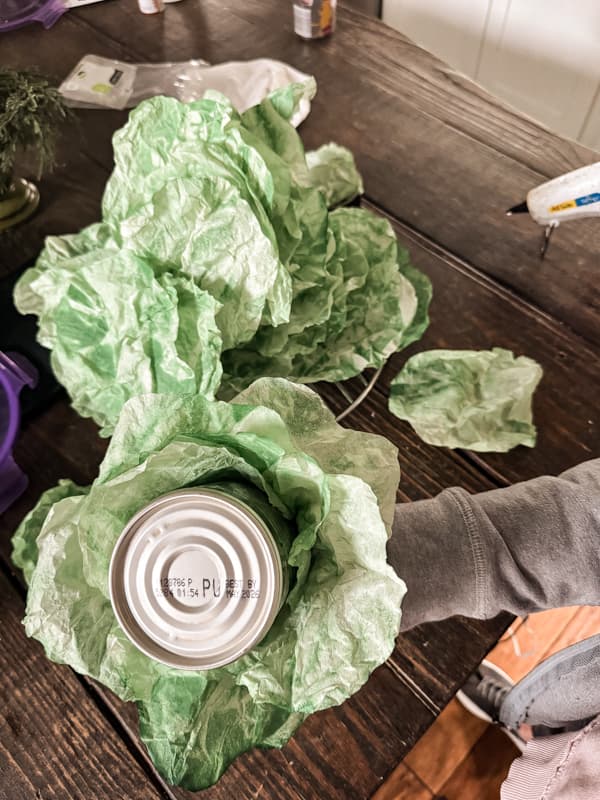
Begin with a cup or tin can to wrap the cabbage leaves around. I used a small recycled bean tin can, and the size was perfect. Fold the cabbage leaves around the rim of the can one at a time.
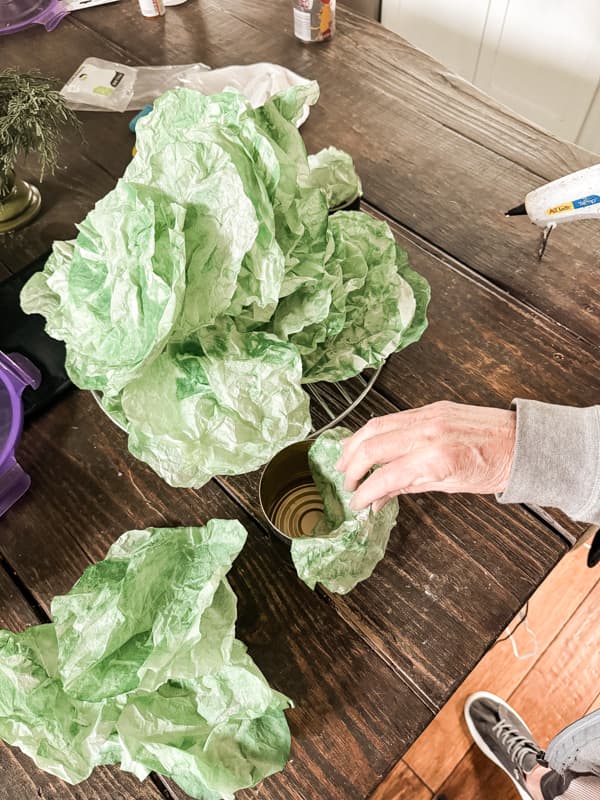
Next, add a small amount of hot glue to the coffee filter at the rim and wrap another one over the top with approximately 1/2 of it overlapped. Continue around the rim of the can for at least two to three more rounds using hot glue to secure as you go. I used 12-15 leaves per cabbage.
Insider Tip
The dried coffee filters are crinkled and wavy. Don’t try to press the wrinkles out with your hands. Instead allow them to remain as wrinkled as possible. This adds to the authenticity of the faux leaves. The craft paint also created a stiff texture to the coffee filters which enhances the design.
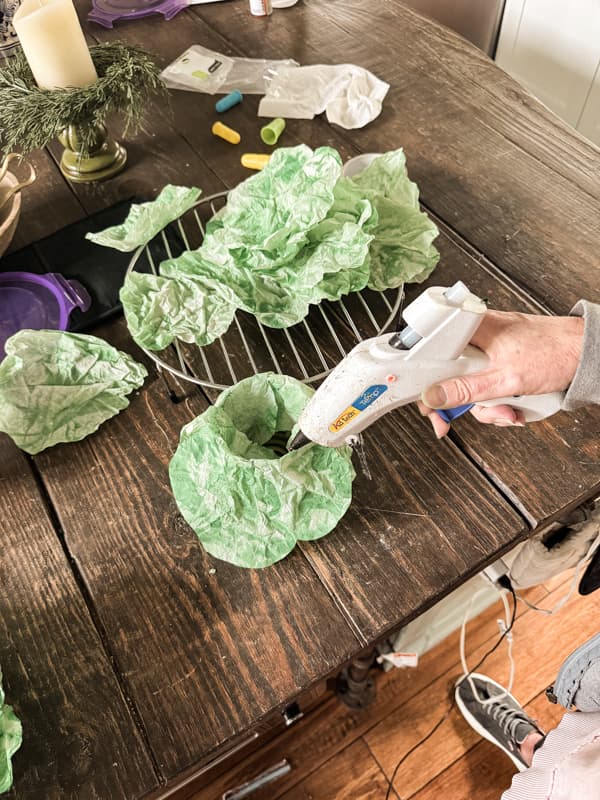
Step 5:
When you have your desired size cabbage, place a bead of hot glue around the entire rim and put one of the coffee filters flat to the bottom. Then, remove the can to reveal your gorgeous cabbage leaf. Easy peasy!

Coffee Filter Craft Reveal
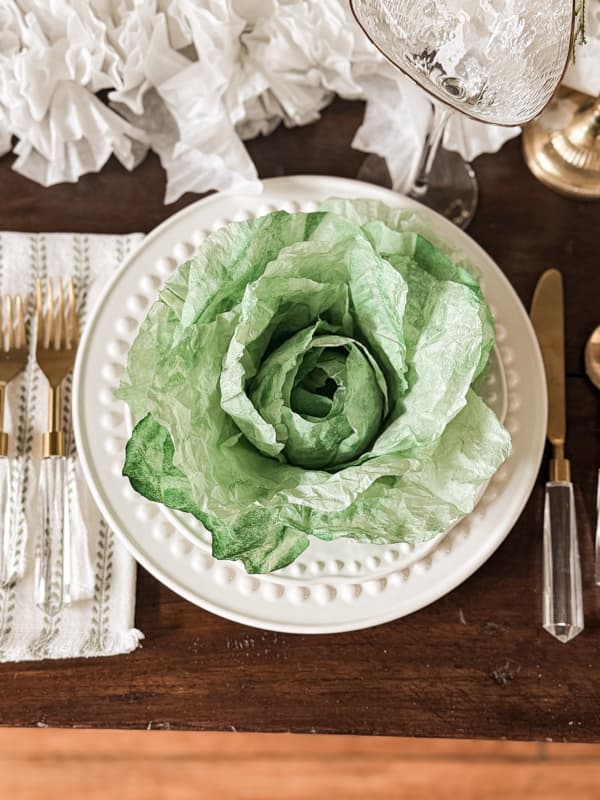
Can you believe how authentic this coffee filter craft cabbage looks? Who knew that they would turn out even better than the boutique decor? And the money I saved!

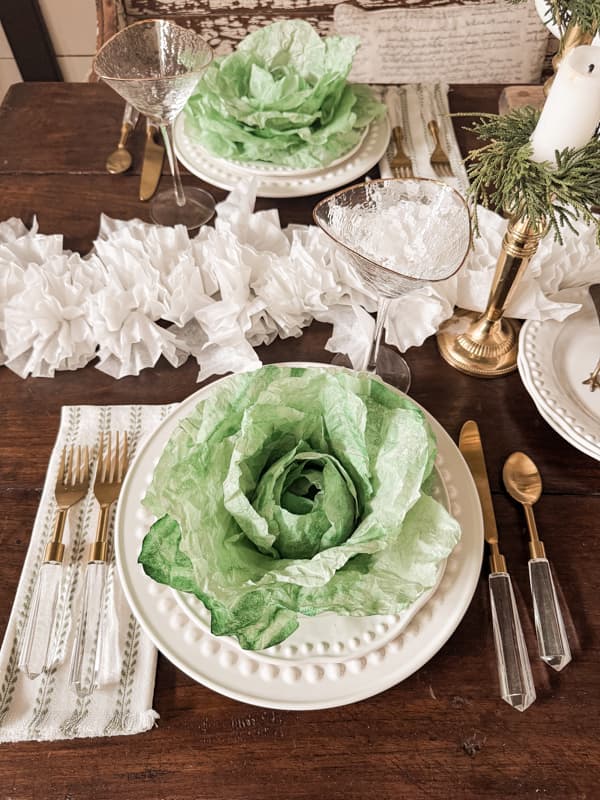
The small amount of craft paint added to the mixture was a blessing. The paint helps the filters maintain their crinkled appearance and resemble real cabbage leaves. They look lovely paired with the coffee filter floral garland I added as a table runner for winter.
In addition, the high/low coloration looks very true to real cabbage.
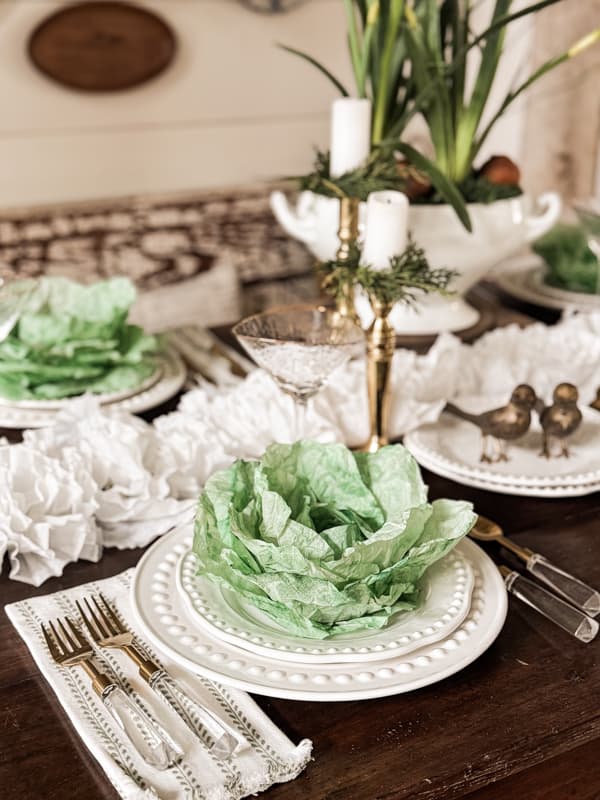
I plan to use the DIY cabbages on dinner plates for an Easter table. However, this craft is so easy and only costs pennies, so I may make more. I can see them all around the farmhouse for Spring and Summer. They also look fabulous, gathered in a display basket for a table centerpiece.
How would you use these cabbages to decorate?
Related Articles
If you enjoyed this craft tutorial, you will also enjoy these articles.
- Learn How To Make Paper Flowers with Recycled Old Book Pages
- DIY Floral Paper Garland with Coffee Filters
- Easy DIY Fall Leaf Garland: Old Book Page Fall Decor
Video Tutorial
I appreciate you for stopping by and look forward to sharing my next adventures with you!

Pin It To Remember It
Did you find some great ideas you’d like to save for future reference? To save, hover over the images and pin to your favorite Pinterest Boards when you see the PIN button in the upper left-hand corner.


Great craft Rachel, and so easy!
And for late summer and fall, applying some purple-pink paint?
Just a thought.
Tricia,
Yes!!! I’ve already thought about all the possibilities. They are so fun and easy! Thank you for stopping by and lifting me up with your encouragement.
Wow Rachel, this is brilliant! I was looking for a cabbage tutorial for my Spring table and cannot wait to make some! Thanks for figuring it out!
Cindy,
Thank you! I’m so glad you like it.
YOU DID IT AGAIN>>>what a realistic looking cabbage. Can be used for table settings, or just
add decorations for anytime. Awesome, and love it.
You always come up with some great ideas …keep up the good work.
Oh Thank you Dee! You are so sweet to lift me up with your encouragement. Have the best weekend.
Rachel, you are such an amazing gal with all these fabulous ideas you bring us! This coffee filter cabbage just looks like the real thing! Love these! This cabbage decor will look great when I have some friends over for a salad lunch. Then, each gal can take one home with them. Can’t wait to make some! They are just so real looking and look so cute! They will be fun to make, too! Have a wonderful weekend, Rachel! Thanks, once again, for this fabulous idea! You are absolutely the best!
Mary-Ann
I’m so glad you like these! I have to be honest, I was tickled green when I finished them. I failed to use gloves and had green cuticles for several days. LOL. Let me know how they turn out.
This is just so clever! Thank you for adding a video, too!
Tess,
I’m so glad you like it! Let me know if you make them. I appreciate you for following along.
I just made my first cabbage and it’s adorable! Definitely making more! Thank you for the great idea!
Lisa,
Oh that’s great. I’m so glad you found this idea helpful. Thank you for following along!
Really cute, but you lost me on Step 5. A video would help.
Teddee,
I’m glad you like the cabbages and yes, there is a video at the end of the tutorial. Just click the play arrow and you can see step by step how I made them. Hope this helps. Thanks for following along.
Any chance you know what color green craft was used?
Yes, it’s leaf green!
Diana,
It was Leaf Green!
So what do you do with these pretty decorations and where do they go when it’s time to eat and put real food on those plates?
Linda,
They will look lovely added to a bowl in the center of the table and then my guests can take one home to add to their spring decor.
Rachel, this is such a great project! You are so creative!
Kim,
I’m so glad you like it.
Ohh, I love these Rachel!! They look so authentic!!
  Adding to your folder on my Pinterest!!
Cindy,
Thank you for this. I’m so glad you like them. Have the best day!
Losing it in the best possible way over these, Rachel! I can’t get over how much they look like real cabbage leaves. It’s cold here but you’re totall giving me Spring Fever. Will definitely share on tomorrow’s From the Front Porch. I’m in love! Big hugs, CoCo
CoCo,
You are so sweet! Thank you for your encouragement.
Rachel, I love these cabbages. You are a genuis!
Tammy,
I’m so glad you like them.
Thank you CoCo.
Jaw-dropping, adorable, and budget-friendly… that’s my kinda craft (if I have to craft). Love these! pinned
Cindy,
Thank you sweet friend! So glad you like them.
Rachel, these cabbages are adorable!!! I can’t wait to make some for future Easter tables and elsewhere. Thanks for creating this tutorial and please come link up at Share Your Style #453. I know folks there would love to learn how, too. <3 Coming over from Farmhouse Fridays with Cindy at County Road 407.
Enjoy your weekend!
Barbara,
Thank you for your kind words and all your sweet compliments. I appreciate your encourgement and hope you are able to use some of my ideas! Have the best weekend.
Rachel, I did share two of your posts for SYS #454 for you! And thank you. <3 I hope you have the best weekend, too.
Barbara,
Thank you so much for doing this. You are the best.
I just love these! I’m a teacher on spring break and need to try this while I’ve got some time. What is the diameter of the tin can that you used. Also, could you provide ratio of coffee water, paint and food coloring. Thank you so much!
Kay,
Oh I hope you have fun making these. The tin can is a bushes beans can. I’m out of town and don’t have one to measure. It’s slightly larger around than a 15 oz. can and shorter. I just added a couple drops of food coloring to 2 cups of water. When I realized the color wasn’t what I wanted, I added a tablespoon of paint. You can add more paint if you want a richer color. Let me know how they turn out.
I used your wonderful tutorial and decided I wanted my cabbage to be a little more durable. I cut my leaves from thin muslin. When I mixed my paint and water I added about a tablespoon of Elmers glue. I then dipped my leaves, crumpled them up, and flatten a little. I dropped a few grains of instant coffee on them while wet. The cabbages turned out beautiful and if stored on a box will be able to use from year to year. Thank you for your inspiration.
Raedell,
What a great idea. I’m so glad you were able to use my inspiration and improve upon it. I’d love to see your creation. Thanks for sharing with me. Have a blessed weekend.