DIY Earthenware Lamp: Thrifted to Pottery Barn Style
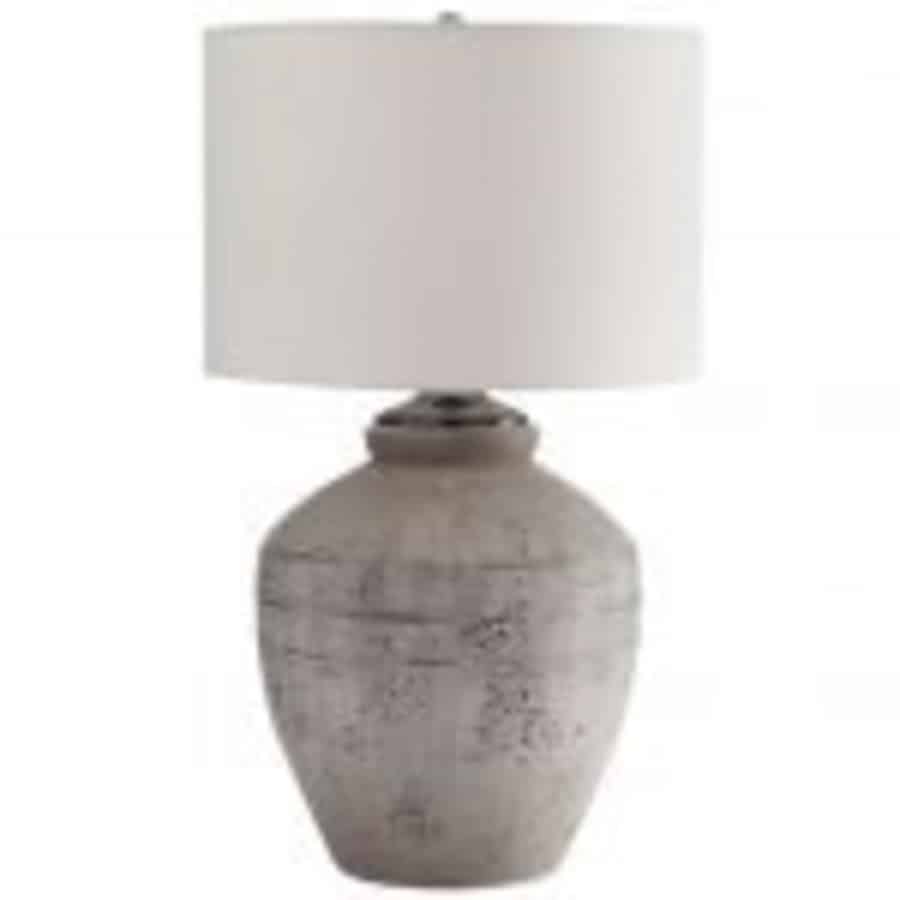
I’ve been obsessing over Pottery Barn’s earthenware pottery lamps, but the price tag is not so budget-friendly! So I’ve been looking for lamps that are similar in shape at the thrift store. Luckily, I found this $7.00 thrift store lamp with the perfect Pottery Barn shape. With a little plaster of Paris, I transformed this forgotten piece into a gorgeous earthenware-style lamp that adds the perfect touch of rustic elegance to my home. There is something so satisfying about taking something old and giving it a new life. Let me show you how you can do it too!

First, Find The Lamp
It would be best to have an idea of what you want before thrifting. So, I studied and took screenshots of the lamps I liked.
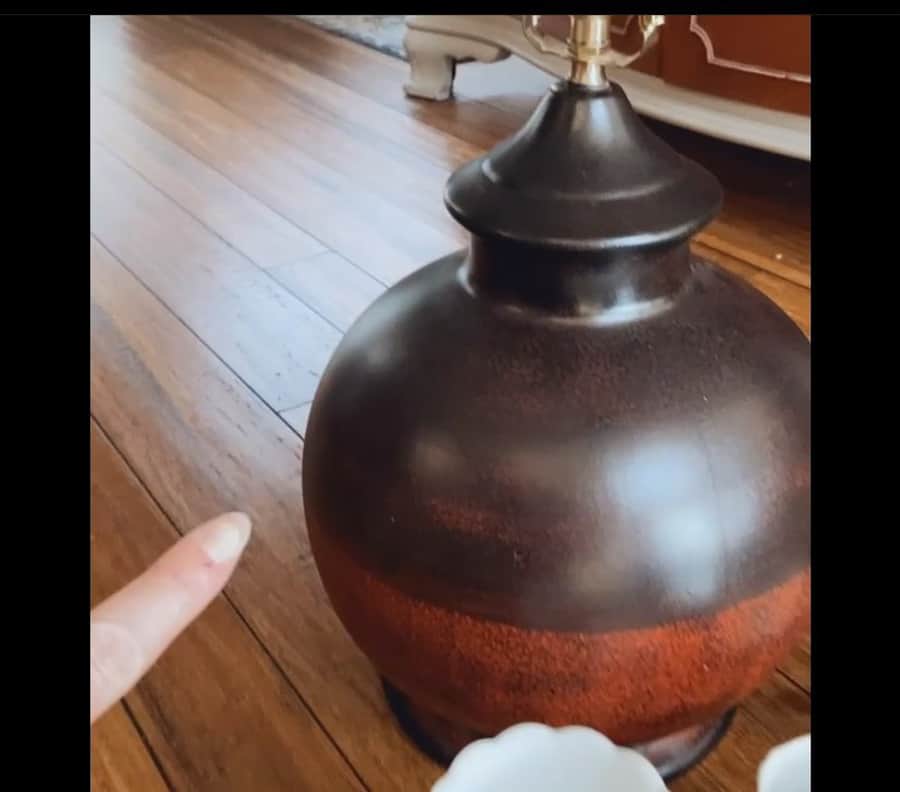
Sometimes, I think, “this was meant to be”! I walked right into my local Goodwill and immediately spotted this lamp. I was thrilled with the size and shape of this $7.00 lamp.
(Posts on The Ponds Farmhouse may contain affiliate links. As an Amazon Associate, I earn from qualifying purchases. See the full disclosure details here.)
How To Prepare Thrifted Lamp For Makeover
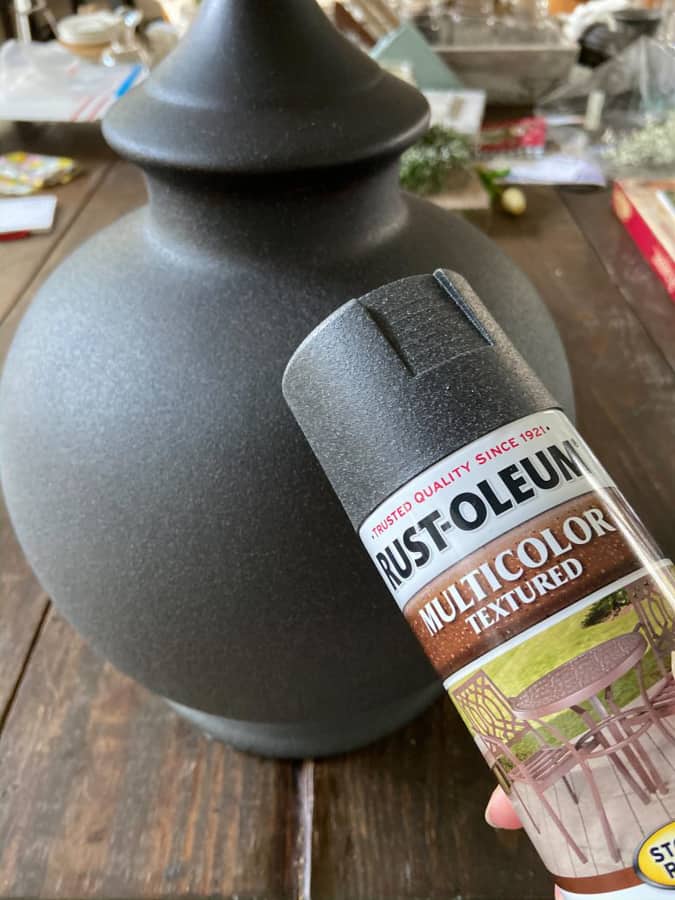
The first step is to add some texture. One of the easiest ways to do this is to use Rust-oleum Textured Spray Paint to cover the entire surface.
Gather Supplies
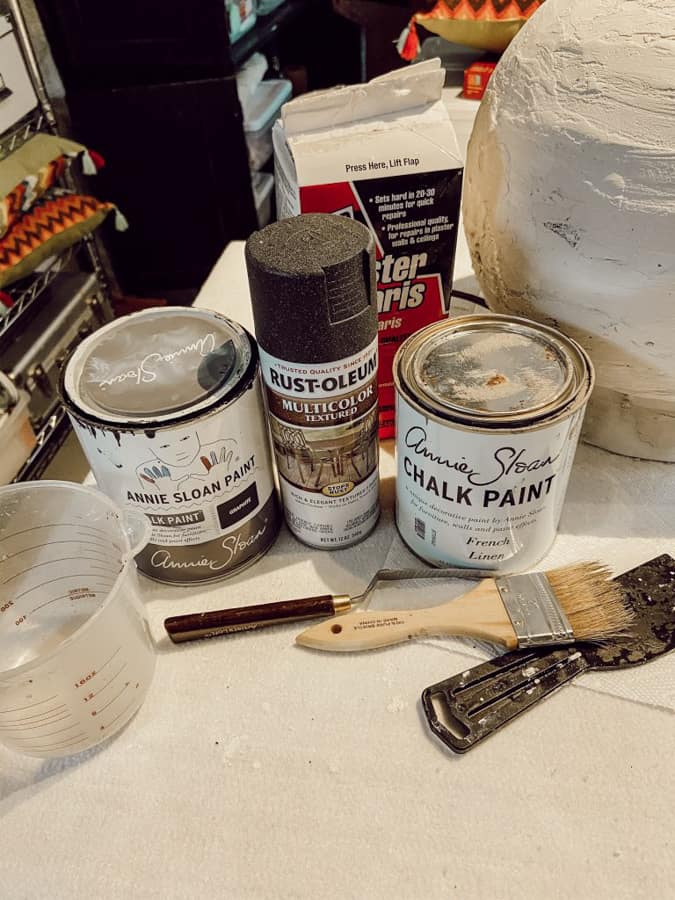
Next, gather all your supplies.
I was planning as I went, but here are the things I used.
- Rust-oleum Textured Spray Paint
- Plaster of Paris
- Chalk Paint – 3 colors of your choice
- Finishing Wax Dark & Clear or Satin Clear Sealant
- Plastic Spatula or trowel
- Chip Brushes
- Small Metal Trowel
- Fine Grit Sandpaper
Add Earthenware Texture To Thrifted Lamp
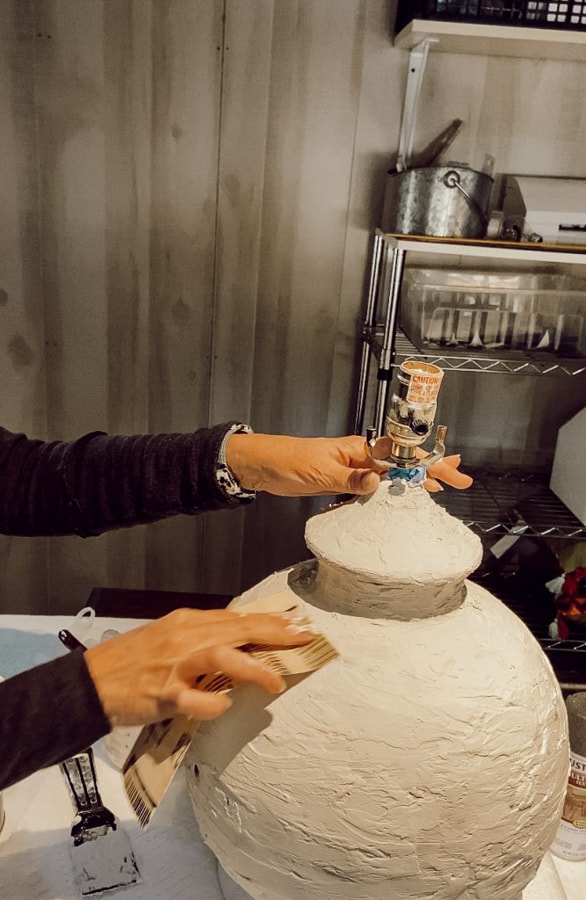
To begin, I added an additional earthenware texture. Using a chip brush, I added a thin layer of plaster of Paris over the entire surface and let it dry.
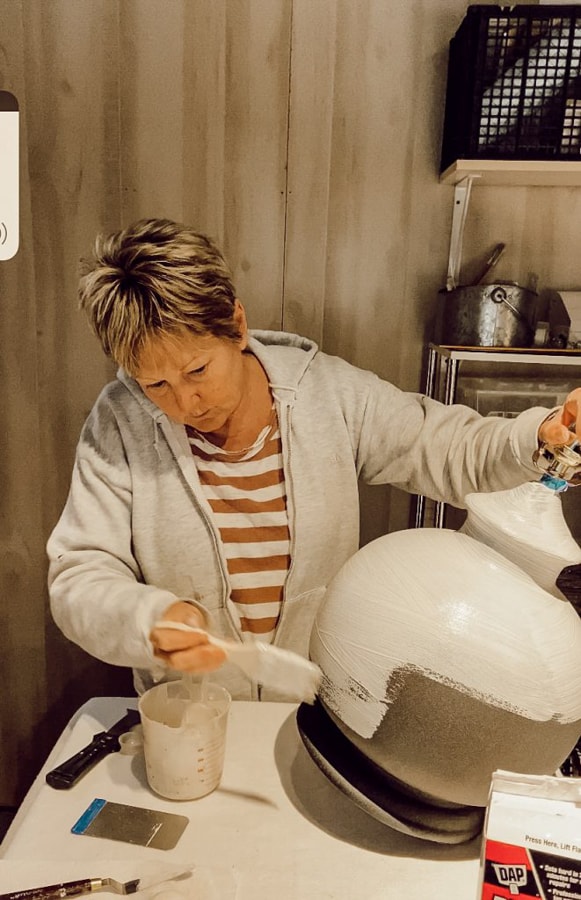
Next, I added a little more plaster of Paris to thicken the mixture. Then, I applied a coat of thicker plaster using a plastic spatula over the entire surface.
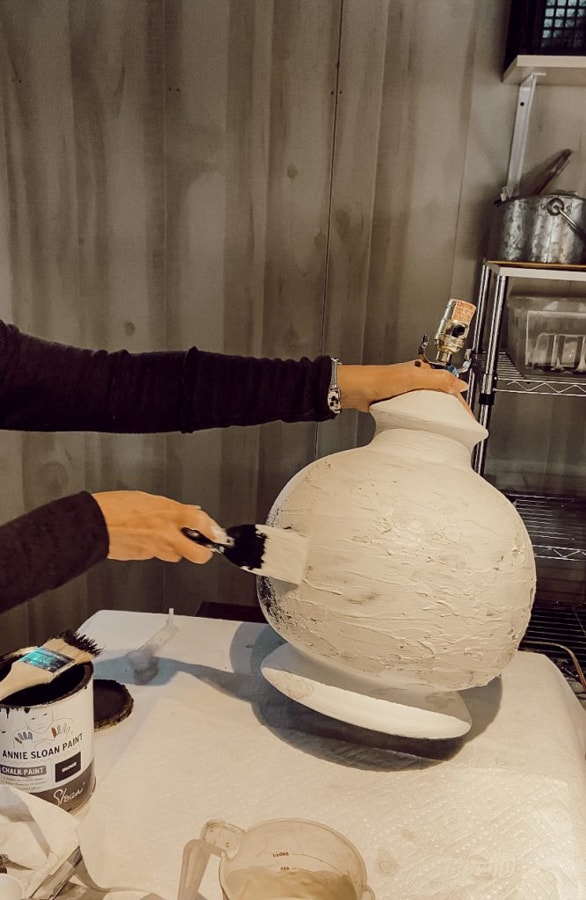
How To Smooth The Plaster
It’s essential to work quickly when applying plaster of Paris. So, once the plaster begins to set, use light-grit sandpaper to smooth any rough edges.
Insider Tip
It’s best to smooth the edges while the plaster is still drying because it’s easier to work with, and you avoid all the dust. I sanded after the plaster had set for approximately 20 minutes.
Add Color To Your Thrifted Lamp
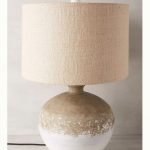
The next step will depend on what exact finish you like. As I worked on this project, I had two different inspiration lamps in mind: one from Pottery Barn with all the texture and the other from Anthropologie with the colors. So, I did a mix of both.
Click the shop name above to see these inspiration lamps.
I chose three colors of Annie Sloan Chalk paint for my lamp.
- Graphite
- French Linen
- Old White
First, the lamp base is painted with Graphite, and I covered the body of the lamp with French Linen.
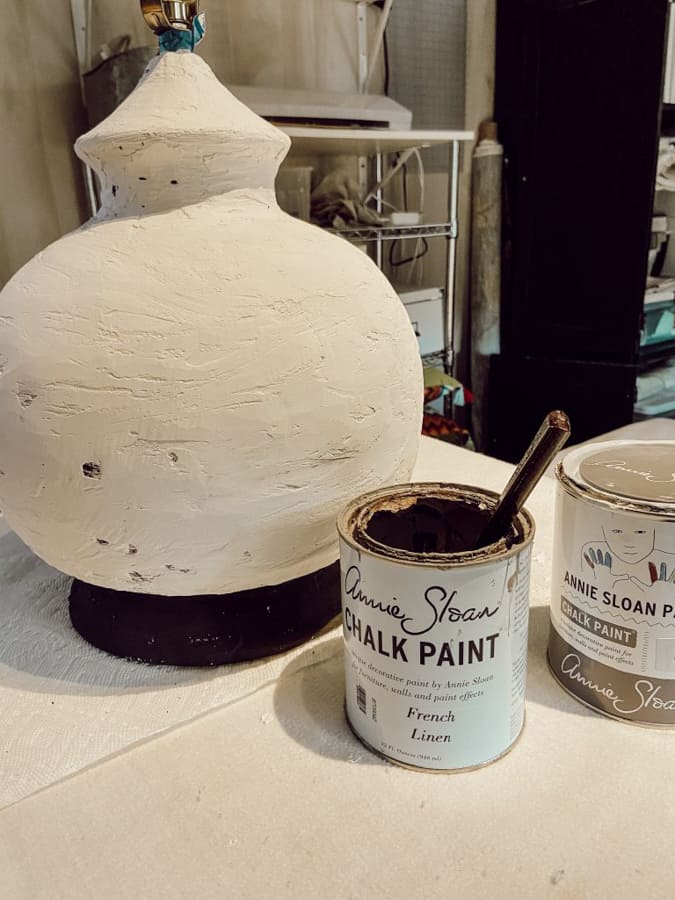
Then, using the Old White Chalk paint, I painted the top and allowed it to bleed down over the French Linen paint.

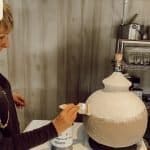
Seal with Wax
Finally, you are ready to seal the surface of your earthenware lamp. I used a mixture of clear and dark wax because I wanted to allow some of the dark wax to settle into the trowel marks and add depth to the texture of the plaster of Paris finish.
If you don’t want to darken your lamp, use the clear wax alone or use a spray sealant such as Rust-0lenum Clear Sealer in a satin finish.
Resources
Scroll and click for details…
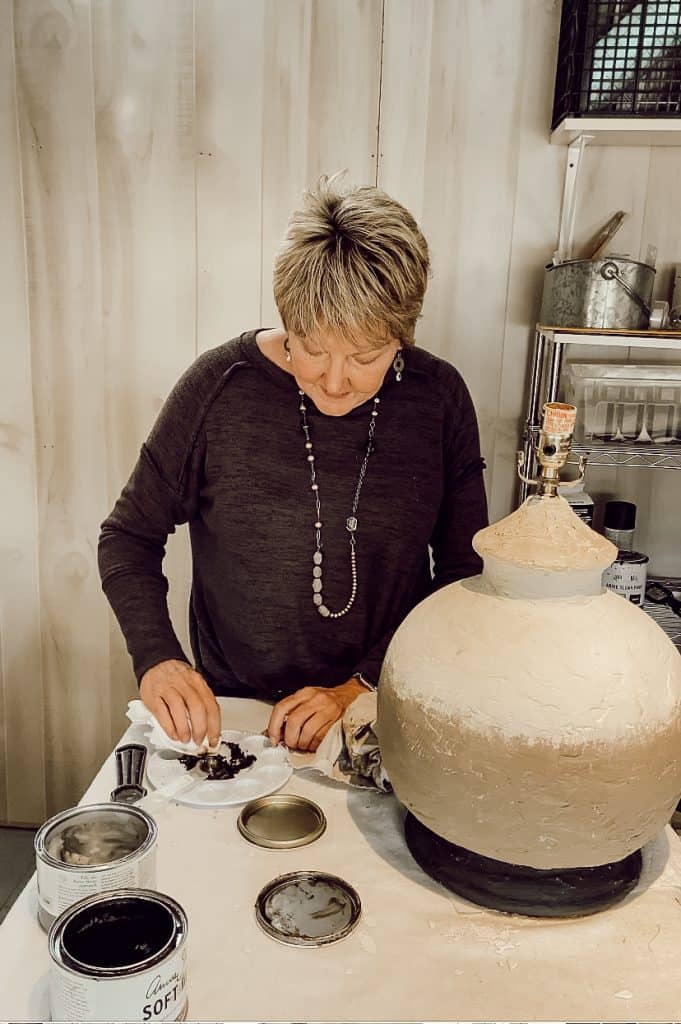
Thrifted Earthenware Lamp Makeover Final Reveal
How do you like the earthenware lamp makeover? I love the texture and the colors. I am still unsure about the lampshade, but I have my receipt. LOL
Did you see this chest before, during, and after the transformation? If not, click here to check it out.
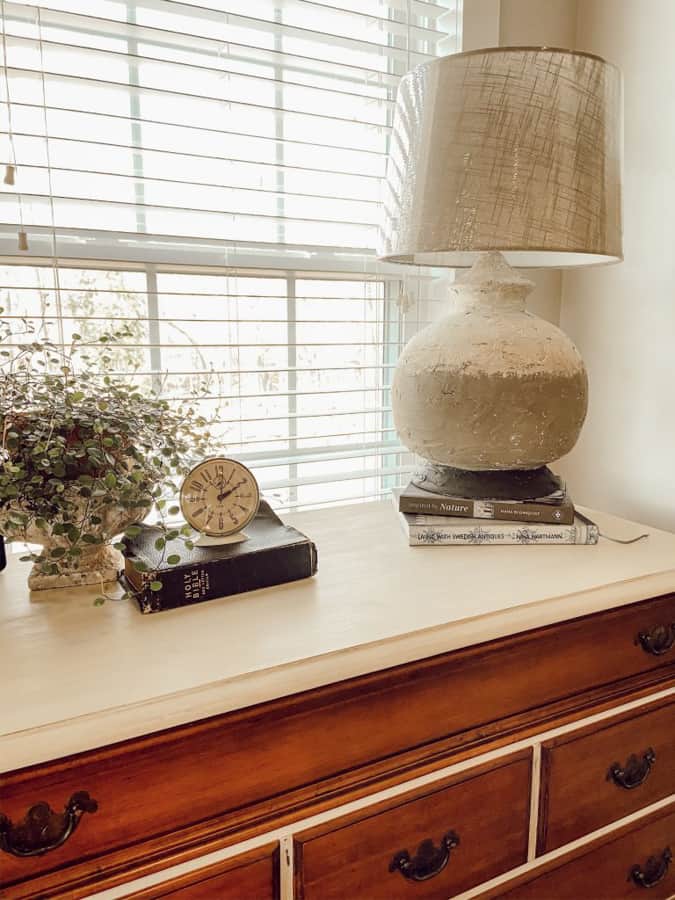
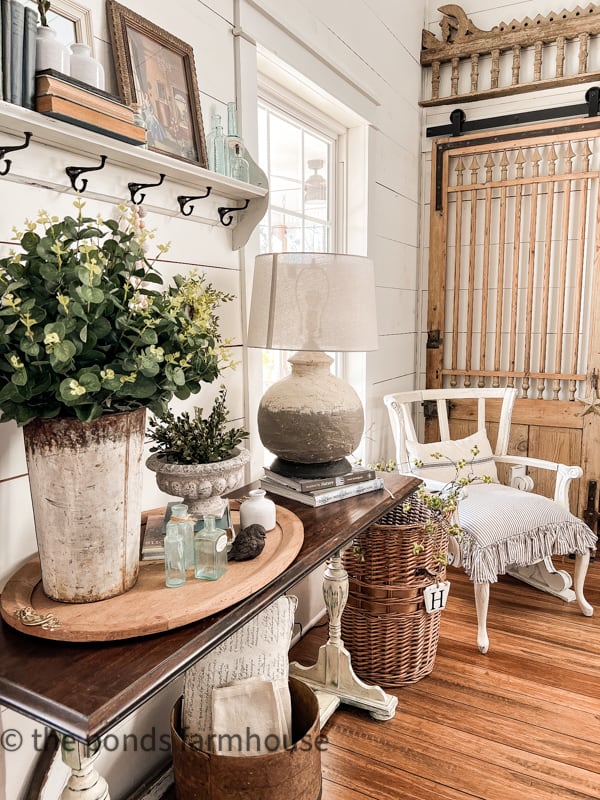
I’ve also used the lamp on our entry table, so it’s a versatile piece that can be used throughout the house and with many decor styles.
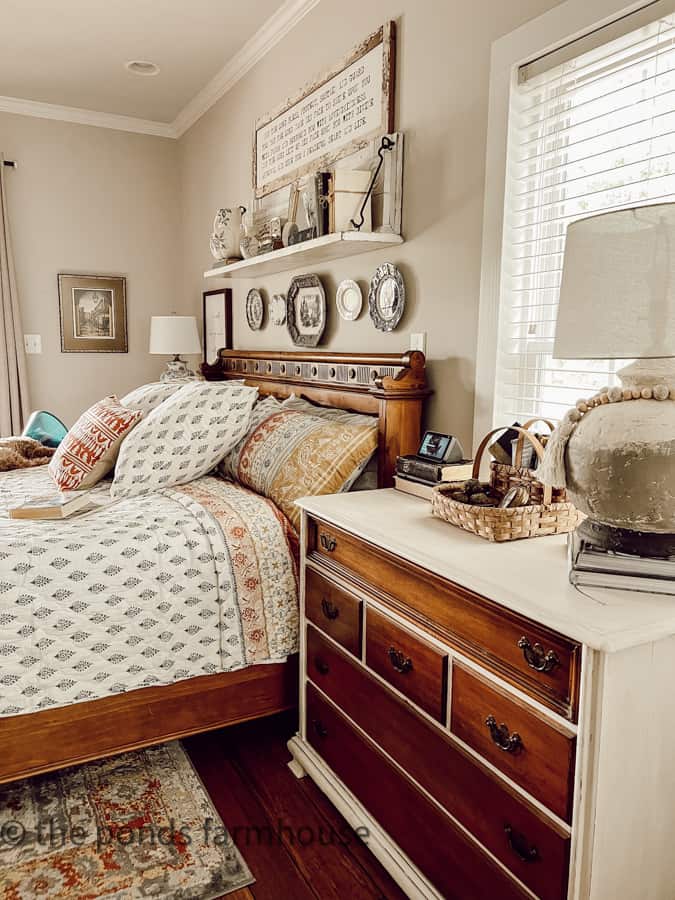
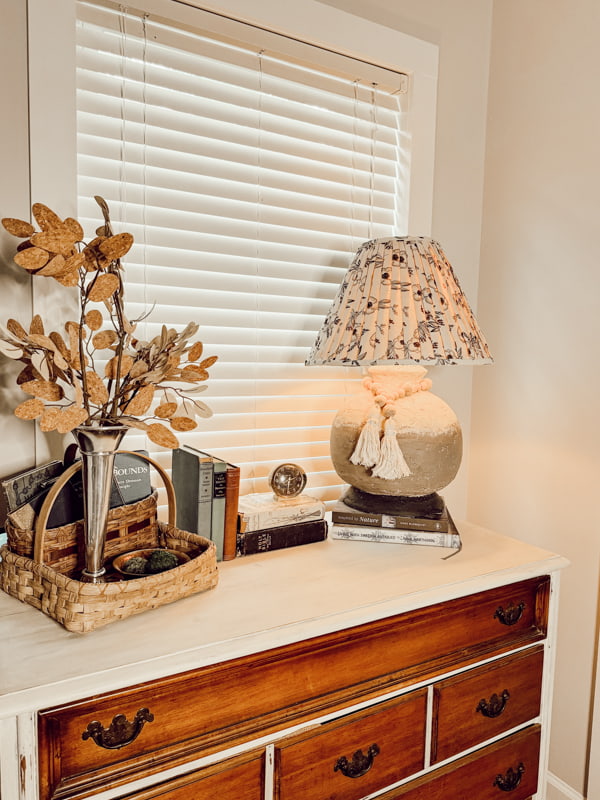
In an update, the lamp has received a series of new shades, adding to this bedroom tour’s vintage charm. The last update is this DIY pleated fabric lampshade update.
You will love the other repurposed lighting posts if you enjoyed this post.
More thrift store finds and transformations are – Apothecary Cabinet & Industrial Transformation.
Thanks so much for stopping by today!


I love how your lamp turned out Rachel! Such a great idea! Love the two tones!
Kristin,
Thanks so much.
Oh, I love how your lamp turned out!! I have a pile of vases I thrifted a couple of weeks ago waiting for their makeover…it’s just been too cold to spray paint up here!
Jennifer,
Thanks, I can’t wait to see what you do.
Thank you so much for this great tutorial! Love how the lamp turned out…so much better than any from the other stores
Oh wow, what a compliment. Thanks.
Wow, your diy lamp is total 100% drop dead gorgeous. You nailed this. Thanks for sharing. I got to keep an eye out for this styles do try to create the same beauty as yours
Ivory,
I’m so glad you like it. Thanks for stopping by.
Rachel
Rachel that is so great. I love the shade but would like to compare to a lighter one. Is that what you are thinking? I worry about darker shades blocking too much light. I like the natural color of the inspiration photo too. Let us know what you decide on the shade. I have a dark brown shade that I want to lighten. Think I may try white wax because it has some texture. It always takes me a while to decide!!!!
Vicky,
Thanks so much for your comments.
I didn’t mean shade, I meant lamp.
Vicky I understood. Thanks.
BTW, You look way to good while working on this project. Jewelry, hair combed, nice clothes. I know that you just wanted to impress us. I have a work outfit. It has so many colors of paint on the old shirt and pants that is almost a designer outfit!!!
Vicky,
you should see me most days. LOL Thanks so much.
Oh my gosh! Lamps are the hardest thing for me to envision so now, thanks to you I’m on a mission. I couldn’t love them more!
Judy,
Thanks so much. I’m so glad you found this helpful.
I love your makeover! I am getting close to doing over some vases like this, that I want in my bedroom. Been here 8 years now and haven’t even been able to tackle my bedroom until now. I just bought a new bed and that prompted the makeover. I’ve had my bedroom set for 20+ years and it’s time. I’m keeping the dressers and nightstands because they are very well made and painting them to coordinate. The bed is champagne color and I’m doing the pieces I have in black with champagne knobs and handles. Can’t wait for it to all come together!
Anyway, I love the lamp but also the dresser you made over!
Shirley,
I really appreciate this. You are so sweet to encourage me. I appreciate you for following along.
Rachel, this DIY is just amazing. It’s hard to believe it’s the same lamp! I will want to share this on Saturday Meanderings….
Oh thanks so much Mary.
Wow Rachel! That lamp looks amazing!!!
Stacy,
Thanks for your sweet compliments.
This lamp is absolutely gorgeous! Well done, my friend! I would love it if you could share it on The Fabulous Friday Link Party this Friday. You can find it on my website. Everyone loves your projects.
Renae,
I’m so glad you like this project.
It looks great Rachel! The tone two effect really sets it apart!
Diane,
I’m so glad you like it. Thanks so much.
Mary,
Thanks so much for sharing.
Great job! I love ut.
Karen
Thank you for stopping by.
Ps
The shade is great, too
Thanks Karen
This lamp looks amazing! Even better than Pottery Barn’s version. You go girl!
Renae,
I appreciate this so much.
I like that shade with your lamp. Great job!
Karen
I really appreciate this.
Wow! Rachel! I love what your thrifted lamp turned out to be. It’s beautiful. Thanks for sharing your tutorial with us. You are such a wealth of knowledge! I just can’t believe all you do and you always make us feel that even we can do this!
I sure wish I lived closer to you so that I could join you on some of your thrifting trips! How fun that would be!
Have a great week!
Mary-Ann
Thank you so much for your kind words. It would be so fun to thrift together. Have a great day.
Love your lamp and I like the shade. I’ve never used chalk paint but got a project I’m working on and want to use it, any suggestions on using it
Gail,
It’s so easy to use. Hard to make a mistake.
Happy Valentine’s Day to you! And I totally understand and it’s was fine!
Hope your day is filled with lots of love
Margie,
I appreciate this so much.
That lamp looks great! Thanks for showing how to make it…I’m going to look for it.
Leisa,
I’m so glad you like it.
Rachel!!! That lamp came out spot on to your inspiration!! It looks amazing. That was the perfect lamp to redo. Pinned
Cheryl,
I really appreciate your comments. Thanks for stopping by.
Thank you so much for the easy to see instructions with great photos! You have really inspired me to get started on my fall decor! Happy gathering! Lina
Lina,
Thank you so much. I’m so glad you found this helpful. Thanks for stopping by.
Rachel, I just love your lamp! The pleated shade is so pretty! You have so many wonderful ideas for us. And, your instructions are always so easy to follow! I only wish we had some great Thrift Shops here. I am just catching up on all your emails. We just moved into a new 55+ apartment complex and we had first choice of our suite. We are on the top floor and have such a gorgeous view of the river. So, we are quite happy here and are slowly getting settled. Hope all is going well for you, Rachel. Thanks, again, for always bringing us such fabulous ideas! You are “the best” and I always enjoy reading your posts!
Mary Ann,
Congratulations! I’m so excited for your new home. I appreciate you so much for all your sweet comments and encouragement. I hope you get settled soon and can start finding some thrifted pieces to update for your new home. I’m glad you like the blue and white. It’s so refreshing.