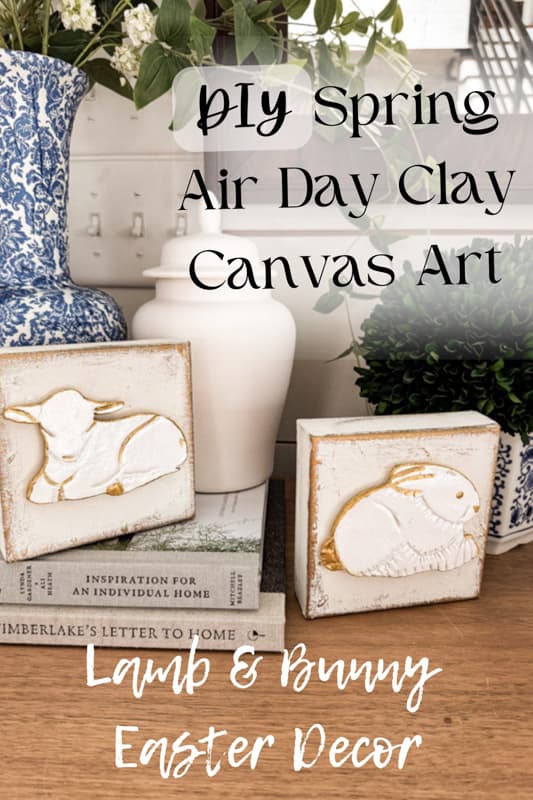
Easy Spring Air-Dry Clay Canvas Art: Bunny & Lamb Easter DIY
Hey friends, I’m obsessed with bunnies and lambs this Spring. Remember the thrifted bunny and lamb art I shared earlier this week? Well, they inspired another project. Today I’m sharing how to make air-dry clay canvas art featuring (you guessed it) a bunny and lamb. This easy DIY mini canvas project is perfect for Easter and all spring long. I’m providing you with a template and step-by-step instructions that are easy to follow. Let me show you how.
(Posts on The Ponds Farmhouse may contain affiliate links. As an Amazon Associate, I earn from qualifying purchases. See the full disclosure details here.)
DIY Small Canvas Art
For this project, I decided to upcycle two small art canvases. I love the small canvas, which is square and only 5 inches. Plus, the 1.5-inch profile allows the canvas art to stand without an easel, and it’s such a fun size. I also created a template for the bunny and lamb for your convenience. You can download the template under supplies.
Here are the supplies I used to create the canvas art.
Supply List
- 2 – Small Art Canvas – These are 5x5inch with a 1.5inch profile just like mine.
- Air Dry Clay
- Wax Paper
- Rolling Pin
- Exacto Knife
- Old White Chalk Paint
- Gold Leaf Rub N Buff
- Metallic Gold Paint
- White Craft Paint
- Clear Spray Sealer
- Lamb and Bunny Template – Click To Download
How To Prepare The Canvas
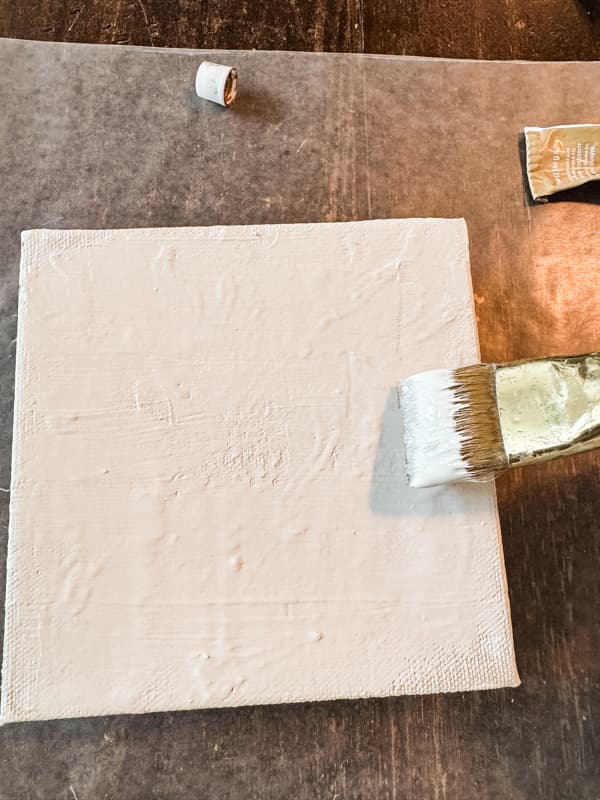
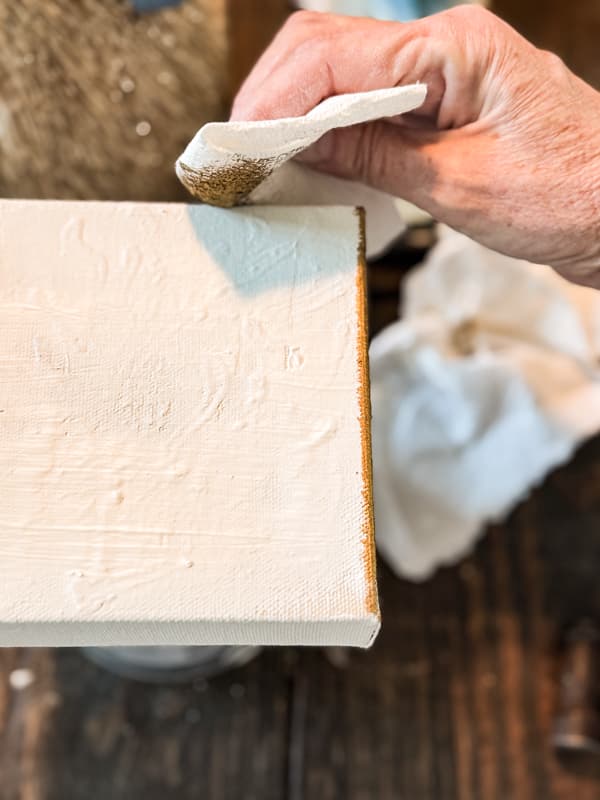
Since my canvases had a previous design painted on them, I had to paint them a couple of times. I used old white chalk paint because it covers well. There was still a lot of texture under the paint, but I think it adds character to the design. If you use a new canvas, you will only need one coat of paint.
Once the paint was dry, I used Gold Leaf Rub N Buff to highlight the edges of the canvas. I added a small amount to a paper towel and rubbed it around the edges. Easy, peasy!
How To Make The Air-Dry Clay Bunny & Lamb
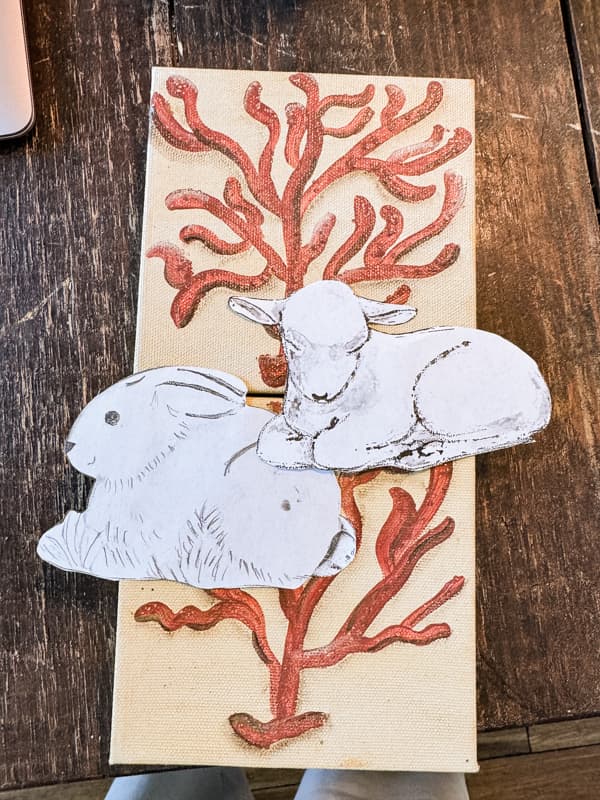
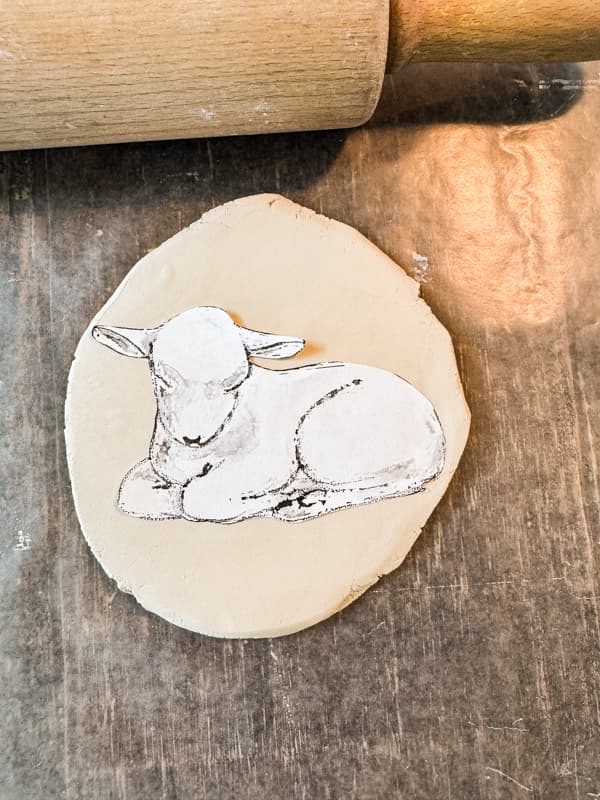
The first step is to download the template and print it out. Ensure that the design will fit on your canvas. Your printer’s dimensions may need to be increased or decreased. Once you have the correct size, cut out the templates using scissors.
How To Roll The Air-Dry Clay
I used wax paper and a rolling pin to roll out the air-dry clay. Ensure that your surface is flat and debris-free. Begin by gathering a handful of clay and kneading it into a ball. Once the clay is mixed well, use the rolling pin to flatten the clay. I left mine approximately 1/4″ thick. Make sure the thickness of the clay is even and there are no air bubbles. Then place the template on the clay to trace.

How To Cut Out The Lamb and Bunny
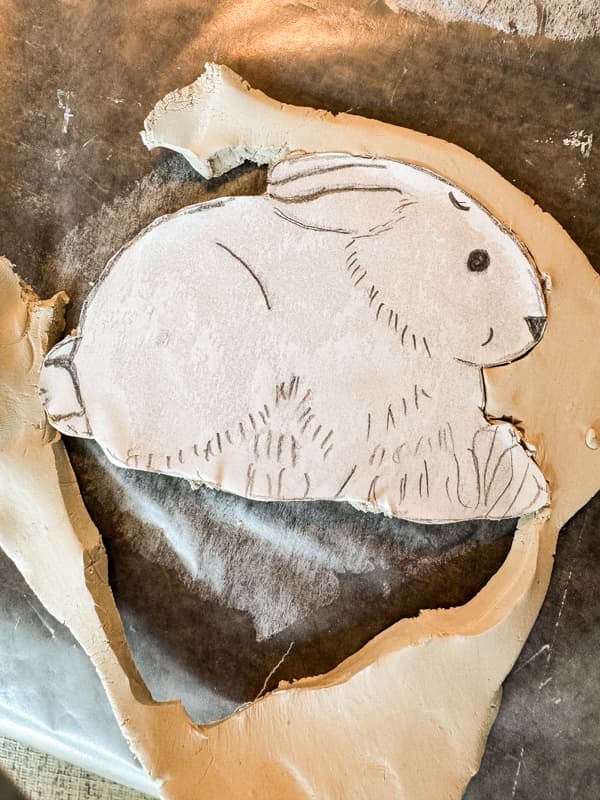
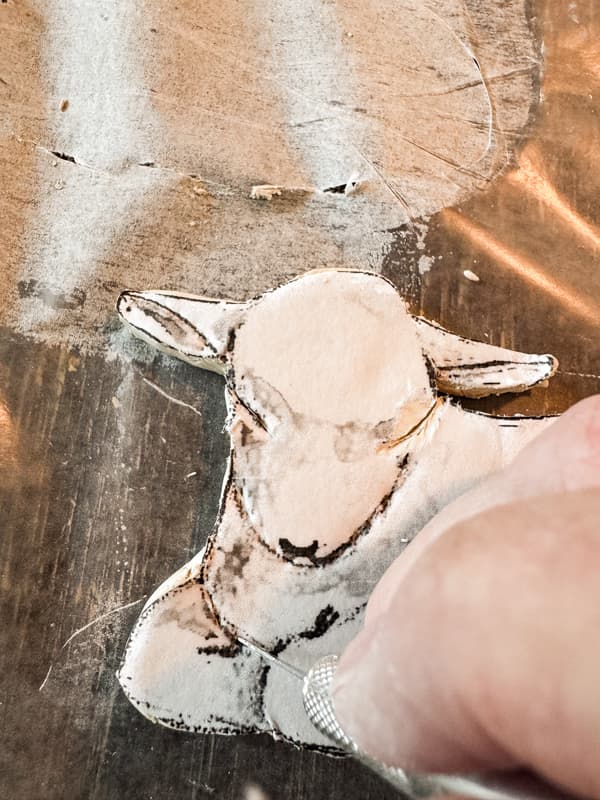
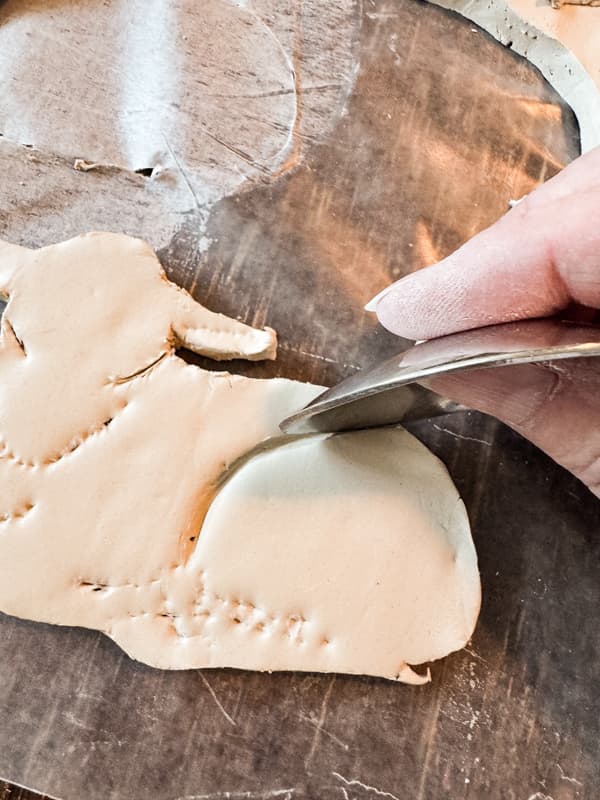
Now you are ready to cut out the lamb and bunny. Press the template onto the clay surface. I used an Exacto knife to cut around the template. Ensure you cut all the way through the clay and pull the excess away from the template.
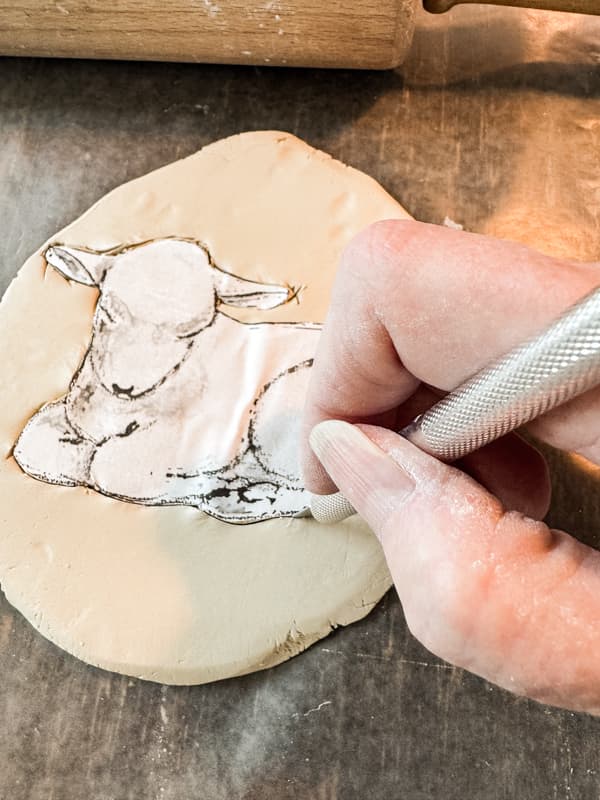
Next, while the template is still in place, use the exacto knife to cut or puncture the design details on the lamb and bunny. Do not cut through the clay; gently mark where the creases will be.
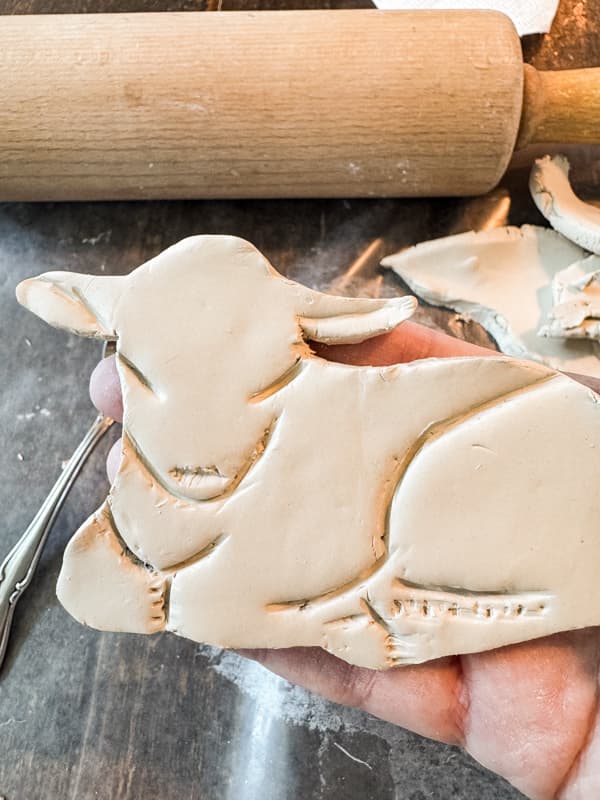
Add Design Details
Remove the paper template from the clay once you have gently marked all the design details. I used a spoon and fork to make the design indentations. To smooth edges and design details, dampen your fingertips with water and gently smooth them. Ensure you don’t add too much water, or the clay will become fragile. Set aside to dry. This will take a minimum of 24 to 48 hours.
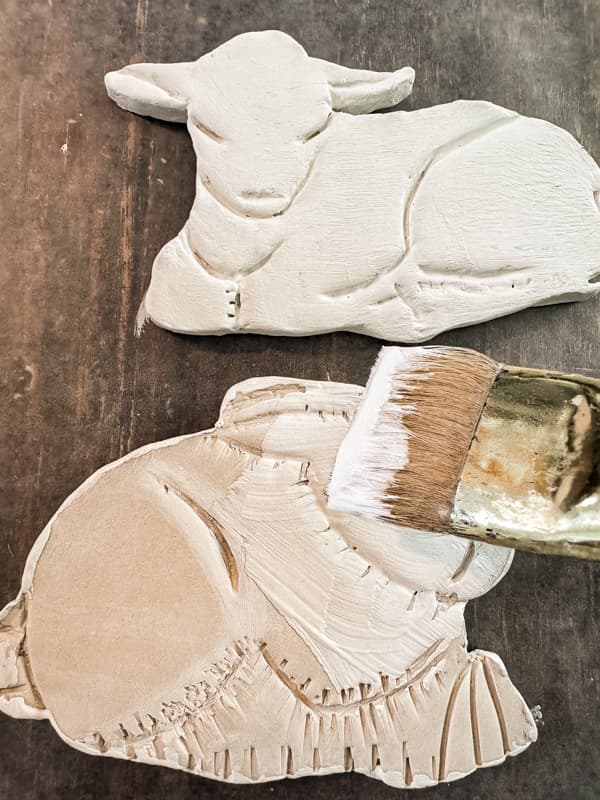
Paint the Air Dry Clay
Once you ensure the clay has dried thoroughly, you will want to add paint. I used white craft paint and applied two coats to the front and edges of the bunny and lamb.
Add Gold Details To Finish Designs
Once the white paint dries, you can enhance the design with a contrasting paint color. I used metallic gold paint to add an eye and nose to the bunny. I highlighted some of the details with a small paintbrush.
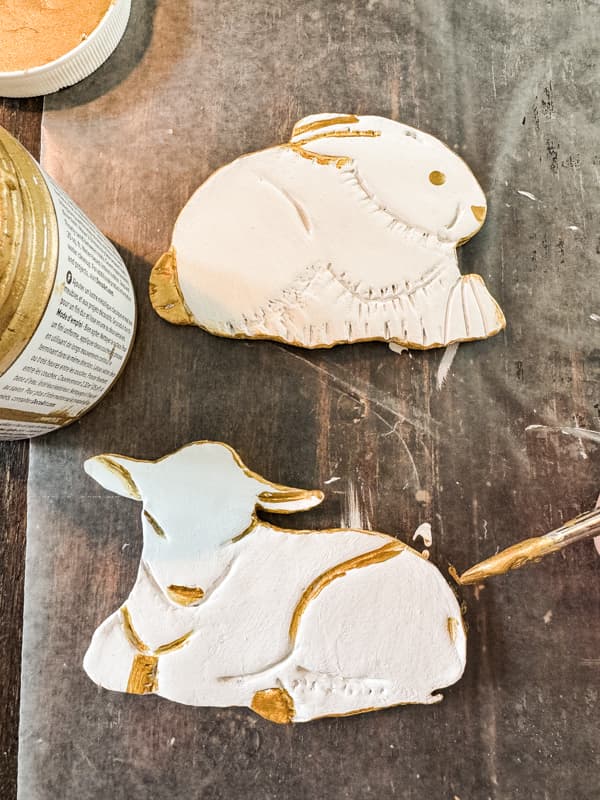
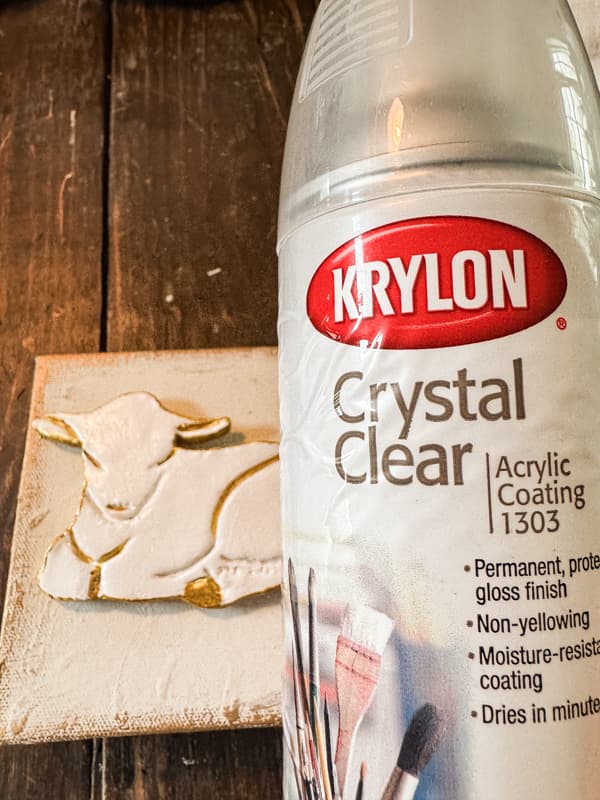
Once the gold paint was dry, I sprayed the air-dry clay bunny and lamb with a light coat of clear acrylic sealer. Allow to dry before proceeding.
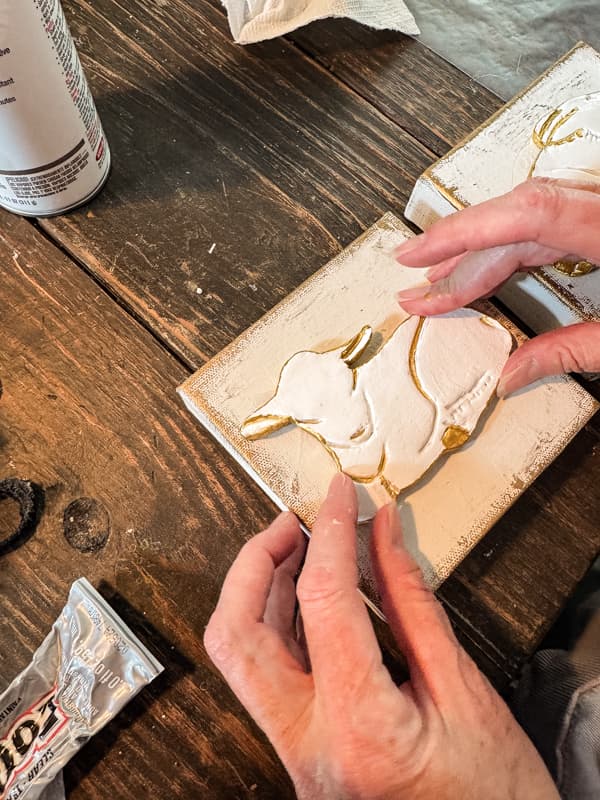
How To Add Air-Dry Clay Figures to Art Canvas
I used a combination of E6000 glue and hot glue to add the air-dry clay figures to the art canvas. The E6000 will create a permanent bond, and the hot glue secures within seconds to prevent any movement before the permanent glue sets up.
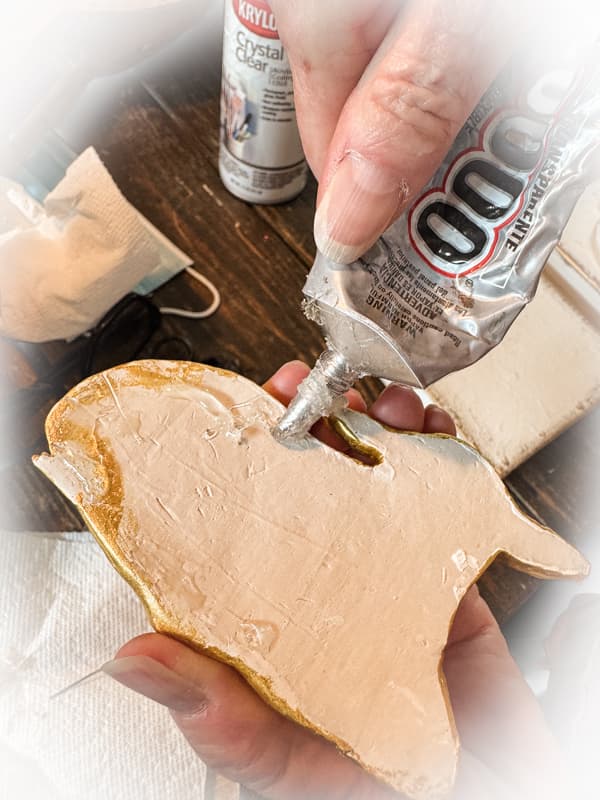
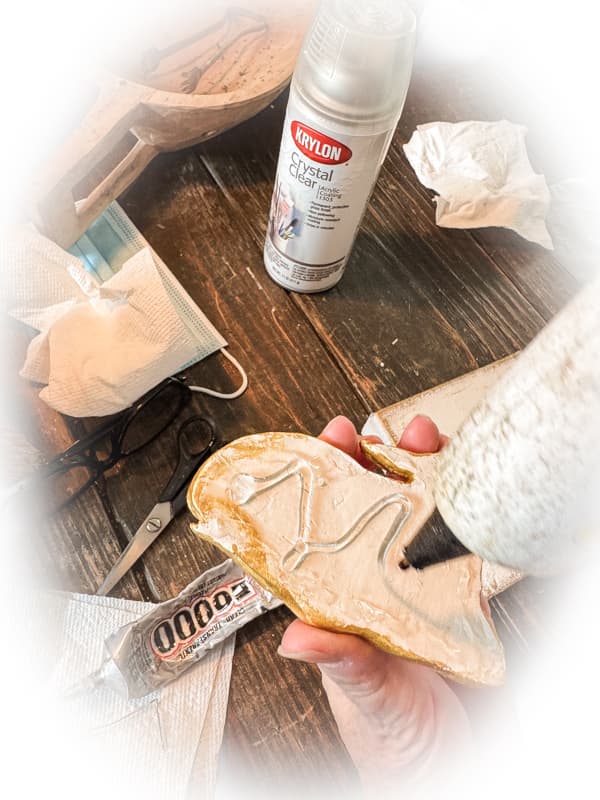
Place the lamb and bunny at the center of the canvas and allow to dry.
3-D Air Dry Clay Art Canvas
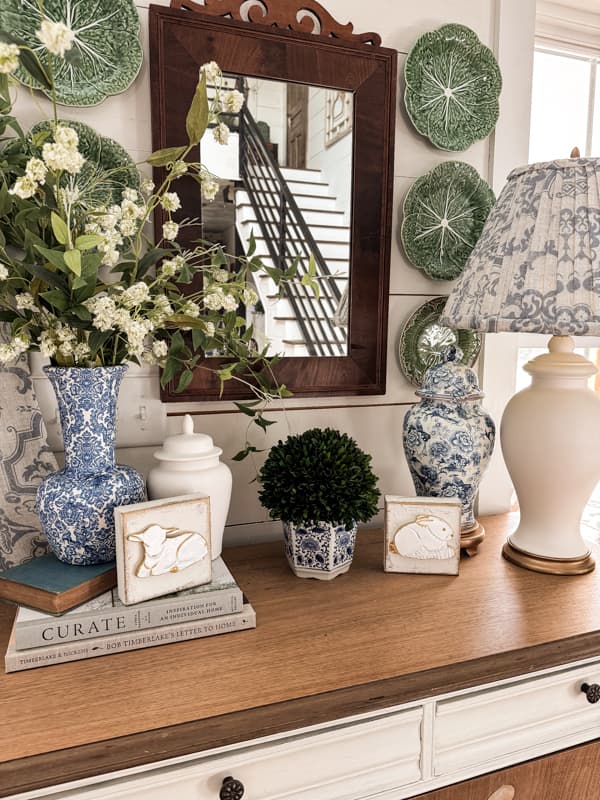
The 3-D effect of the air-dry clay lamb and bunny on the painted canvas is stunning. I love the white and gold tone-on-tone design. You can create similar canvas art with other animals or birds, and the options for painting your designs are unlimited. You can use a dark canvas for more contrast or paint the lambs and bunnies in pastel colors for Easter.
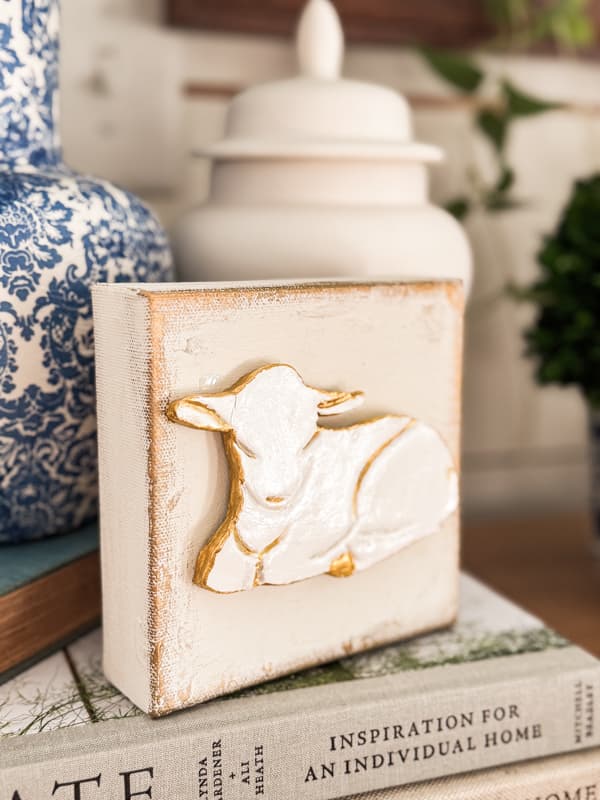

I wanted to extend the display time for my art canvas designs, so I opted for the neutral colors with gold accents.
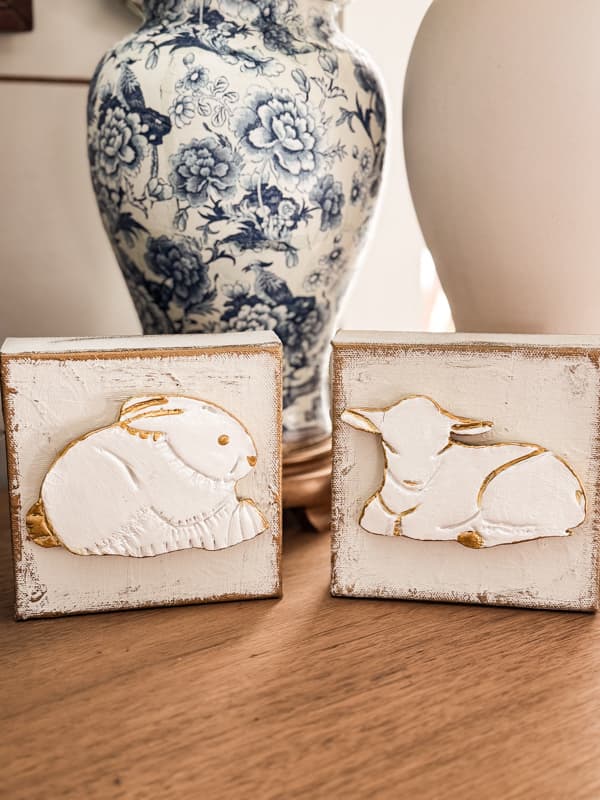
I’m adding the lamb and bunny art to my entry table. The 1 1/2-inch wide frames allow the art to stand on its own.
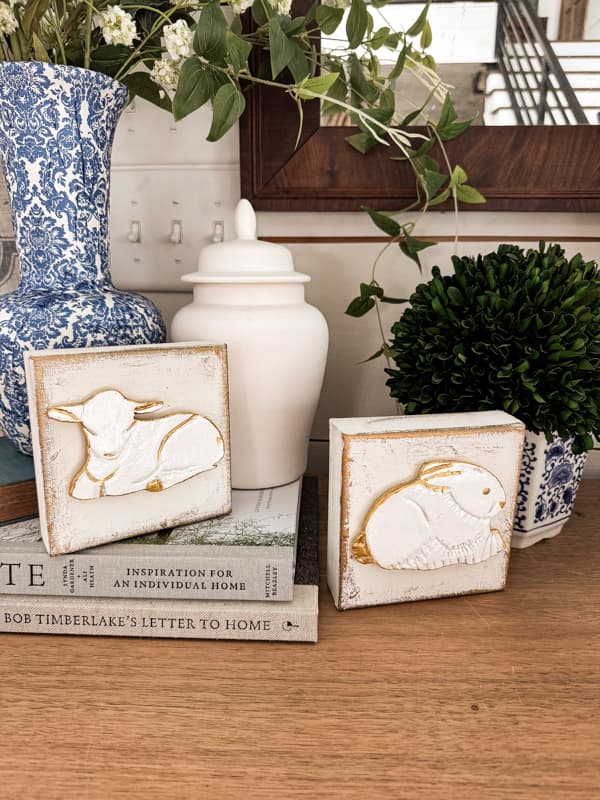
They would also be adorable hanging on the wall. With the unlimited options, you can get as creative as you desire. I hope you like this air-dry clay idea, and I’d love to see your creations.
Resources: Shop This Post
Thank you for stopping by today, and I look forward to sharing my next adventure with you.