Easy DIY Pinecone Swag For Fall Porch Decor
Hey friends, are you looking for unique and eco-friendly DIY Fall porch decor ideas? If so, you are going to love how creative this easy pinecone swag is to make. This fall pinecone craft is unlike any you’ve seen, made from foraged pinecones, grapevine wreaths, luxurious ribbons, and spray paint. The best part is that this tutorial can be adapted for a Spring or Christmas swag simply by changing the color choices and greenery.
(Posts on The Ponds Farmhouse may contain affiliate links. As an Amazon Associate, I earn from qualifying purchases. See the full disclosure details here.)
Table of contents
Eco-Friendly DIY Fall Porch Decor
I was looking for something different for this year’s fall porch. I was tired of the same wreath ideas I’ve used for the past few years. You know I love to create budget-friendly DIY fall porch decor, and I’ve wanted to do something with pinecones. But I wanted it to be unique, so here is what I did.
Gather Your Supplies
You will need a variety of pinecones. I used three large ones, two smaller oblong-shaped ones, and some really small pines were added to the mini-grapevine wreaths. I foraged the pinecones and the grapevine to make the small wreaths, making this project budget and eco-friendly. Here are the additional supplies I used.
- Frayed Velvet Ribbon in Terra Cotta and Moss Green
- Wild Honey Yellow Spray Paint
- Sundried Tomato Spray Paint
- Moss Green Spray Paint
- Hot Glue Gun
- Jute Twine
- Wheat Stems
Spray Paint Pinecones
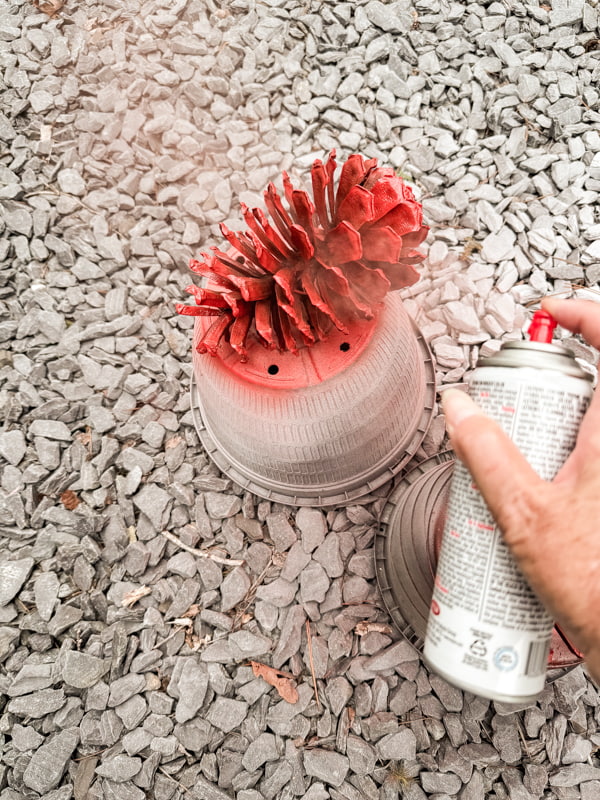
The first step is to clean the pinecones of debris and ensure they are free of bugs. Read the Foraging Safety Guide before painting. I also used a small brush to remove dirt from between the scales.
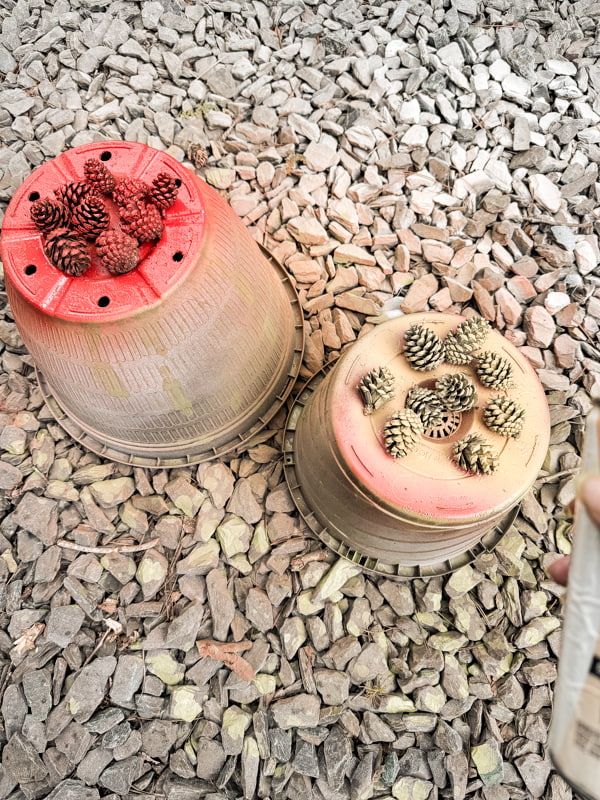
In a well-ventilated space, spray each of the large pinecones with a different color of paint. I was making two pinecone swags, so I painted six large cones with three colors and mixed the colors on the smaller pinecones.
How To Make Pinecone Wreaths
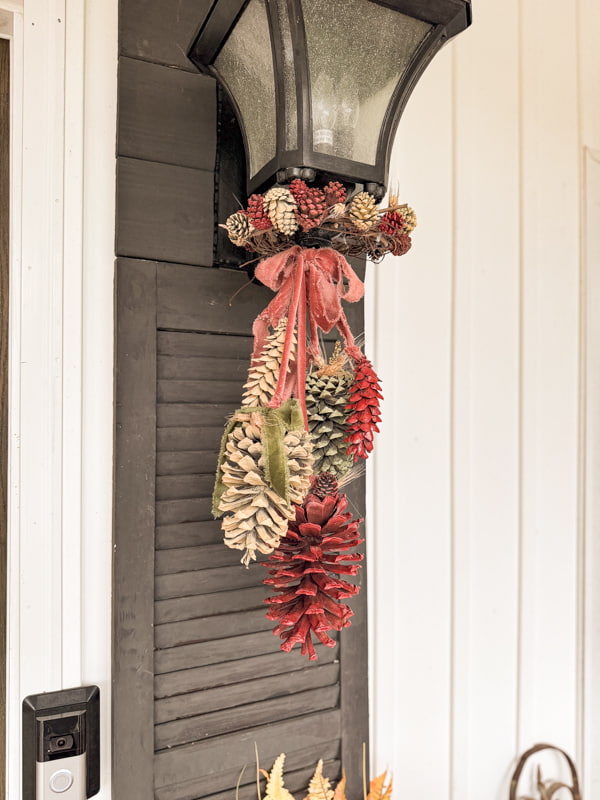
Here is the unique part of this DIY Fall porch decor: The sway will be attached and hung from the wall sconce light fixtures on either side of the front doors. The small grapevine wreaths were designed to fit at the base of the lights, but I also wanted the wreaths to be adorned with pinecones.
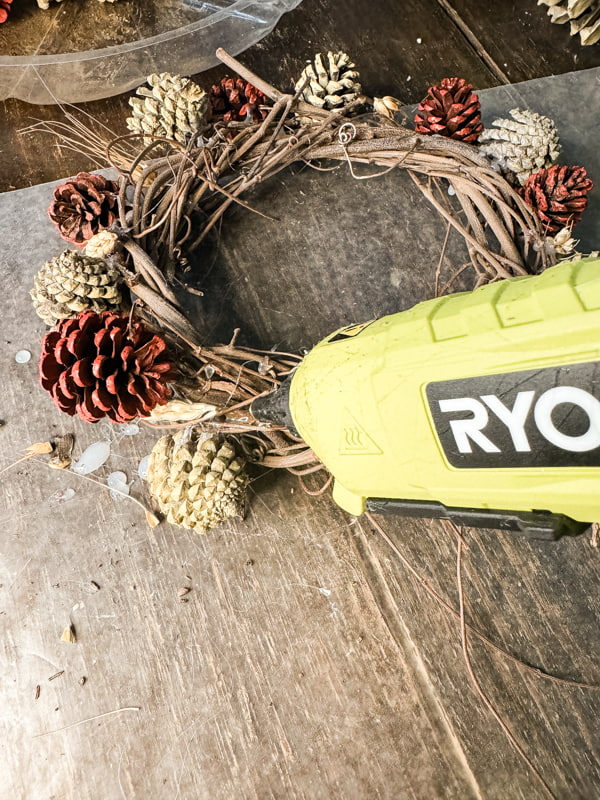
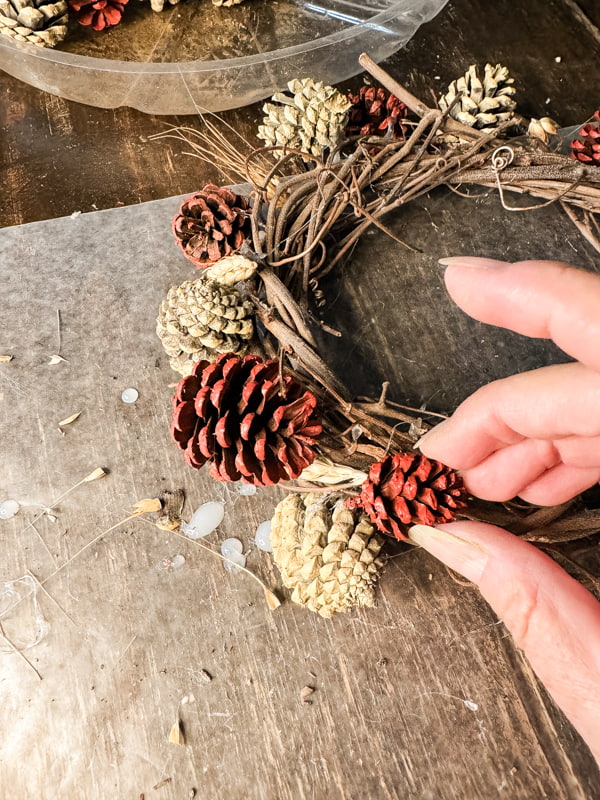
Begin by gathering your grapevine wreaths and small painted pinecones. Using hot glue, attach the pinecones to the outside edge of the wreaths. Some of the wheat stems can fill any gaps.
Apply the pinecones in random positions for a more creative style.
DIY Pinecone Sway Tutorial
Now, you are ready to prepare the painted pinecones to make the fall pinecone craft.
Embellish DIY Fall Pinecone Craft
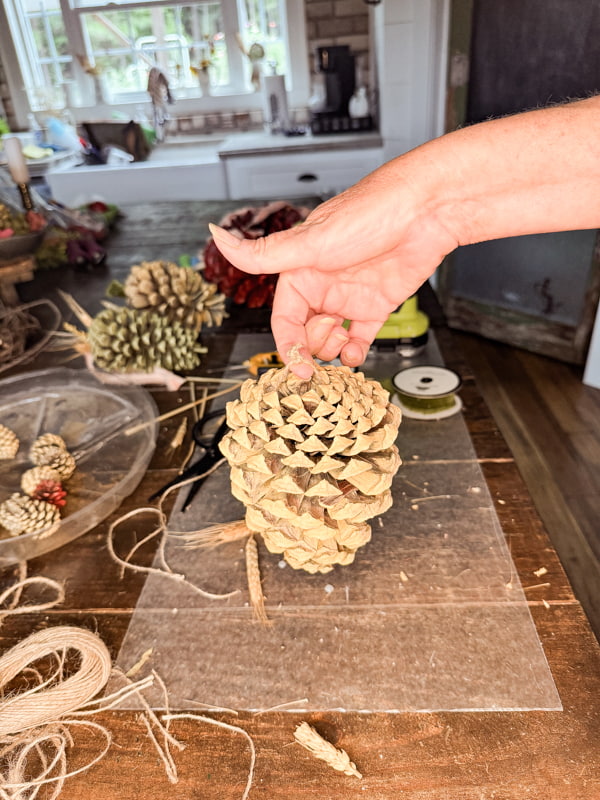
To embellish the DIY fall pinecone craft, start by adding a hanger to the large end of the cone. I used jute twine for the hanger. However, you can use an eye hook if you prefer. I have plenty of jute twine and found it easier to thread the ribbon through the loop than through the eye hook.
To create the hanger, wrap the twine in between the pinecone scale close to the large end of the cone. Crisscross the twine and bring it halfway back around. Then, pull the ends of the twine toward the center of the pinecone top. Tie a loose knot, allowing enough give to thread the ribbon through.
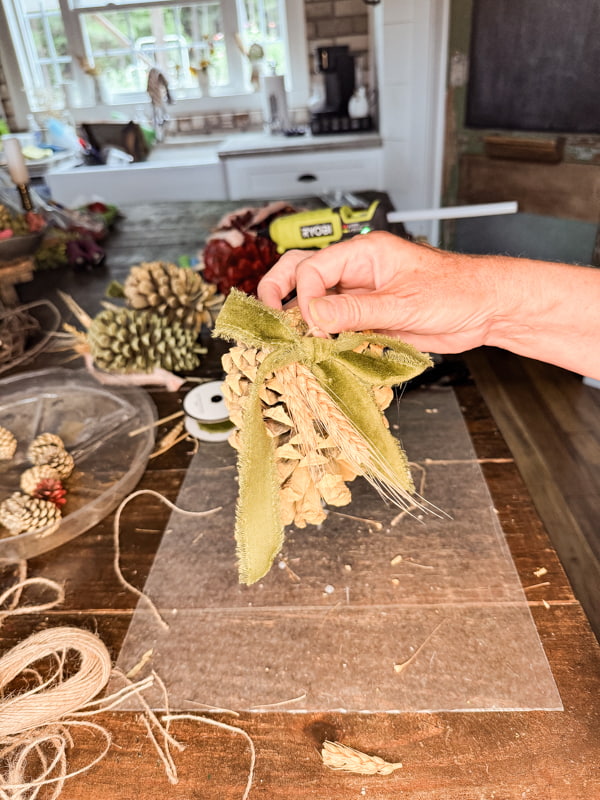
Next, using hot glue, embellish the top of the pinecone with ribbon, wheat stems, or additional pinecones. Ensure that the twine hanger is still accessible.
Insider Tip
A little embellishment is all that is needed. I went a little heavy on my first few pinecones and ended up removing some of the ribbons and stems. In the end, I only added one extra ribbon per swag.
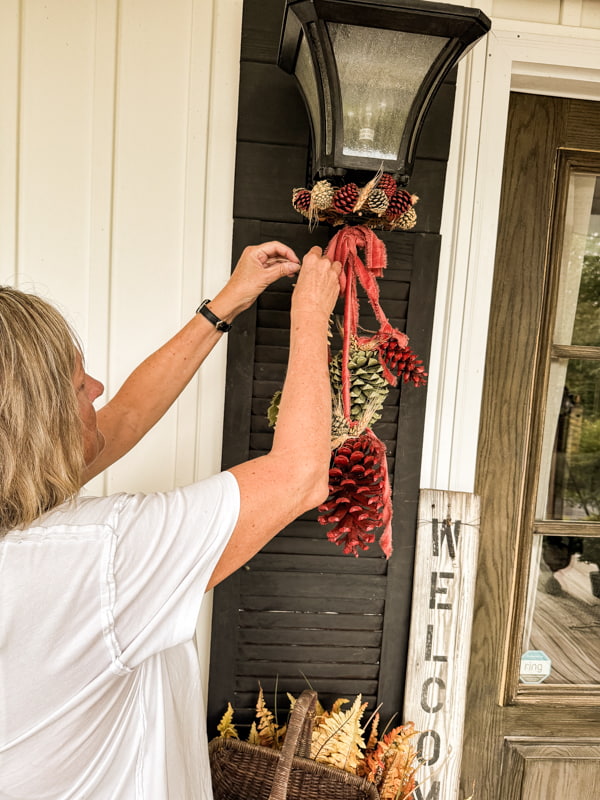
How To Hang Your Pinecone Swag
Now, you are ready to hang your pinecone swag. Unlike most DIY swags, you will need to assemble them on your porch.
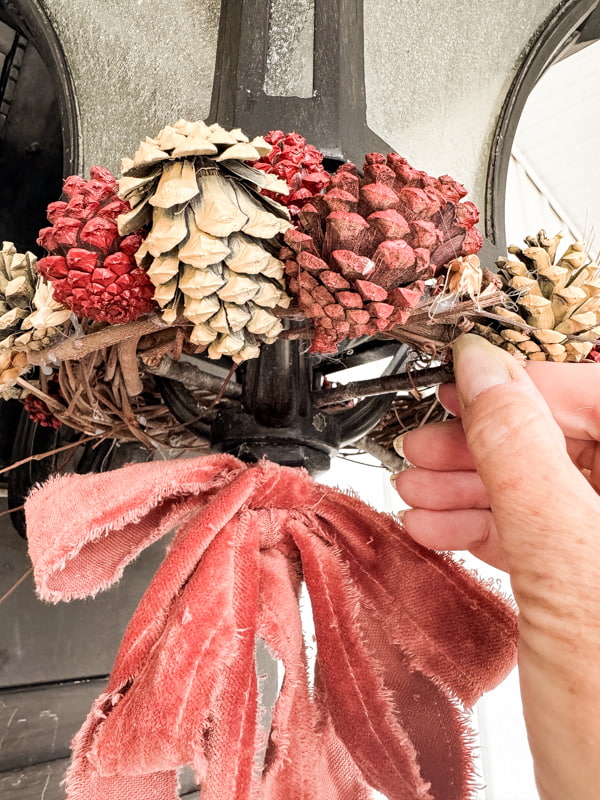
Attaching the Grapevine Pinecone Wreath To The Light Fixture
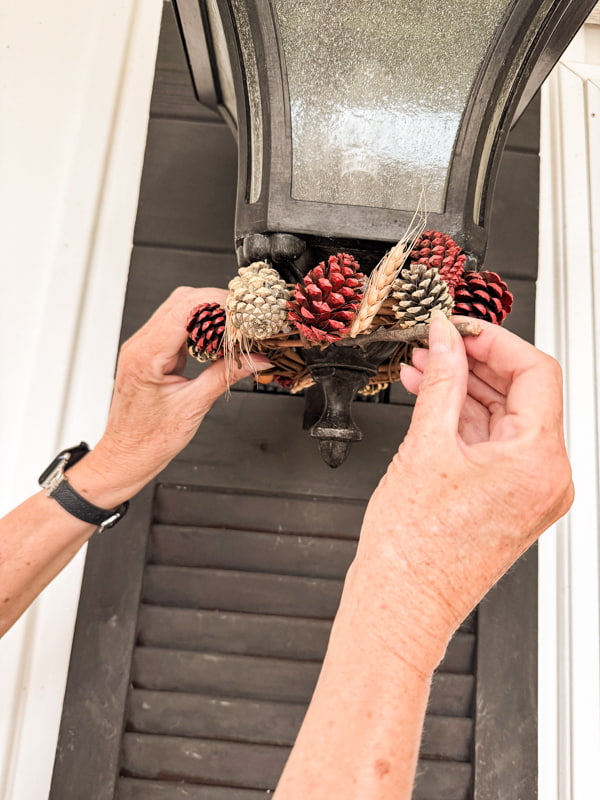
First, install the grapevine wreath on your light fixture. Each fixture will be unique and may require different methods of installation. My fixture has an open area at the bottom, which allowed me to place the wreath in position and slide a small stick underneath and through the open area of the fixture. You could also use lightweight wire or floral wire to attach. (Note: If you don’t have a light fixture that would work for this method, see other options below.)
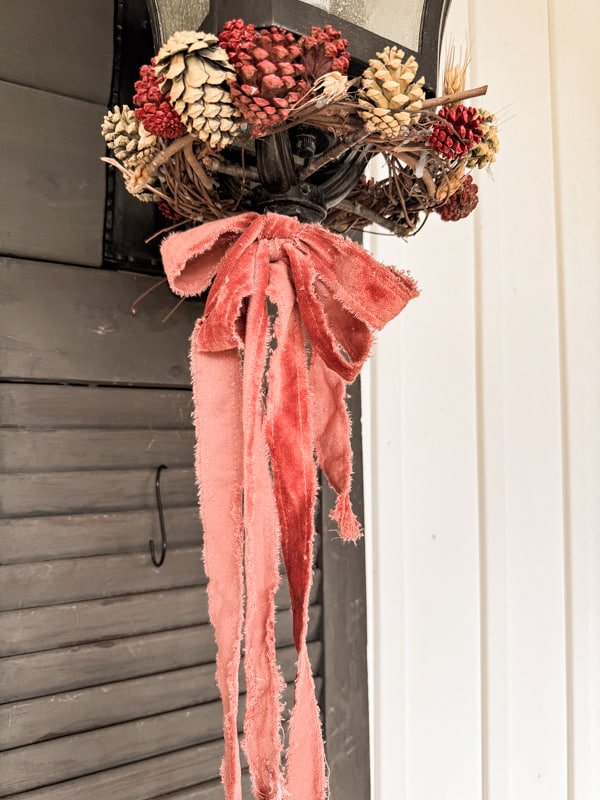
How To Add Ribbon For Swag
Next, with approximately 1 1/2 yards of ribbon for each, tie two bows at the bottom of your light fixture. Allow one of the bows to hang with a long and short tail. Just off-center the ribbon as you tie your bow. Notice how one end is extremely short compared to the other ends.
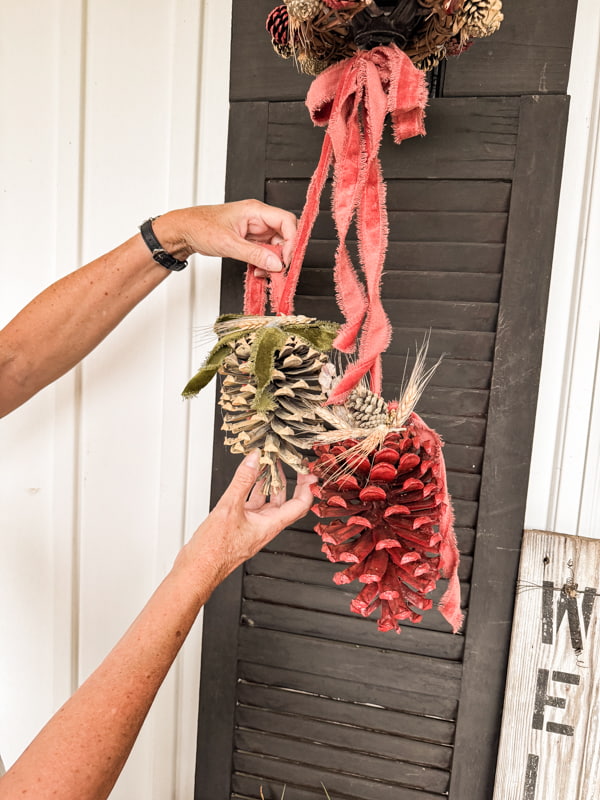
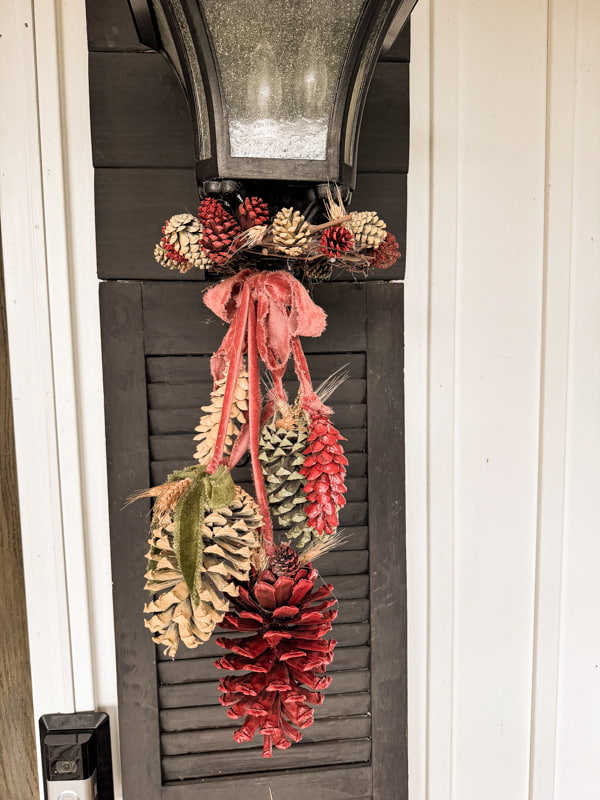
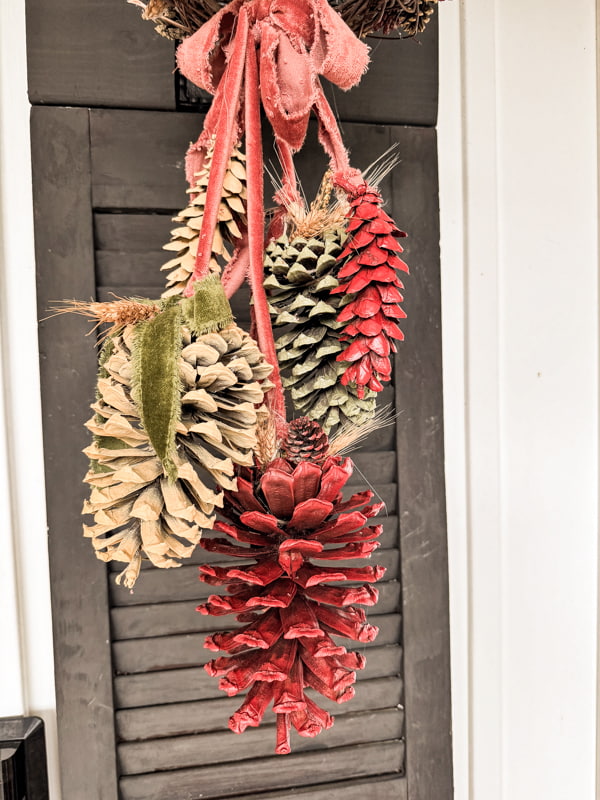
Finally, you are ready to tie the pinecones onto the ribbon. Begin with your largest pinecone and let it hang the lowest. Add the second largest and position it with the bottom edge slightly overlapping the first pinecone. Next, position the smallest of the large pinecones, slightly overlapping the second one.
Pull the ribbon through the hanger loop you made with the jute twine and tie it into position. It is best to keep the ribbon loose until you have stood back to ensure the position is to your liking. My first one was a breeze, and everything looked balanced and perfect. However, for the second one, I had to reposition two of the pinecones a few times to achieve the desired effect.
To finish, add the smaller oblong pinecones. I only used two on each swag and used the same hanger method as I shared for the larger pinecones. If you decide to see more, I recommend using odd numbers for the total of pinecones on each swag. These are a good size to help balance the swag. You should play around with the positions until you like the balance.
Insider Tip
The velvet ribbon I used doesn’t slip when tied once. I didn’t tie in a knot because it wasn’t slipping. However, you may need to tie your ribbon in a knot if you are using satin or slick material.
Also, there are only four tie ends; you may have noticed I used five pinecones. The second cone is on a long piece of ribbon, and once it is tied, it leaves another long end. I used the excess to attach the 5th smaller pinecone. If you are using more than five pinecones, you can tie an additional ribbon to the fixture.
Optional Use
If you don’t have a light fixture to display your pinecone sway, don’t worry; you can still make one. Here are some display options.
- Tie the ribbons on a wreath hanger and hang the swag on your door.
- Attach ribbons to the grapevine wreath and hang the wreath from the door. If you use this method, the small pinecones should be glued to the front of the grapevine instead of the sides.
- You can hang the swag from a light fixture inside your home, such as over a dining table or island.
- Hang from a porch post or light post.
Easy Pinecone Swag
Don’t they look great? Once the paint is dry, this is a quick and easy project. I made two swags in less than one hour.
This pinecone craft would also look good with all the pinecones painted in one color, such as white or gold. This option would be especially good for the holidays. You can add greenery and different ribbon colors for a more festive holiday style. The options are unlimited.
I love the colors I chose for my fall pinecone craft, and the unique grapevine wreath on the light fixture gives it a crowning touch. What do you think?
I couldn’t resist adding some additional fall touches to the planters, and in a few weeks, I’ll share the entire porch that has been decorated for fall.

Related Articles
DIY Fall Pinecone Swag Tutorial
Step-by-step instructions on how to make easy pinecone swag for your fall porch.
Materials
- 6 Large Pinecones
- 4 Medium pinecones
- Approx. 20 very small pinecones
- 2- six inch round grapevine wreaths or appropriate size for your light fixture.
- Frayed Velvet Ribbon in Terra Cotta and Moss Green
- Wild Honey Yellow Spray Paint
- Sundried Tomato Spray Paint
- Moss Green Spray Paint
- Jute Twine
- Wheat Stems (optional)
Tools
- Hot Glue Gun
Instructions
- Spray paint all the pinecones and a variety of the three colors
- Hot glue the small pinecones around the edges of the small wreaths and fill in with small pieces of wheat stems in the gaps.
- Add jute twine to make a hanger at the wide end of the 10 larger pinecones.
- Hot glue ribbon and wheat stems to the tops of the 6 large pinecones. Ensure that the twine hanger is still visible.
- Attach the grapevine wreath with pinecones to the bottom of your light fixture with wire or twigs.
- Tie two bows to the bottom of the light fixture with the terra cotta ribbon. Use approx. 1 1/2 yards of ribbon and off center the bows so that you have some short tails and some longer.
- Begin attaching the largest pinecone to the first light fixture by pulling the longest ribbon end through the jute twine loop. Tie to secure.
- Add the second largest pinecone slightly closer to the light fixture with the bottom of the cone slightly overlapping the top of the first pinecone.
- Add the third pinecone to a short length of ribbon with the bottom slightly over lapping the middle pinecone.
- Add the two middle size pinecones to balance the swag.
- Repeat on the other light fixture.
Notes
You only need minimum embellishments on the large pinecones.
Attempt to hang both swags evenly. Don't tie the ribbon tight, so you can play around with your arrangement until you are satisfied with the results. Once you are happy with the balance pull the ribbon tight. If you are using a satin ribbon, you will want to tie a knot.
Resources
Click the items below to shop.
- Frayed Velvet Ribbon in Terra Cotta and Moss Green
- Wild Honey Yellow Spray Paint
- Sundried Tomato Spray Paint
- Moss Green Spray Paint
- Hot Glue Gun
- Jute Twine
- Wheat Stems
- Small Grapevine Wreaths
Video
Thank you for stopping by today. I appreciate your continued support.


Looks beautiful Rachel. Love the colors.
Cindy,
Thank you for stopping by.
Such a charming decoration
Angie,
Thank you for your kind comment.
Looks nice Rachel ,goes well with your fall decor.
Teresa,
Thank you! I’m so glad you like it.
I’m loving this DIY project Rachel!
Kim
Thank you, I’m so glad you like it.
Rachel, I have thousands of pinecones here at the cabin! I’ve been making all sorts of things with them and now because of your post, I can make a swag! Thanks for sharing. You are so darn creative!
Mary,
You are so sweet. I appreciate your encouragement.