DIY Shabby Chic Faux Fireplace Mantel with Repurposed Materials
Looking for a budget-friendly way to transform your living space? Check out our Shabby Chic Farmhouse Faux Fireplace DIY Mantel made with repurposed materials. If you want to embrace the charm of farmhouse living, consider adding a shabby chic farmhouse faux fireplace mantel. This project not only adds a touch of rustic elegance to your décor but also allows you to personalize your space with repurposed materials and creative touches.
(Posts on The Ponds Farmhouse may contain affiliate links. As an Amazon Associate, I earn from qualifying purchases. See the full disclosure details here.)
Table of contents
- Planning For A Vintage Fireplace Mantel
- How To Build A Shabby Chic Faux Fireplace Mantel That Looks Antique.
- Creating the Vintage-Inspired Mantelpiece
- How To Prepare The Fireplace Mantel Area
- How To Build The DIY Mantel Top
- Framing the Shabby Chic Faux Fireplace Mantel
- Finishing and Trimming the Shabby Chic DIY Mantel
- Shabby Chic DIY Mantel
- Cozy Winter Mantel Decor
Planning For A Vintage Fireplace Mantel
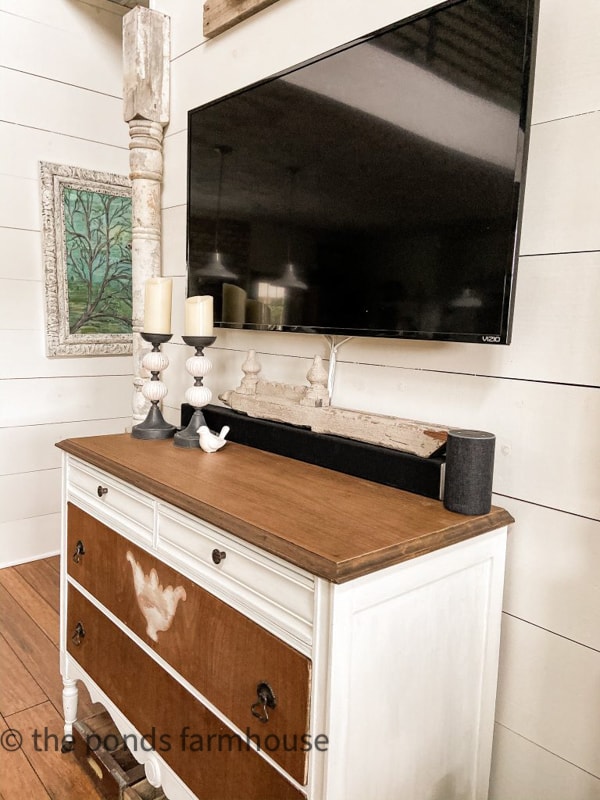
We were looking for a way to cozy up our living room and wanted an authentic vintage mantelpiece. The plan was to add a faux fireplace mantel below the existing TV.
After searching and failing to find the perfect piece, we decided to build one with some vintage porch posts we had been decorating with.
The vintage dresser would be removed, and the porch posts would be repurposed.
How To Build A Shabby Chic Faux Fireplace Mantel That Looks Antique.
Begin by determining the location of your faux fireplace mantel and consider the size and materials you will need to complete the project.
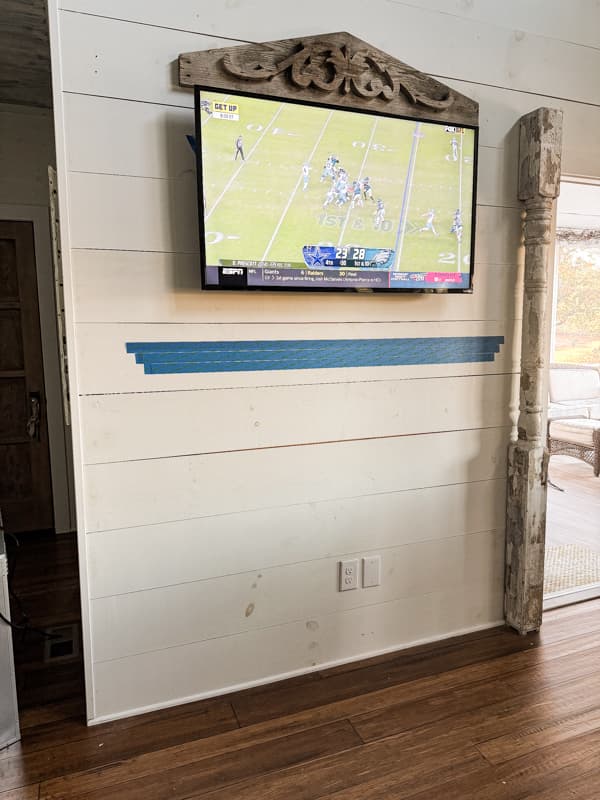
If you want to build a faux fireplace mantel that looks like an authentic antique, you should consider using some vintage architectural elements.
What Can Be Repurposed To Build a Faux Vintage Mantel?
Many old architectural materials can be repurposed into building materials to make a faux vintage mantel. Here are a few things to consider while planning your Shabby Chic Faux Fireplace Mantel.
- Old Corbels
- Porch posts
- Damaged ornate dressers, mantels, and doors contain materials that can be repurposed.
- Trim and fretwork from old buildings and homes, such as crown moldings, gingerbread trims, porch railings, etc.
Where To Find Vintage Architectural Elements
Here are some places to look if you are looking for vintage architectural elements to build a Shabby Chic Fireplace Mantel.
- Habitat ReStore: They received donations of old doors, porch posts, old mantels, and other materials. Their prices are hard to beat, so it’s my first stop. However, supplies are unreliable, and you have to check back often.
- Architectural Salvage Yards. Many areas have salvage yards that sell materials from old homes and buildings that have been demolished.
- Antique and Vintage Stores and Malls. In some antique stores, you can find corbels, doors, mantels, and other architectural pieces. Look for booths that specialize in these materials. The porch posts we used were from an antique mall and were very reasonably priced.
Creating the Vintage-Inspired Mantelpiece
To begin creating your vintage-inspired mantelpiece, you will want to tape off the location on your wall.
Take careful measurements to ensure your faux fireplace mantel is large enough to hold a fireplace insert.
I recommend having the fireplace insert on hand before beginning the project to ensure you allow for an appropriate opening.
Materials and Supplies for DIY Mantel
Materials and supplies will vary based on the size of your mantel. You can see the materials we used as a guide to help you plan your supplies.
- 2″ x 8″ x 8′ pine boards for mantel top, sides and front
- 2″ x 4″ x 8′ framing 2×4’s to build the frame of the mantel
- Decorative Trim for the mantel top
- Hardy Backer Board for attaching the marble tiles
- Black Marble Tiles
- Minwax Classic Grey Penetrating Stain
- Tile Adhesive
- Nails
- Finishing Nails
- Screws
- Wood Biscuits
- Wood Glue
- Wood Filler Putty (stainable)
- The architectural elements we used were two vintage porch posts (8 feet tall)
- Electric Fireplace Insert
Tools needed to complete the project.
How To Prepare The Fireplace Mantel Area
First, it’s important to prepare the area where your new DIY Mantel will be located.
You will need an electrical outlet within reach of the electric fireplace insert. Be sure that your outlet meets the specifications of the insert you purchase.
I recommend that the outlet be behind the faux fireplace mantel if possible.
It was necessary to raise the TV in our space, and to prevent the wires from being exposed; we installed a new electrical outlet behind the TV.
Caution: Be sure to hire a licensed electrician when making any electrical changes to your home if you are unfamiliar with the process.
How To Build The DIY Mantel Top
The materials for the DIY Mantel Top were 2″x8″x8′ pine lumber. Although I would have loved to have reclaimed materials, instead, we used new materials and made them look aged.
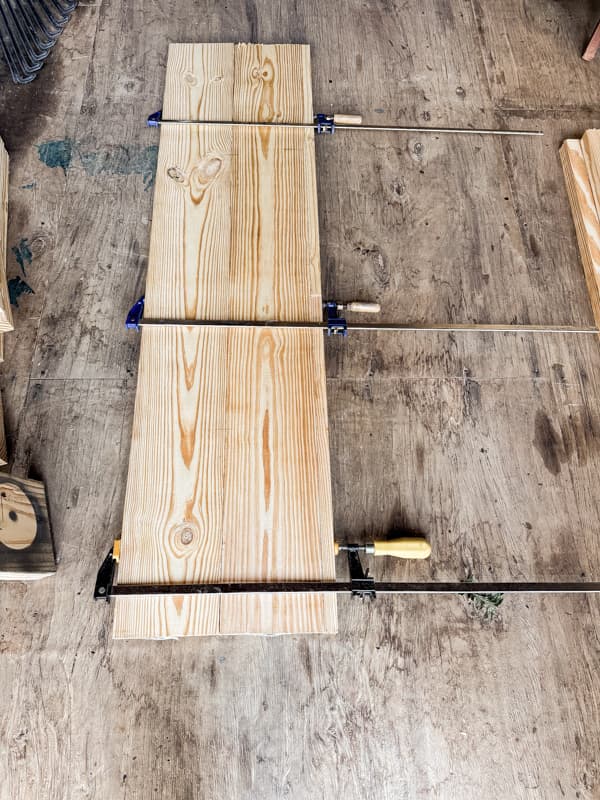
To create a deep mantel top, we attached the eight-inch wide boards together with biscuit joiners and wood glue.
We decided on three stacked boards to complete the top. To accommodate the depth of the fireplace insert, the smaller board would need to be 14 inches deep and 50 inches long.
The middle board was 15 inches deep and 52 inches long. Finally, the top board was 16 inches deep and 54 inches long.
Now that all the DIY mantel tops were cut and glued, the construction of the mantel frame began.
Framing the Shabby Chic Faux Fireplace Mantel
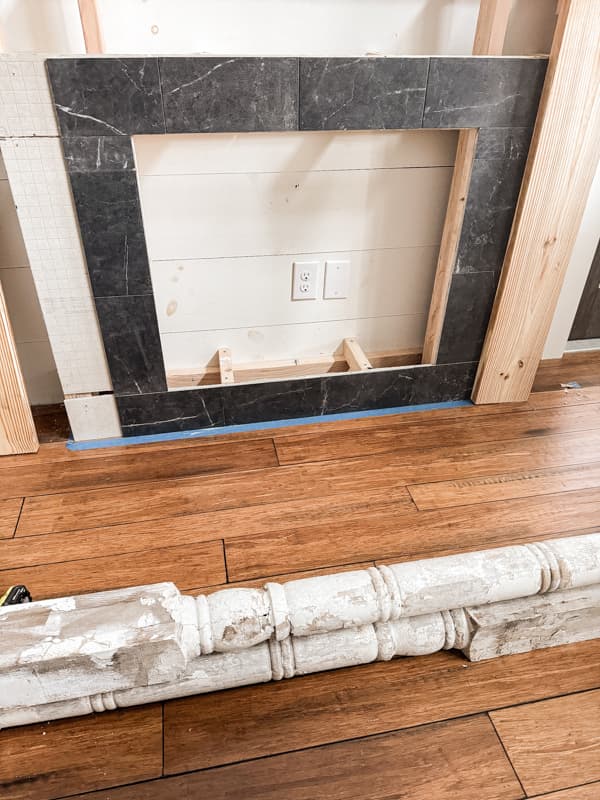
Before framing the Shabby Chic faux fireplace mantel, apply painter’s tape to the designated area to be enclosed.
With careful measurement, create a frame that will encase the electric fireplace insert and accommodate any architectural elements you plan to incorporate in the construction. In addition, be sure to allow for the backer board and tile installation.
We constructed the frame using standard construction wood nails and 2 x 4s framing.
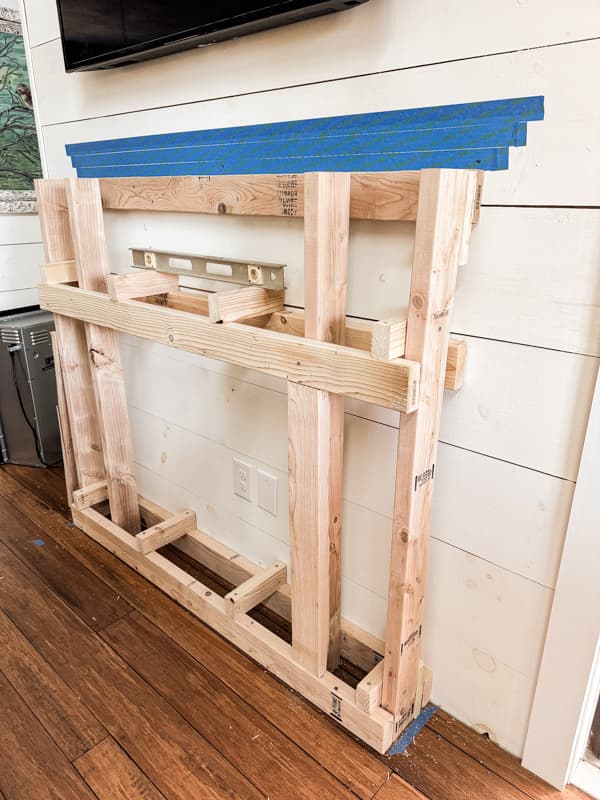
To ensure your materials are installed level both vertically and horizontally, use a laser level and a handheld level.
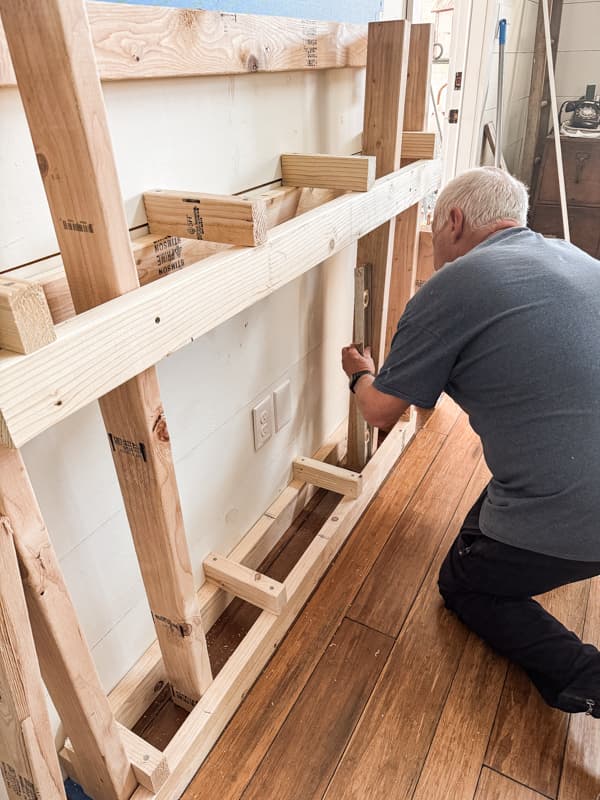
Adding Backer Board and Tile
Once the frame is in place, you will want to add the Hardy Backer Board to apply the tile surrounding the faux fireplace.
You want the backer board to extend the entire width of the DIY mantel surround and install it using finishing nails.
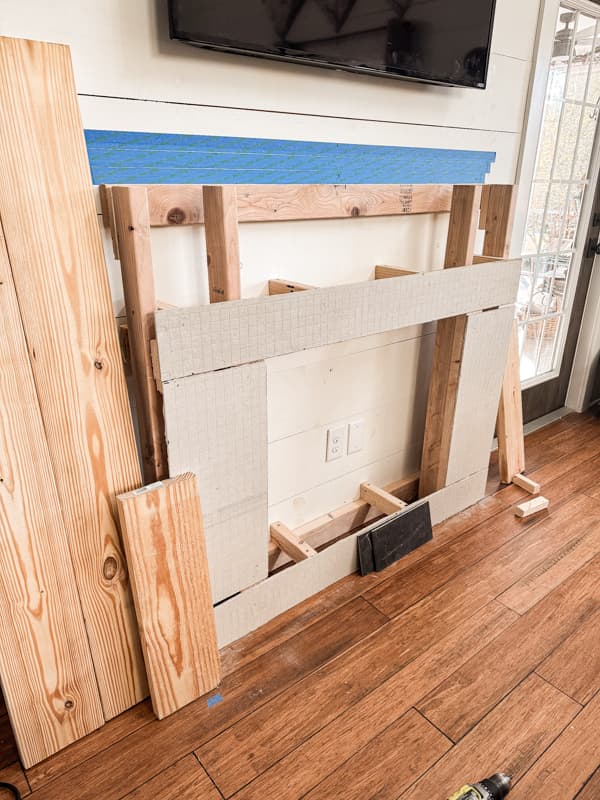
Now, it’s time to install the tile surrounding the fake fireplace. Luckily, we found that a six-inch wide tile perfectly fits our space. Therefore, we will use six-inch tiles to cover the entire area around the fireplace opening.
Use the adhesive to apply the tile and follow the adhesive drying instructions before proceeding with construction.
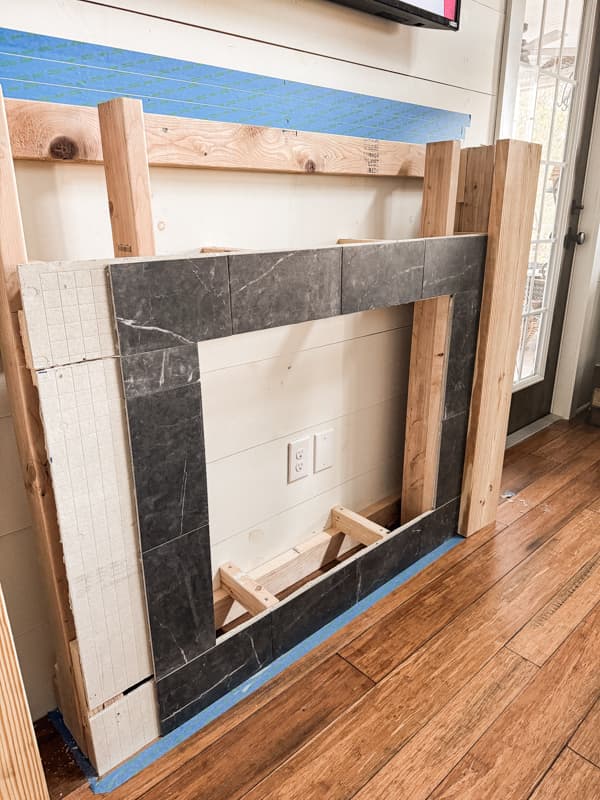
Encase the Faux Fireplace Mantel
Once the tile adhesive is dry, you can encase the faux fireplace mantel.
Using the 2″x8″ boards, add one board to either side of the tile and attach with wood screws.
To accommodate the fireplace insert, the eight-inch board was too narrow to fill the space at each end of the mantel. Therefore, it was necessary to make a wider board for the ends.
If you run into this problem, you can use a table saw to cut one of the boards to size. Then, join the two boards with glue and nails to attach to each end of the mantel.
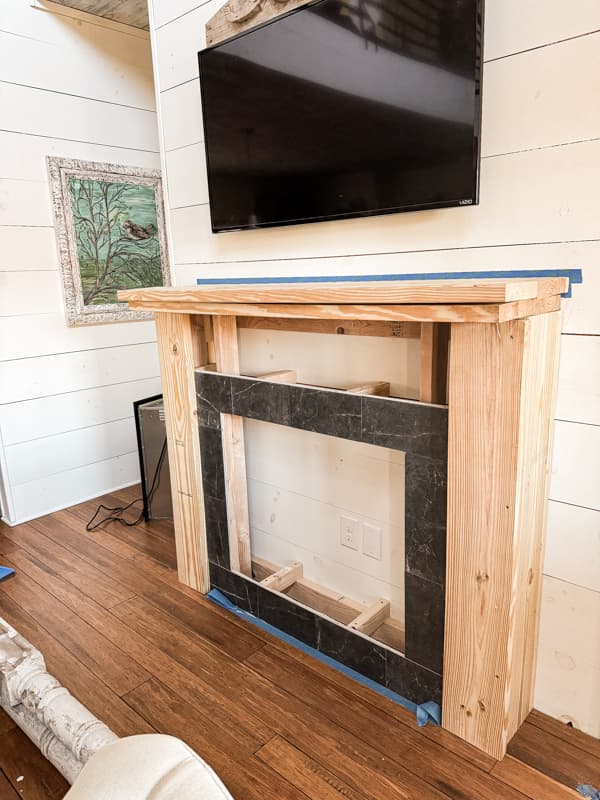
How To Create An Aged Look To New Wood
To create an aged look to new wood on the mantel, stain the wood with a classic grey stain.
Wear protective gloves and rub the stain into the wood with a soft cloth to apply the stain.
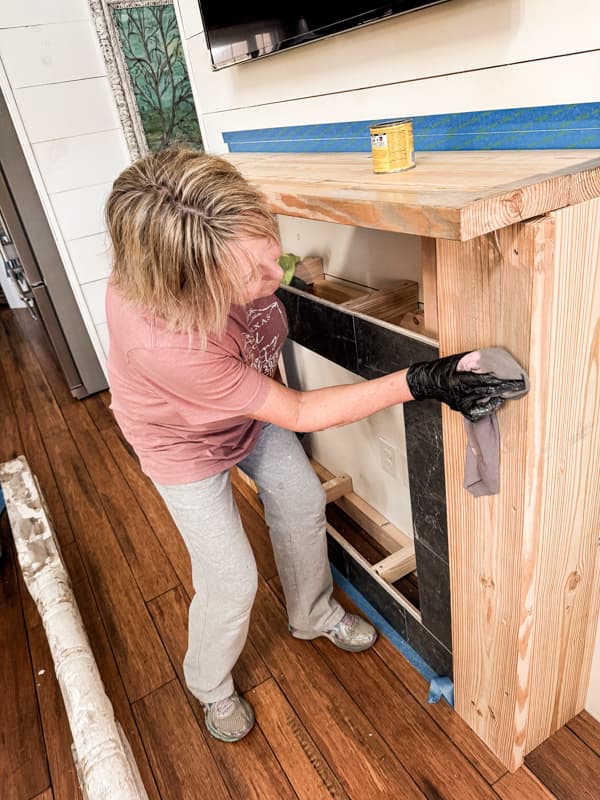
Follow the stain with a Dark Wax to darken the wood.
Insider Tip
Be sure to apply the stain and dark wax to the new wood on the DIY mantel before adding the architectural elements unless you are staining them, too.
The porch posts we plan to use have shabby chic chippy white paint, and I didn’t want to alter their appearance.
Another option is to paint the new wood. I recommend using the grey stain first if you want an authentic, aged look for your mantel.
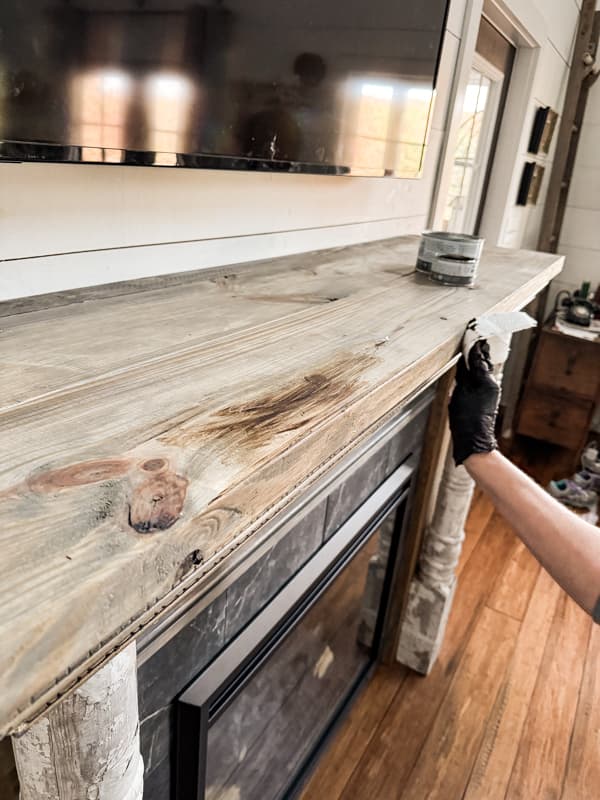
Adding Architectural Posts
Next, we are ready to add the shabby chic architectural posts to the mantel, and we had our first oopsy!
First, carefully measure the post height and cut them to size with a miter saw.
Insider Tip – Oopsy!
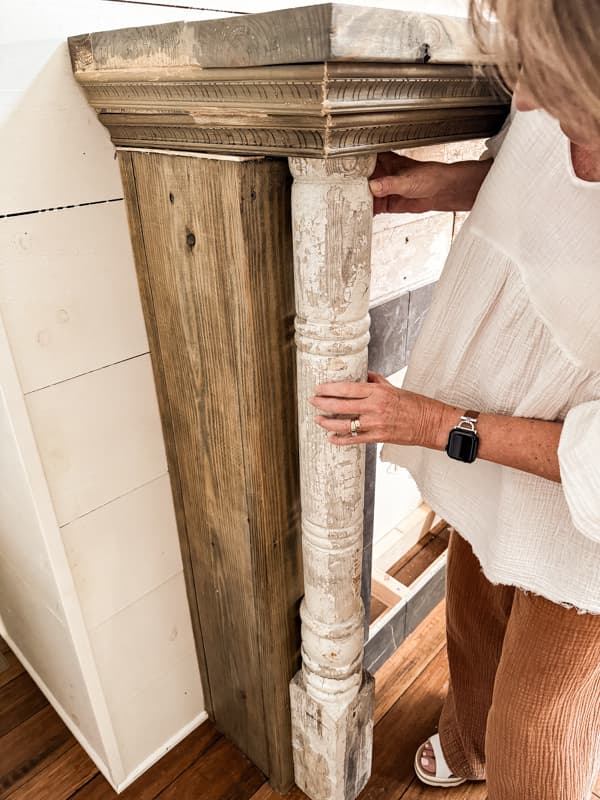
We realized we should have attached the porch posts before installing the front mantel boards. Fortunately, we had secured the boards with wood screws, and it was easy to disassemble.
We removed boards from the mantel enclosure, then attached the posts to them with screws from the backside.
Ideally, attach the posts to the front enclosure boards before attaching them to the mantel frame.
Attach vintage porch posts to boards with two wood screws from the back.
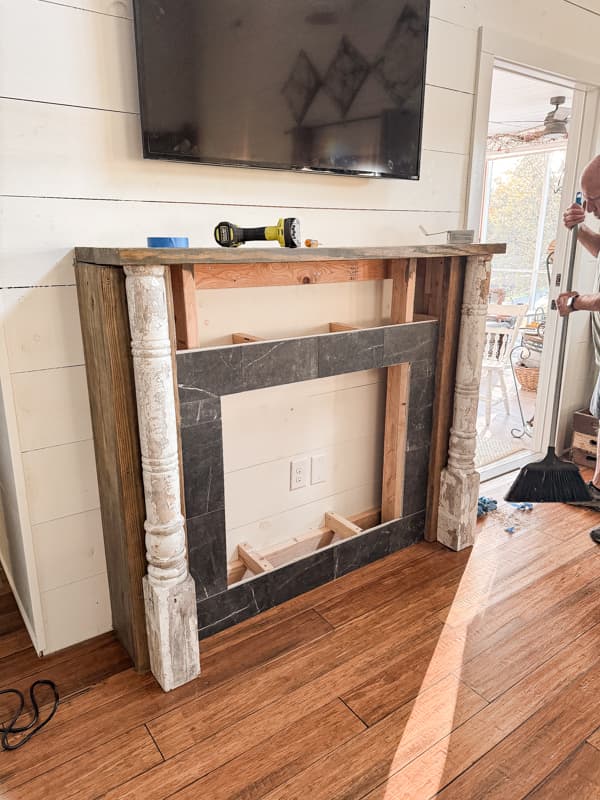
Finishing and Trimming the Shabby Chic DIY Mantel
Finally, you can trim and finish the Shabby Chic DIY Mantel.
We purchased some trim for the mantel top, but the remaining old porch posts were deconstructed, which added to the authenticity of the farmhouse mantel.
Every piece of the old porch posts was repurposed to use on the DIY mantel.
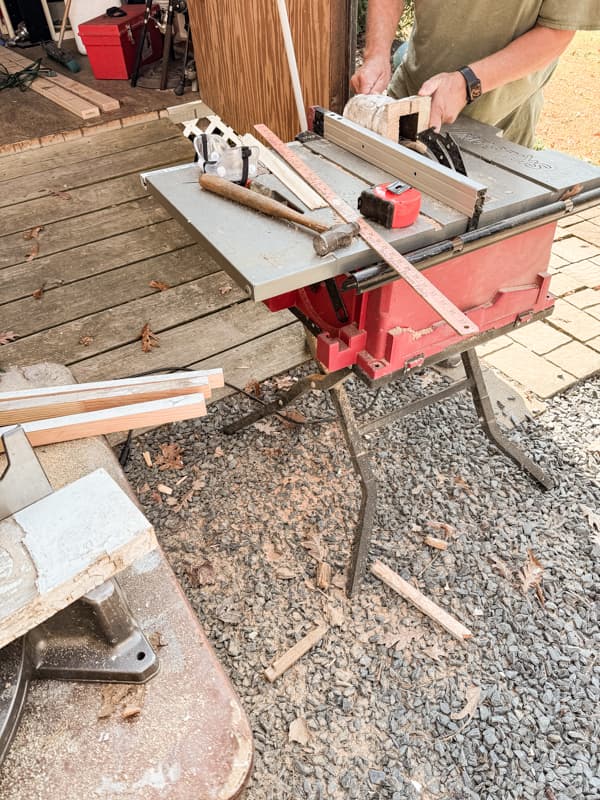
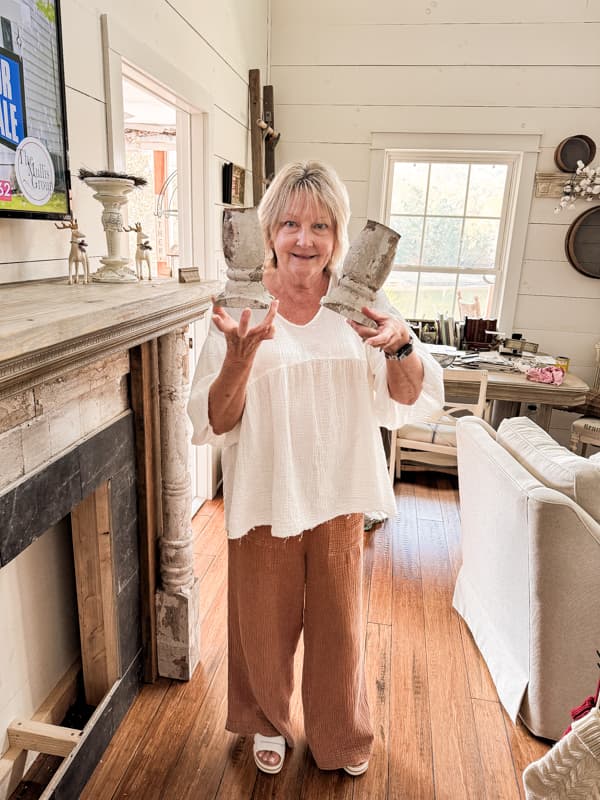
We assembled the repurposed flat boards and used them to fill the space above the tile. Other pieces enhanced the shabby chic farmhouse faux fireplace mantel design.
We found some of the pieces were fragile and applied them to the mantel with wood glue to prevent further damage. Painter’s tape held them in place until the glue was dry.
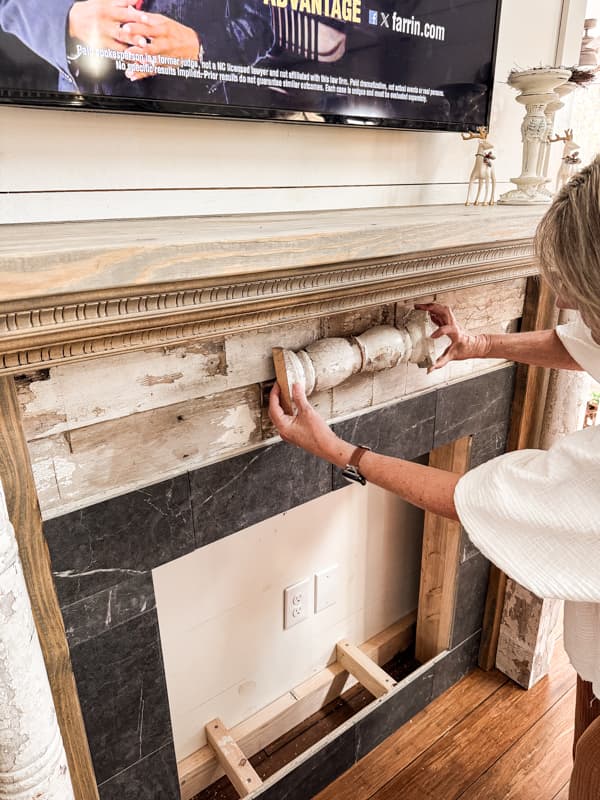
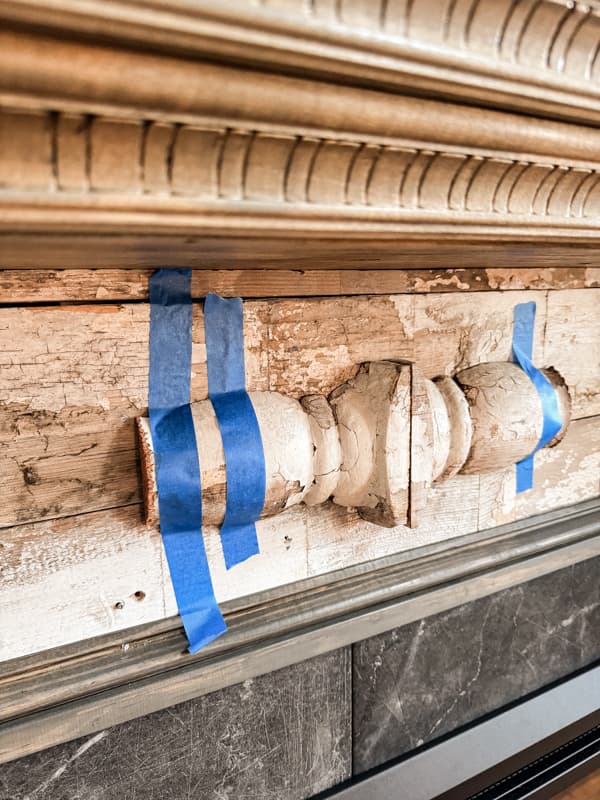
We constructed the mantel top from three boards, trimming it with new wood molding and staining it grey for an authentic, aged appearance.
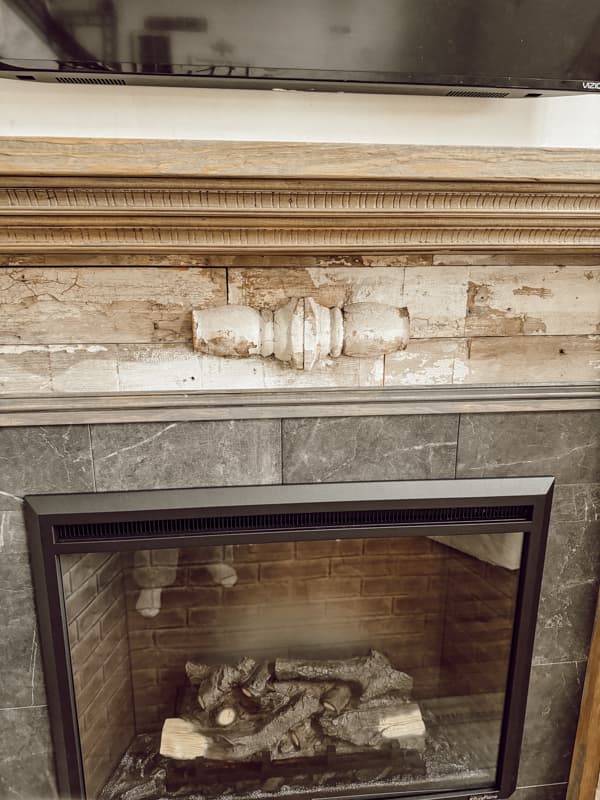
Shabby Chic DIY Mantel
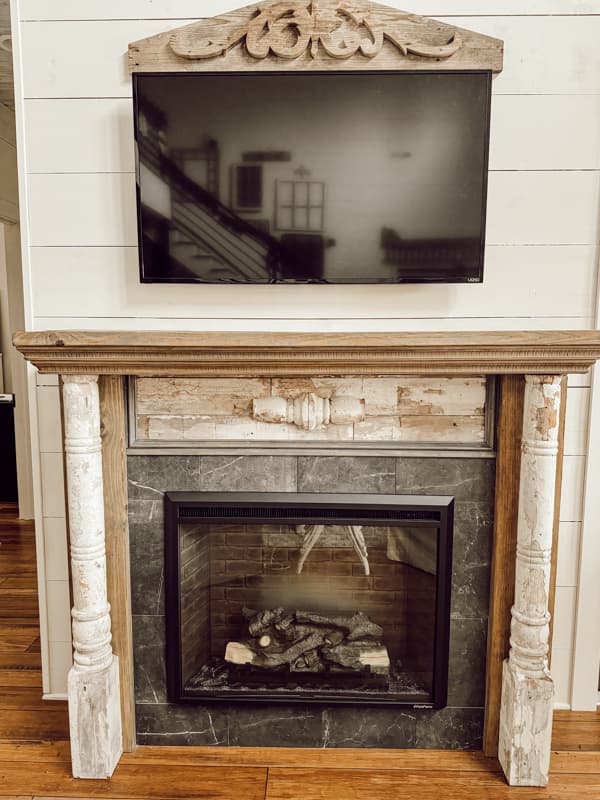
We are loving the new Shabby Chic DIY Mantel. The architectural elements create an authentic, aged feel to the farmhouse.
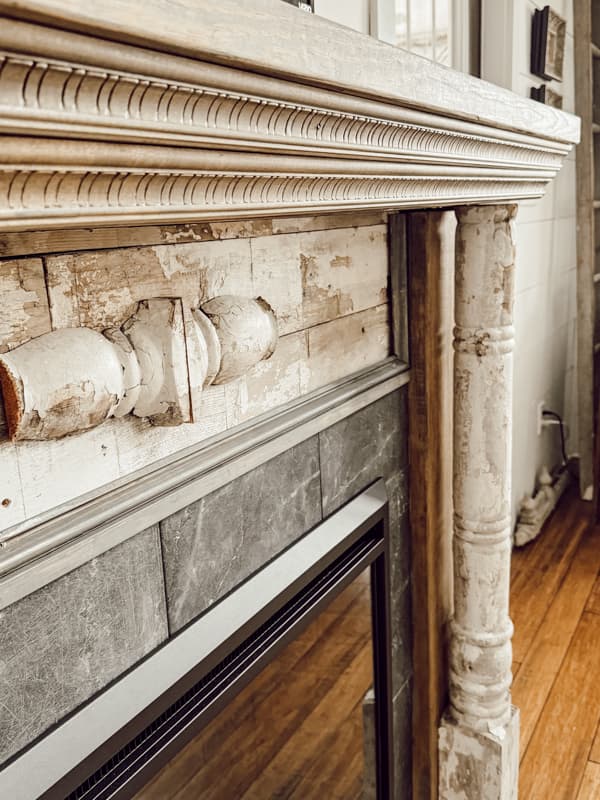
The mantel has made such a difference to the living room. It has added a rich, warm, cozy focal point that was missing previously. I don’t even mind the black box above quite as much. LOL
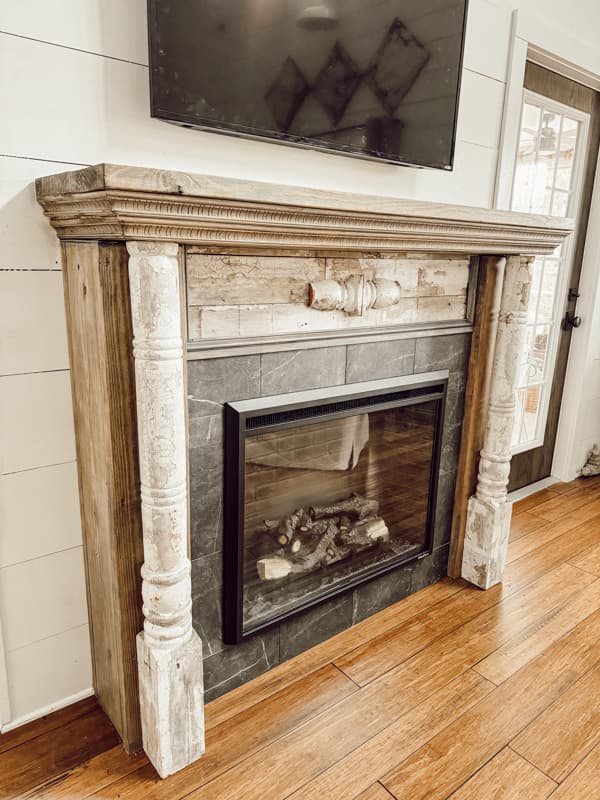
Another previously purchased architectural piece frames the TV perfectly, enhancing the entire wall with vintage charm. Wait until you see the mantel decorated for Christmas. I’m sharing a home tour on Wednesday, so stay tuned.
Resources
Click the images below to shop for resources for this project.

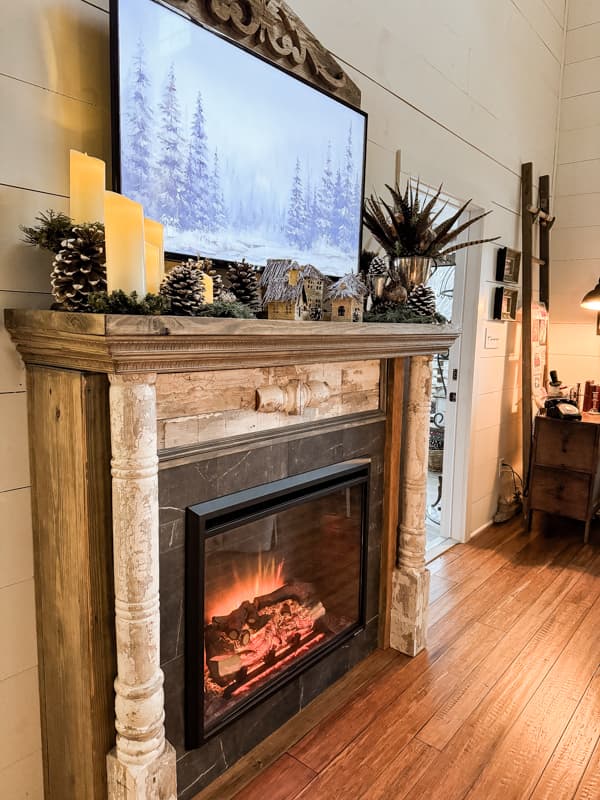
Cozy Winter Mantel Decor
See how to style your mantel with cozy winter decor with hygge-inspired winter magic here.

Pin It To Remember It
Did you find some great ideas you’d like to save for future reference? Hover over the images you’d like to save and pin to your favorite Pinterest Boards when you see the PIN button.



Brilliant idea. Looks lovely!
Stephanie
I’m so glad you like it.
It looks fantastic! Wish I had a handy man like yours
Margie
Once I get him going it’s great. LOL
Oh my goodness – I read your blog daily but have never commented, but this, this has got to be one of the best ever! Not just on your blog but on every DIY I’ve ever seen . You guys are quite “the team” and knocked this one out of the park – I’m pinning it and sharing it . Love it. Can’t wait to see how you style it.
Marilyn,
This just made my day. I appreciate these words of encouragement. They lift me up and keep me going. I’ll be sharing a Christmas tour on Wednesday.
That’s really charming and looks like ya’ll did a great job of it!
Gina,
I’m glad you like it. Thanks for your comments.
Simply perfect! I guessed correctly on what this project was going to be, haha. We too just finished a retro-fitting of a discarded mantle, and I just love ours. Yours is rustic and inventive, once again batting 1000! Or however the saying goes!
Gail,
I’m so glad you like it. We are so happy with it.
Y’all did a great job, I love it!
Stephanie,
I really appreciate this.
That looks awesome. Great job. Can’t wait to see it decorated for Christmas!
Miche,
Thank you so much. I’ll be sharing on Wednesday.
Well, all I have to say is…what took you so long to make this gorgeous looking fireplace???? It looks like it was always there. You and Brad are a good team building beautiful furniture. You are so lucky to have a handy husband that makes awesome projects ..ie the lovely greenhouse..drooling here..
Lorri,
I so appreciate you for commenting. We love how the fireplace mantel turned out and it’s always encouraging when others agree with us. Thank you for stopping by.
Wow Rachel, this an amazing project!
Cindy,
Thank you! I’m glad you like it.
Wow! I am super-impressed. One would never know that’s a fake if you hadn’t written this! Love it. You and your “Mr. Pond” did a fantastic job!
Barbara,
I appreciate this so much. We are so pleased with the results and I’m glad you like it.
Rachel, this is such a great idea. It looks gorgeous. I can only image all the wonderful ways tht you are going to decorate it. Hugs to you, my friend.
Renae,
Thanks for stopping by. I’m glad you like it.
This is amazing! You’ll love being able to decorate that mantel!
Debra,
I already do love it. Thanks.
Amazing!!!!
Debbie,
I’m so glad you like it. Thanks for stopping by.
Great job on the Shabby Chic Fireplace mantle!!! I love it!
Donna,
I appreciate this. Thanks for your comments.
Looks fabulous Rachel! I love the all of the details and the chippy finish on the spindles.
Wendy,
Thank you, it is amazing the difference it makes in the room.
Beautiful! Looks as if it was constructed 100 years ago.
Rosie says hello to her brother Rudy.
Beautiful! Looks as if it was constructed 100 years ago.
Rosie says hello to her brother Rudy.
Lynn,
What a great compliment. Thanks so much and awww that’s so sweet. Rudy says hi back.
I want one exactly like this in our master bedroom. Just wish I could build one. Thanks for sharing
Ivory,
Good luck. We are loving ours and I hope you can find someone to help you build one.