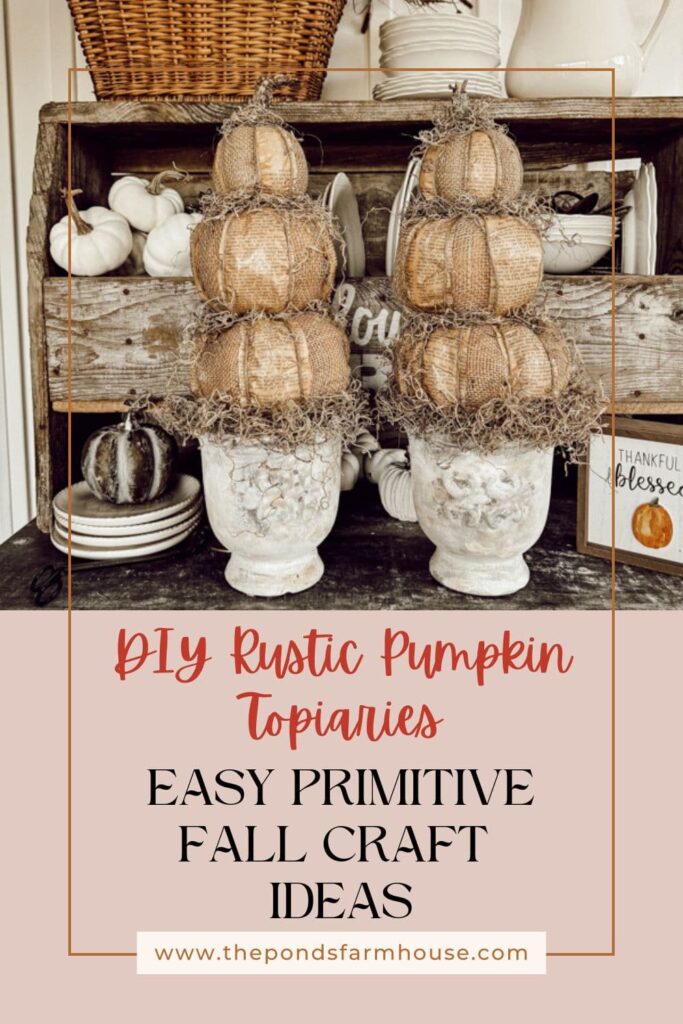
DIY Rustic Pumpkin Topiaries: Primitive Fall Craft From Dollar Tree
Are you looking for a quick and easy fall craft to add a touch of rustic charm to your home? These DIY Rustic Pumpkin Topiaries are the perfect project if you are a pumpkin fan like me! You can create this adorable primitive fall craft in no time with affordable materials from Dollar Tree and old book pages.
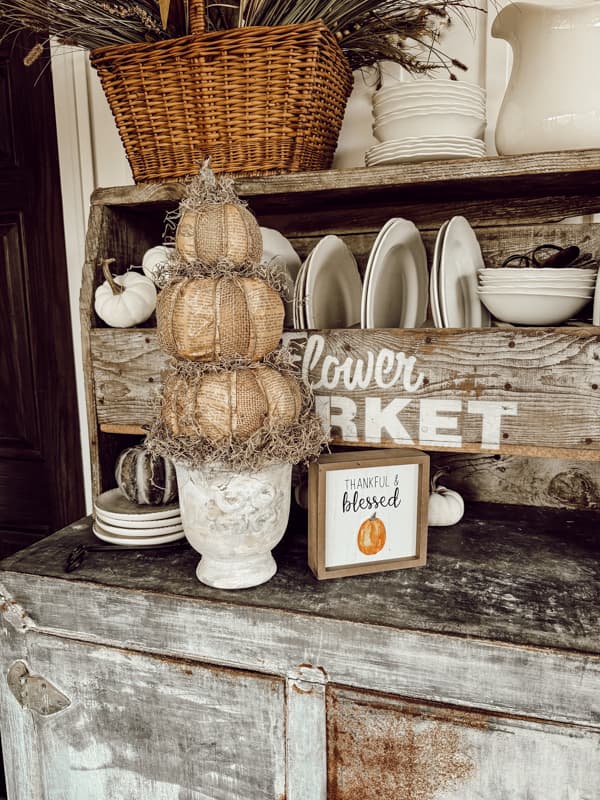
As I was planning this year’s fall decor, I wanted to add a rustic, primitive touch to my mantel. Do you remember the updated thrift store vases I shared a few weeks ago? Well, I wanted to use them on the mantel and was racking my brain for a creative idea. Making a sweep through Dollar Tree, I spied this little burlap pumpkin, which sparked an idea for these primitive pumpkin topiaries. All three pumpkins are from Dollar Tree, and you only need a few more supplies to make these budget-friendly rustic topiaries for your fall decor. Let me show you how easy this project is to make.

(Posts on The Ponds Farmhouse may contain affiliate links. As an Amazon Associate, I earn from qualifying purchases. See the full disclosure details here.)
Table of contents
DIY Primitive Pumpkin Topiaries
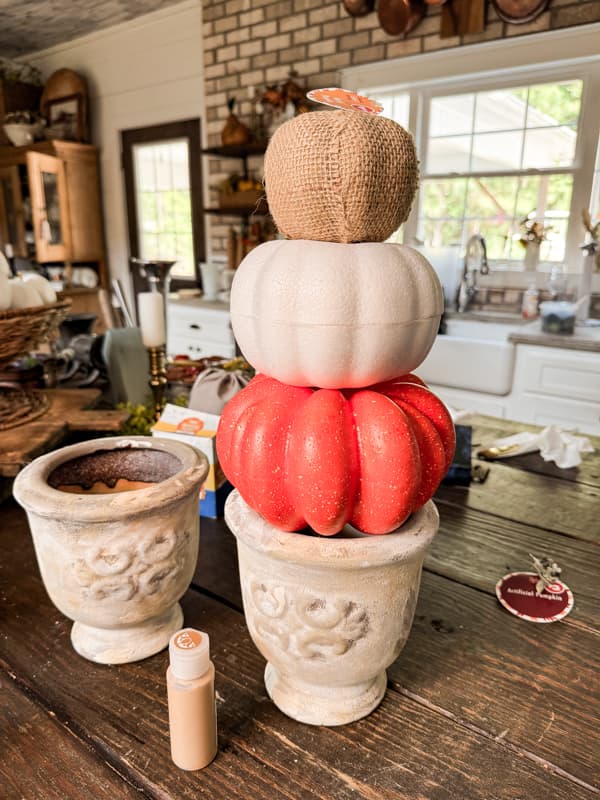
You will love how easy and creative this primitive fall craft is to make. Once I saw the burlap pumpkin, I looked for larger pumpkins to create a topiary. Dollar Tree has these styrofoam carving pumpkins each year for only $1.25. They are the perfect size for the middle pumpkin. However, I still needed a larger one for the bottom. It needed to be as big as the top of my updated vases. I finally found this orange pumpkin in the $3.00 section. They will make the perfect size DIY Pumpkin Topiaries for my mantel. I spent $11.00 to make two fall primitive crafts.
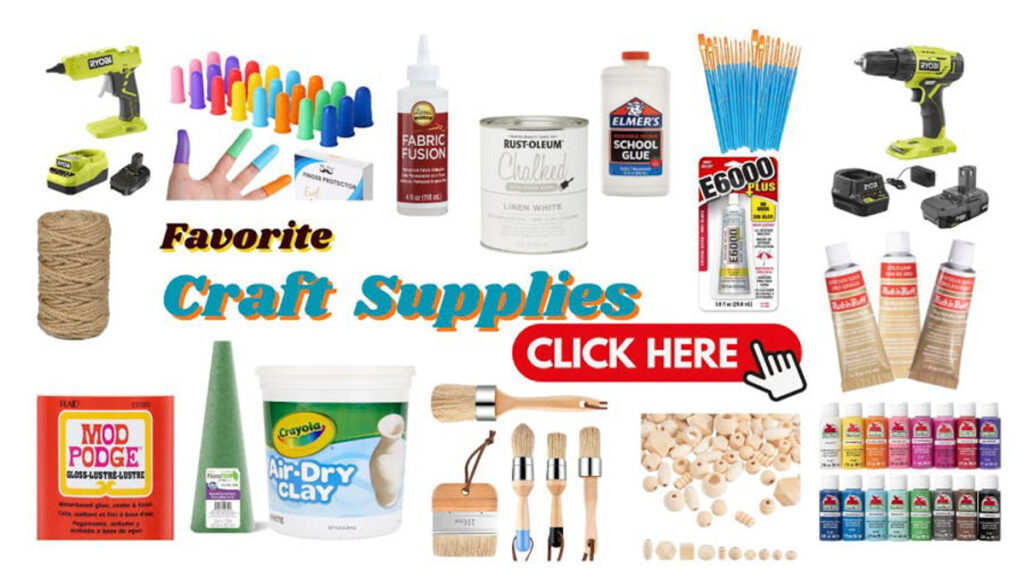
Supplies for Primitive Fall Craft
Here are the supplies I used for this primitive fall craft, which made two pumpkin topiaries.
- 2 – Burlap Pumpkins
- 2 – Styrofoam Carving Pumpkins
- 2 – Larger $3.00 Pumpkins
- Jute Twine
- Old Book or Magazine Pages
- Burlap Ribbon or Fabric
- Mod Podge
- Hot Glue Gun
- Finger Protectors
- Spanish Moss
See resources for all supply links.
How To Prepare Pumpkins For Topiaries
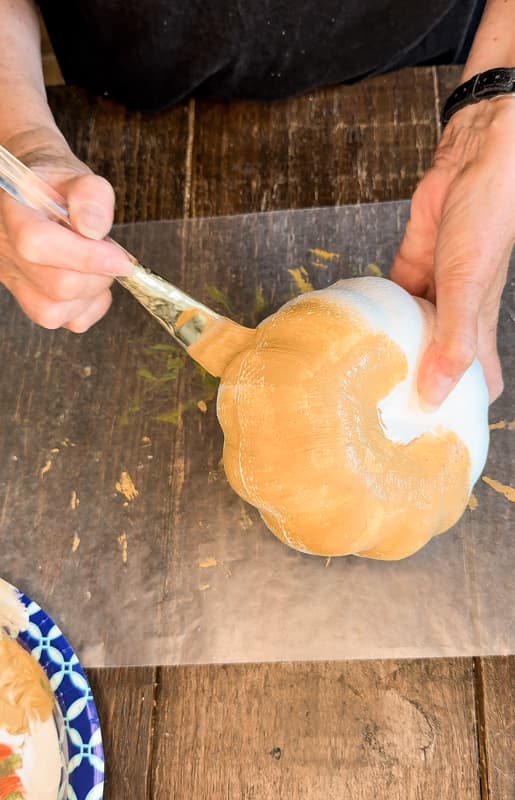
First, the white carving pumpkin and orange pumpkins needed a little paint. Because I planned to cover them with burlap, I didn’t want their original colors to show through the fabric’s loose weave. Begin by removing the stems from the two larger pumpkins. Then, use any tan-colored craft paint to add a quick coverage to the white and orange pumpkins. Allow the paint to dry before moving to the next step.
How To Add Burlap To Dollar Tree Pumpkins
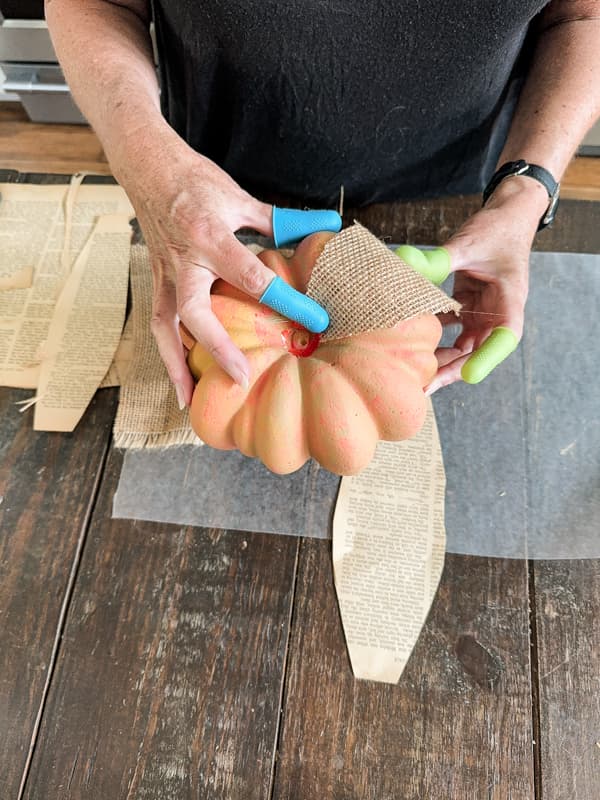
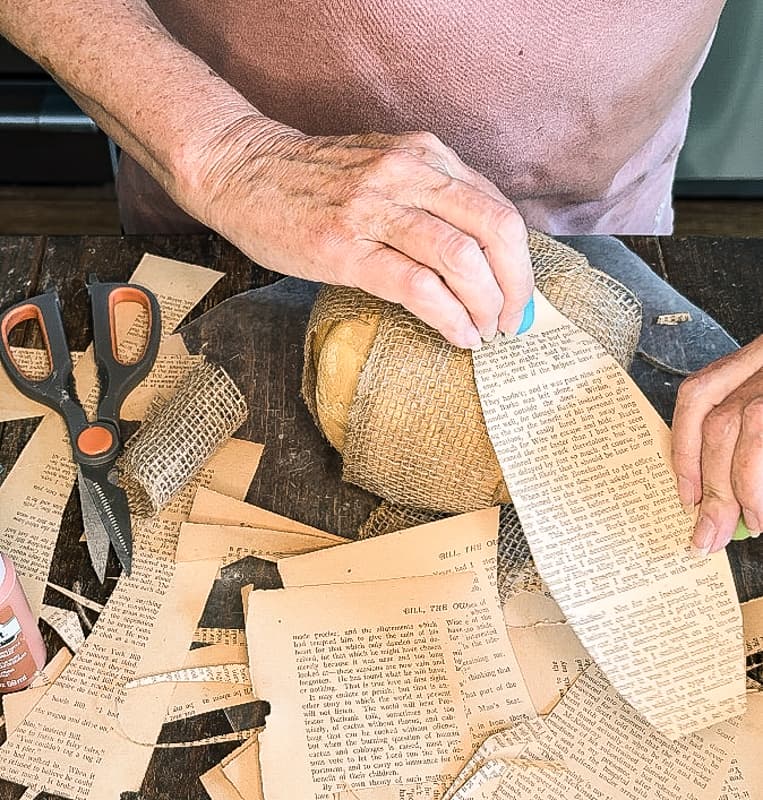
The small pumpkin is covered in burlap, so you will need to add it to the larger pumpkins. I had some scrapes of burlap fabric and some wide burlap ribbon on hand. I used the burlap ribbon for the middle pumpkin. Just cut the ribbon into pieces that can wrap around the pumpkin from the stem area to the bottom. Add hot glue to secure the ribbon and pull tight to attach the other end at the bottom of the pumpkin. Add four strips of ribbon, leaving four open sections.
For the larger pumpkin, I cut strips of burlap and trimmed them on both ends. I used the same method of attaching one end at the stem area with hot glue. Then, I pulled the fabric taunt and attached it to the bottom of the pumpkin with hot glue.
Once you have all the burlap in place, you will be ready to add the old book pages to the open areas of the pumpkins.
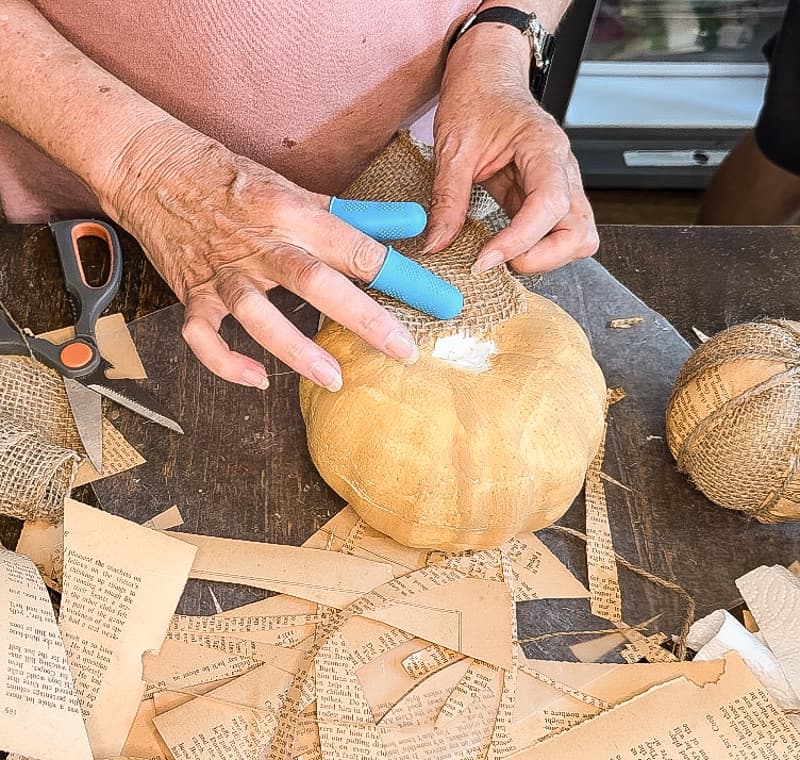
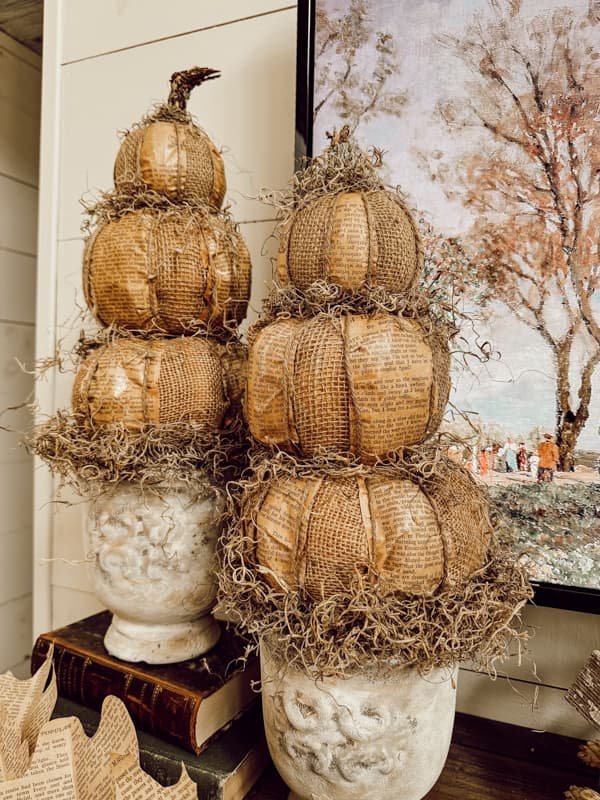
How To Add Old Book Pages For A Primitive Fall Craft
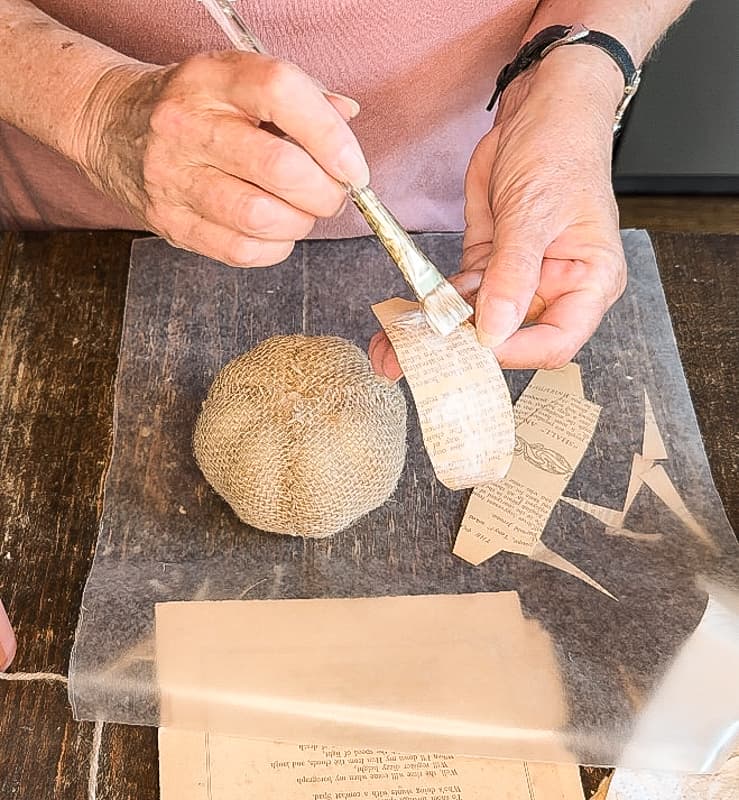
Now let’s create primitive pumpkins. Gather some old book pages or magazine pages. You can cut several strips at one time to speed up the process. Cut them wide enough in the center to overlap the burlap pieces on each side. You can see the shape of the book pages in the images below.
Begin by applying Mod Podge to one side of the book page. Adhere the wet side of the paper to the pumpkins and cover the burlap edges. Use hot glue at the top and bottom to secure. Press the paper firmly to the pumpkin to make it fit around the curved sides. Then, apply another coat of Mod Podge over the outside of the old book page.

Insider Tip
There are a couple of ways to wrap the book page paper around the curve of the pumpkin. One, you can cut small slits into the edges of the paper, which I did in the beginning. However, with the Mod Podge softening the paper, it was easy to press the paper into the curves with the palm of your hand. Ensure that the burlap edges are underneath the paper when you press it down. Note: the small pumpkin is completely covered in burlap, so worrying about the edges is unnecessary. If you desire, you can completely cover the larger pumpkins with burlap and add the old book pages over the top.
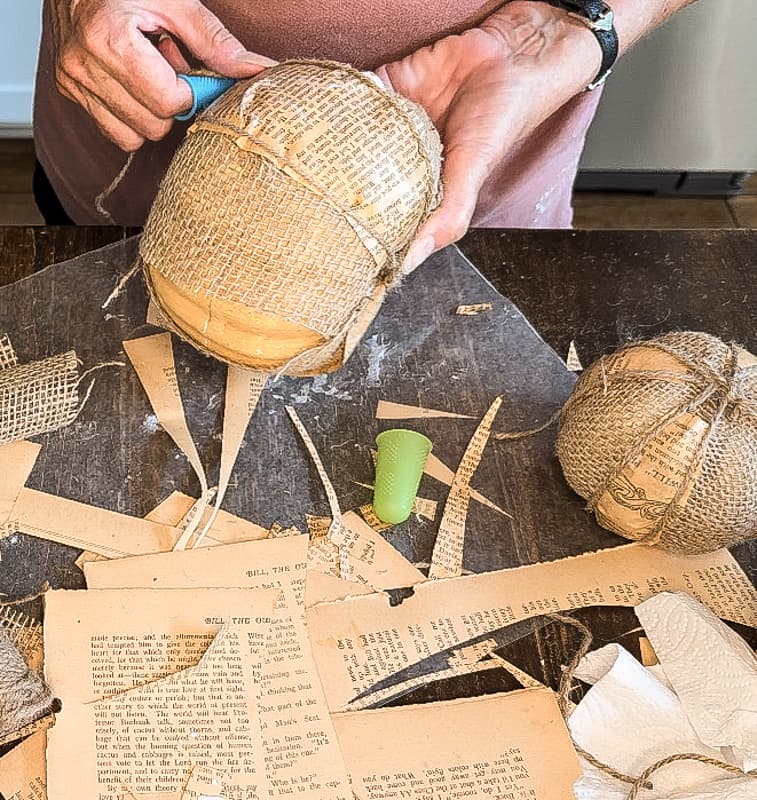
Add Jute Twine To Pumpkins
Finally, to complete the preparations for the DIY Pumpkin Topiaries, let’s add the jute twine.
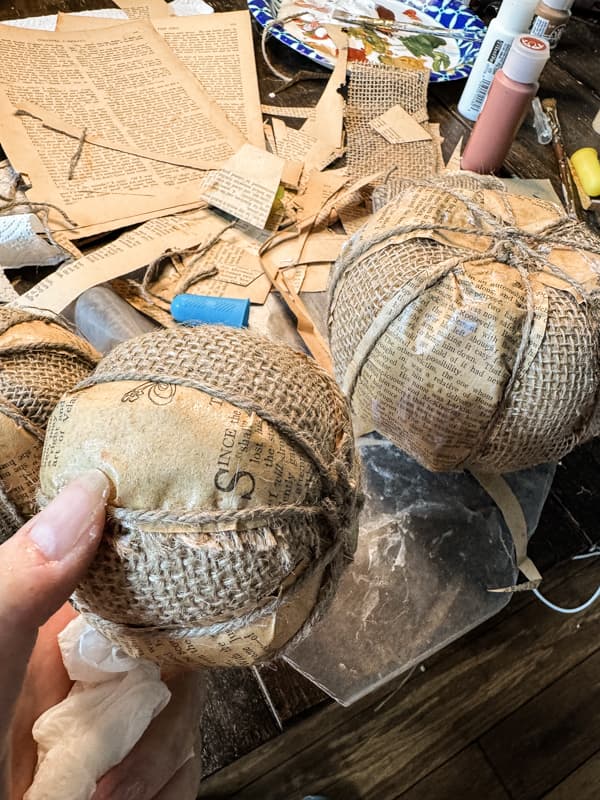
Add the jute twine over the edges while the Mod Podge is still wet on the old book pages. Wrap the twine tightly over all of the edges. Pull tight and tie to secure. This will cause the old paper to crease in the curves of the pumpkin, creating a rustic, primitive pumpkin appearance.
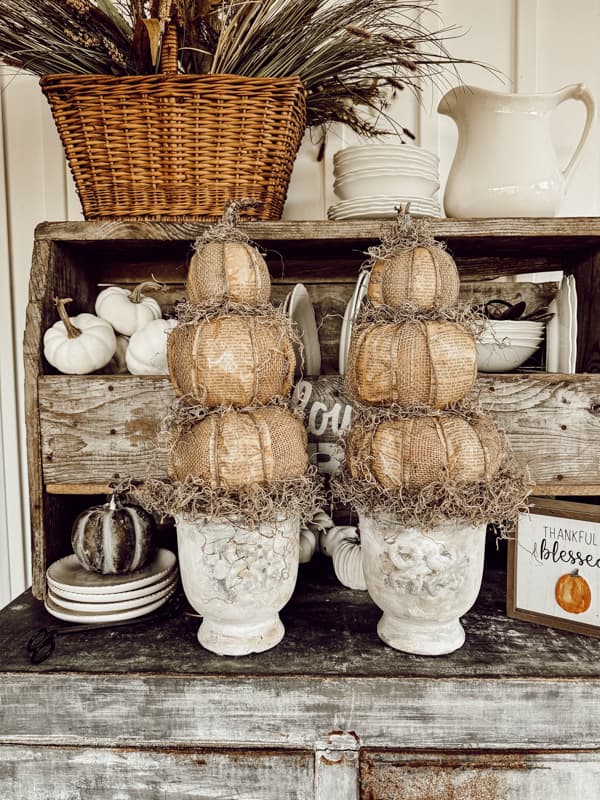
How To Build DIY Pumpkin Topiaries
Now that you have created your primitive-looking pumpkins, it’s time to build your DIY Pumpkin Topiaries.
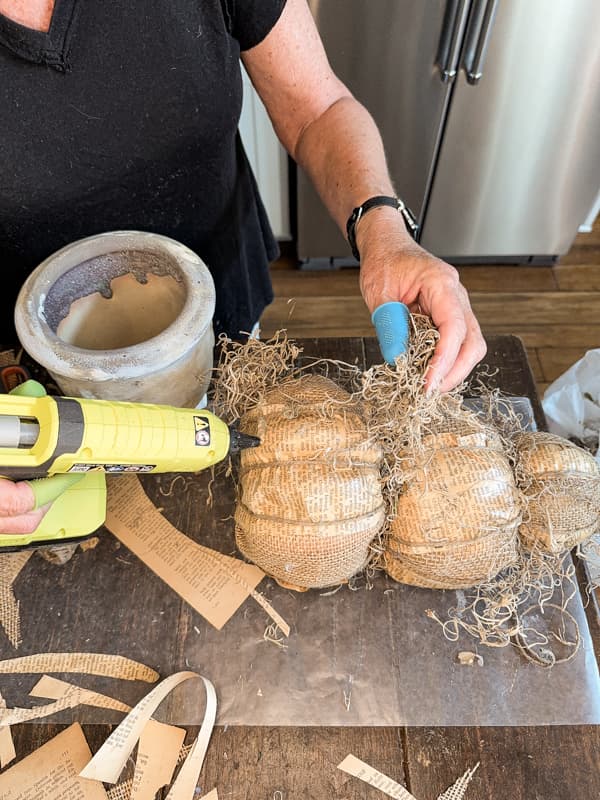
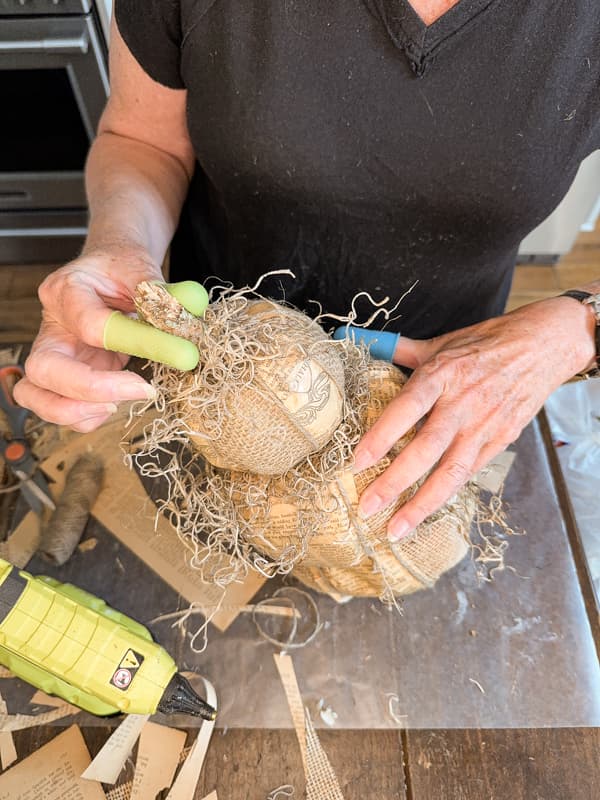
First, add Spanish moss around the top edges and between the pumpkins. Use hot glue to adhere.
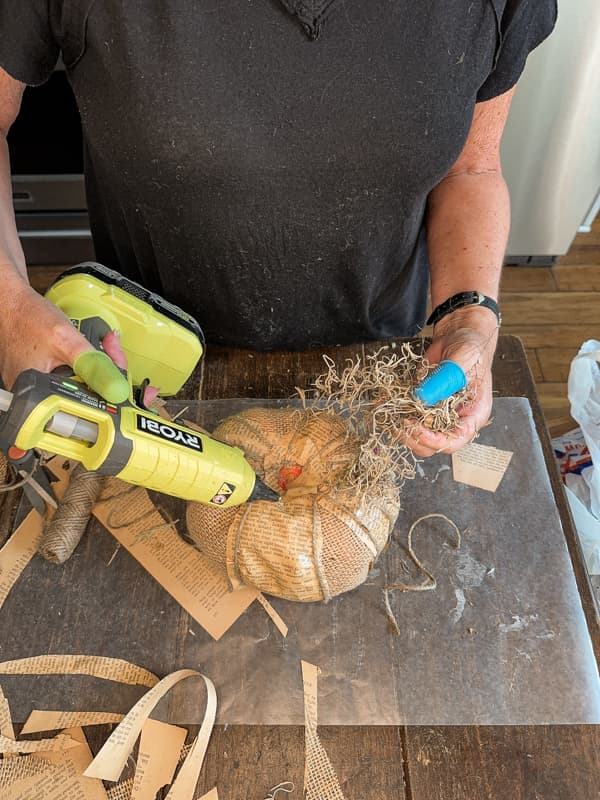
Stack the two larger pumpkins in place and run a wooden bamboo skewer down through the middle of the stack. Add more Spanish moss to the middle pumpkin and push the smallest one onto the skewer.
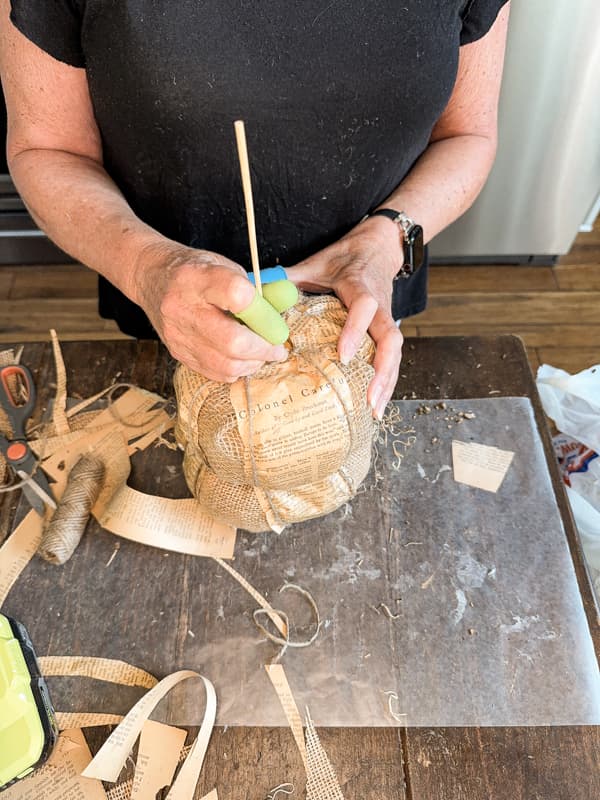
To finish the DIY Pumpkin Topiaries, use hot glue to add moss to the bottom edges and at the top. Add a rustic stick or old pumpkin stem to the top pumpkin’s center. Secure with hot glue.
Finally, add the pumpkin stack to your container or vase and let the fall decorating begin.
Insider Tip
You can secure your pumpkin topiaries in your container. I just set mine on top without attaching it. This method may not work for some containers. If you need to secure the pumpkins to the container, add styrofoam to the bottom of your container with hot glue. Then, use a second bamboo skewer and push it into the styrofoam. Add more hot glue if necessary to steady the skewer. Then, press the bottom pumpkin into the top until the pumpkin sits firmly on the top of your vase or container.
Pumpkin Topiaries – Primitive Fall Craft
How do you like the rustic pumpkin topiaries? I’m loving how this fall craft turned out.
I’ll share the full mantel decorated with them on my Fall Home Tour.
Related Articles
Here are some related articles you will enjoy.
- Fall Home Tour: Budget DIY Autumn Decor Ideas 2024
- Easy Decor Vases Makeover: Transform Outdated Thrift Store Finds
- How to Upcycle Old Books Into Fall Pumpkins
- Old Book Leaf Project
- DIY Fall Pumpkin Wreath
Resources
Video

Pinterest Challenge
Today’s project is part of the monthly Pinterest Challenge hosted by Cindy at County Road 407.

If you are joining me from Angie at Postcards From The Ridge, welcome. I know you enjoyed seeing her Circut Pumpkin Face Decals. Next is Michele at Thistle Key Lane. Just click each image below for all the pumpkin inspiration.

Pin It To Remember It
Did you find some great ideas you’d like to save for future reference? To save, hover over the images and pin to your favorite Pinterest Boards when you see the PIN button in the upper left-hand corner.


Rachel, these are super cute! I love them.
Renae,
Thank you so much. I appreciate you for stopping by.
Absolutely love this cute (and inexpensive) idea Rachel! Pinned
Cindy,
I’m so glad you like them. I appreciate you for stopping by.
I cannot believe these are from the Dollar Tree, Rachel. I know I say taht every time but gah these are so stinking cute! I love the way you mixed the book pages and the burlap. It adds such a pretty layer of texture that is perfect for this time of year and I can’t wait to try these too! Big hugs and can’t wait to see what all you have in store this season, CoCo
CoCo,
I’m so glad you like these topiaries. I’m so happy with how they turned out also. I appreciate your encouragement.
I love the mixed textures on the pumpkins and wowza they turned out fantastic! And all for $11.00?! Double fantastic! You make me want to craft and honestly, I hate crafting. Thank you for sharing this fun idea. pinned
Cindy,
You are so funny! I’m so glad you like them.
Rachel your primitive pumpkin topiaries look like something I would find in an expensive boutique! They are just beautiful and I’m loving this rustic look for fall!
Michelle,
I really appreciate your compliment. I get so much inspiration from the challenges.
Rachel, this is such a cute and thrifty project. I love the different textures you used and the height is perfect.
Angie,
I’m so glad you like this project. It was fun and easy to make.
Your topiaries are amazing. What a fun idea and your tutorial is perfect. I can’t wait to make one.
Marty
Thank you for your kind words. Have the best day.
Such a cute craft for fall and I love how inexpensive it is to make!
Rachel,
I’m so glad you like it. Thank you for stopping by.
Rachel, these pumpkin topiaries are so stinking cute!!! I’m sorry I didn’t get over here earlier this week. It has been a trying one. We took my MIL to the hospital on Tues. evening and then trying to catch up. Anyway, I love what you have created and the cost is terrific.
Enjoy your beautiful pumpkin topiaries!!! And happy almost fall to you and your family,
Hugs,
Barb
Barb,
Thank you so much and I hope your MIL is doing good now.
Rachel, your pumpkin topiaries are beautiful! I love the rustic look you created with the mix of book pages and burlap. These are so perfect for fall!
Lynne,
I’m so glad you like them. Thank you for stopping by.
These are such a fabulous idea! I need to make a trip to Dollar Tree. I haven’t been in a while.
Christy,
They always have surprises that are perfect for crafting.