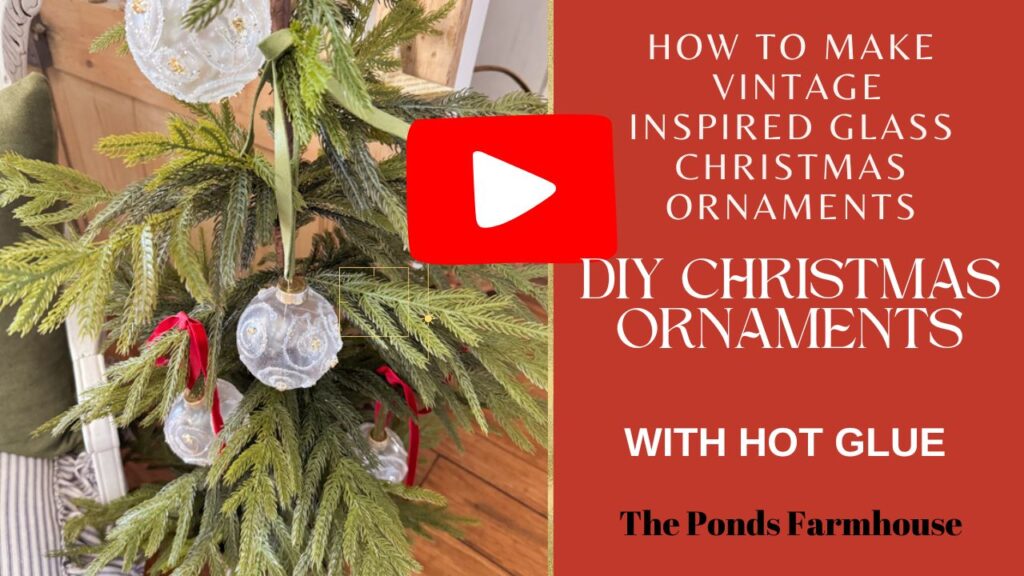
Elegant Vintage Inspired Christmas Ornaments: Easy Hot Glue DIY
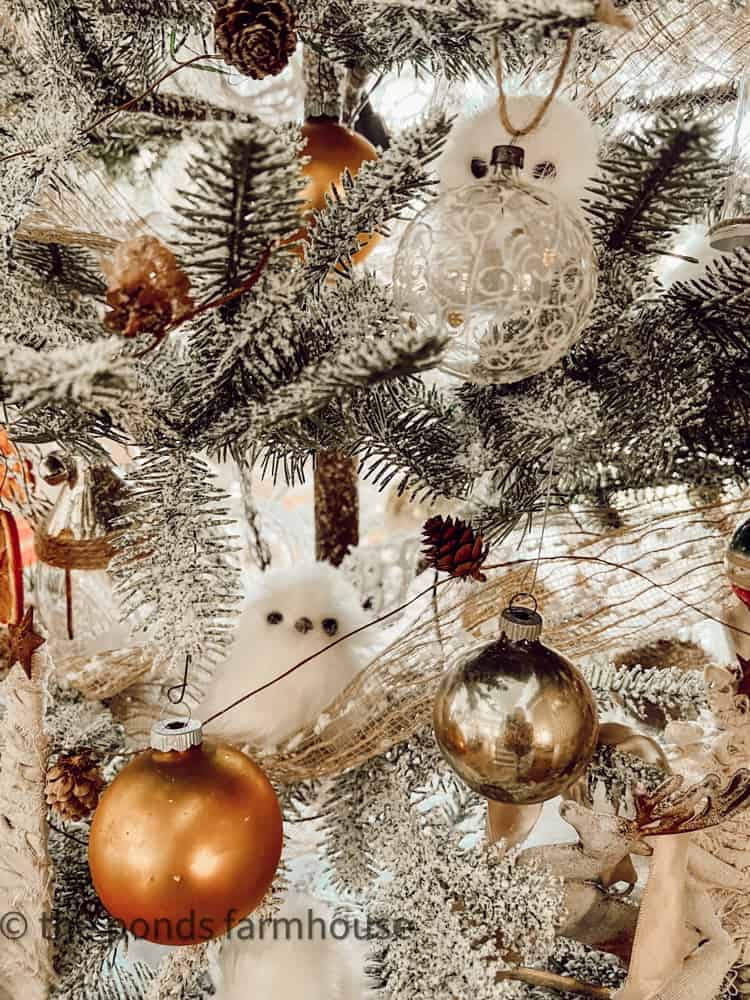
I love these delicate vintage gold and glass ornaments I found at a thrift store years ago. I wanted to duplicate the look of these ornaments for my Christmas tree this year. So today, I’ll teach you how I made these easy, vintage-inspired, DIY Christmas ornaments with hot glue embellishments. The hot glue Christmas ornaments are enhanced with gold glitter, diamond dust glitter, and glitter burst spray paint for an elegant, vintage-inspired design. If you want an inexpensive way to create elegant gold and glass ornaments, you will love this tutorial, which can be customized for different decor styles. Let’s gather our supplies, and I’ll show you how.
(Posts on The Ponds Farmhouse may contain affiliate links. As an Amazon Associate, I earn from qualifying purchases. See the full disclosure details here.)
Table of contents
How To Make Hot Glue Christmas Ornaments
These hot-glue Christmas ornaments were inspired by vintage glass, which is very fragile. I would love to find more authentic ones, but it’s not likely. Therefore, I decided to try to duplicate the look. After a few trials and errors, I finally got the look I wanted. I love how they turned out, and they are easy to make. The good news is you can be creative and design your ornaments to match your current decorating style. The options are unlimited. Let me show you how.
Supplies
Here are the supplies I used to make the DIY Christmas ornaments.
- Glass or Plastic Clear Craft Ornaments. (I used a combination of both)
- Diamond Dust Glitter Blast Spray Paint
- Clear Glitter
- Gold Glitter
- Elmers Glue
- Hot Glue Gun with temperature control
- Gold Leaf Spray Paint
How To Prepare Clear Ornaments
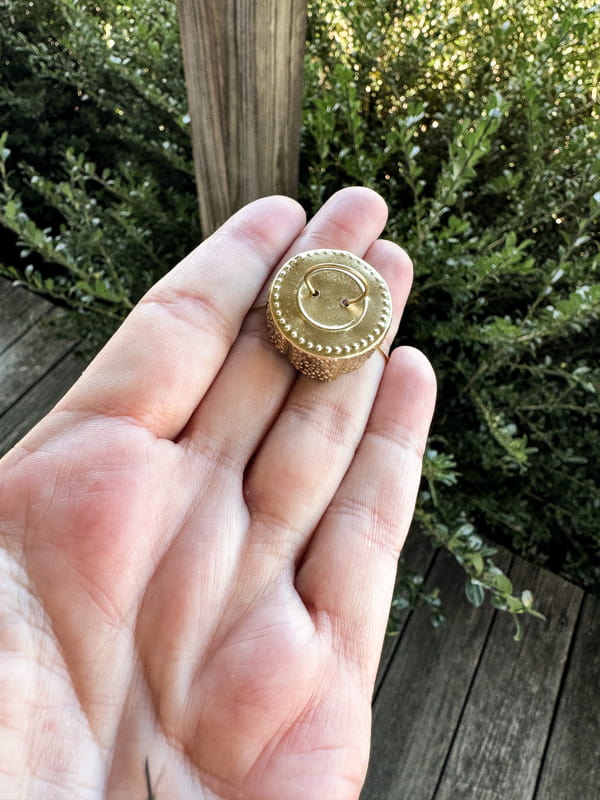
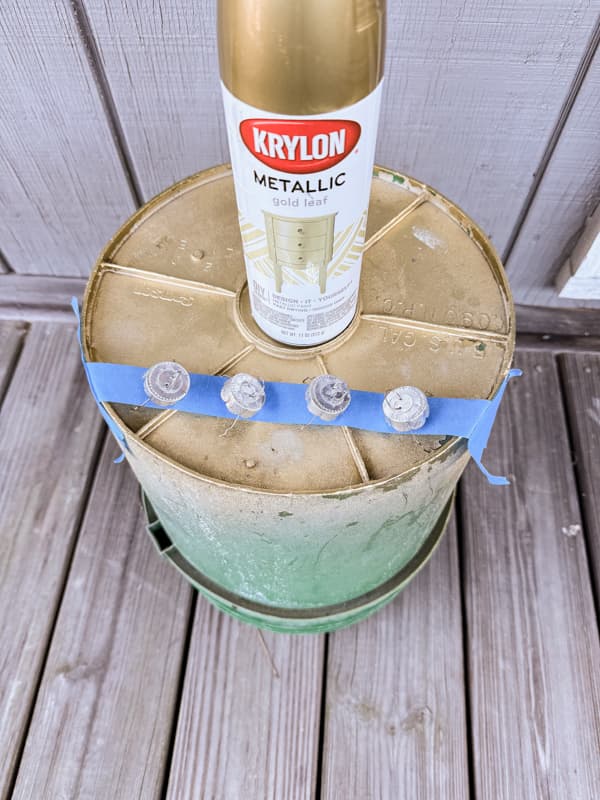
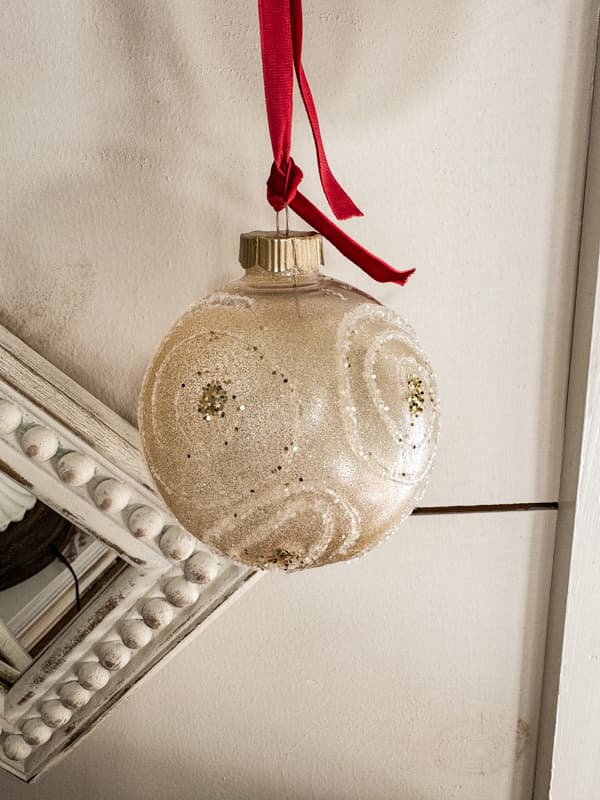
I purchased 8 large clear plastic ornaments and found a package of 4 glass craft ornaments at the thrift store. The ornaments have silver caps, which will be great with some design choices. However, I wanted mine to be gold, so I first sprayed the cap with gold leaf spray paint.
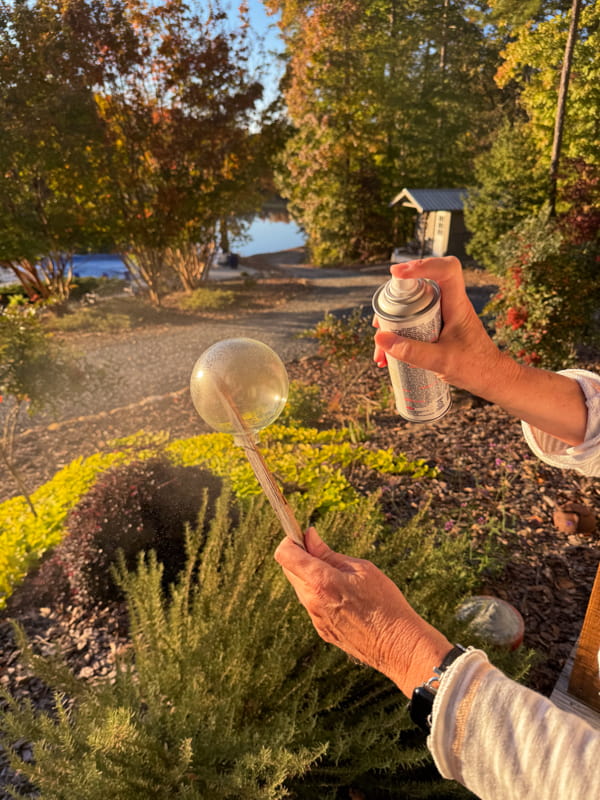
Next, I used the glitter blast Diamond Dust to cover the clear ornaments, giving them a frosted metallic appearance.
How To Spray Paint Ornaments and Caps
The ornaments and caps are lightweight and easily blown around by spray paint. Therefore, it’s necessary to take precautions when applying the spray paint.
First, the ornament caps can be attached to painter’s tape to hold them in place while you spray them. Attach the tape with the sticky size up to a box or bucket and stick the caps to it. As you spray the caps, they will stay in place.
The ornaments are easily painted by placing the ball on a stick and turning it as you spray the paint until it is covered. You don’t need heavy coverage because you want to see through the glass.
How To Make Hot Glue Christmas Ornaments
The fun part of making hot-glue Christmas ornaments is that you can choose any design you desire. If you are working with plastic ornaments, you will need to have the hot glue gun set on low heat. In addition, be sure the gun is fully heated before beginning your designs.
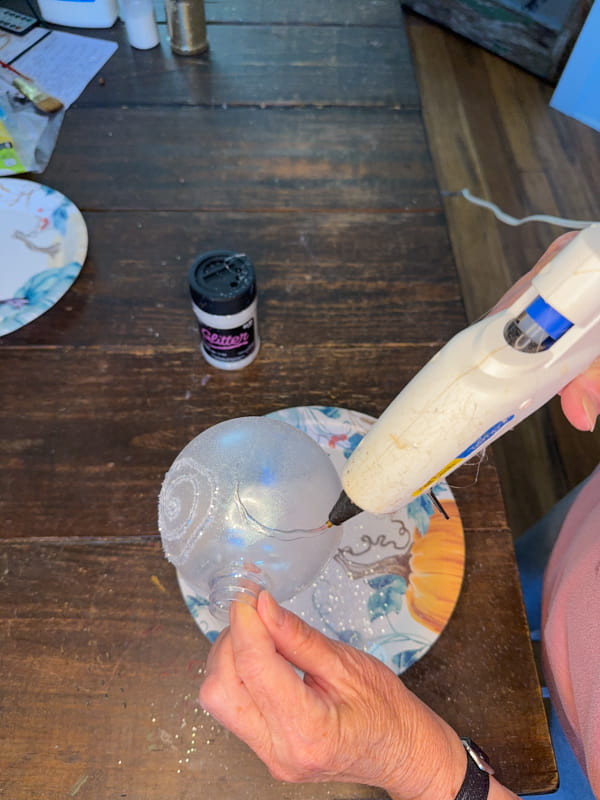
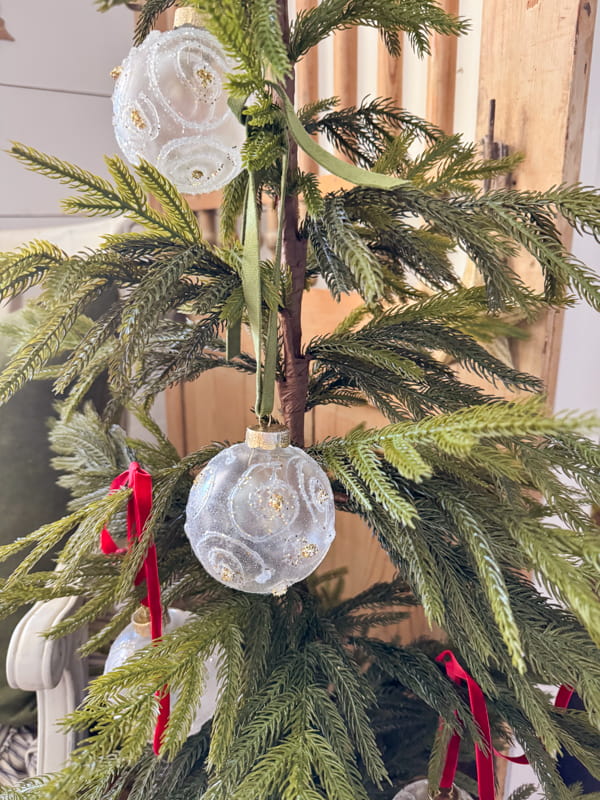
Hold the ornament at the base and work down and around the ball. I used a swirl on each of my ornaments with a center that I’ll later fill with gold glitter. I also experimented with a couple of other designs, which I’ll share at the end.
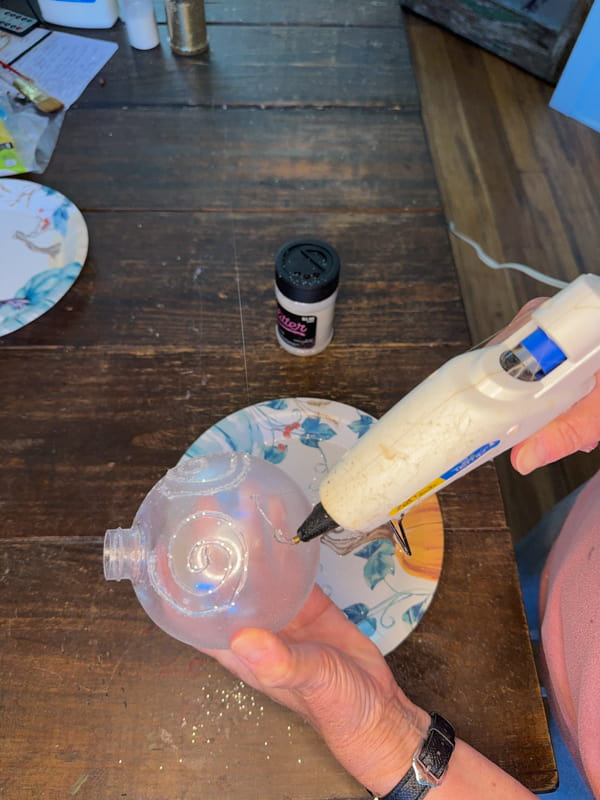
Add Clear Glitter
Work in small sections and sprinkle the hot glue with glitter before it dries. Hold the ornament over a paper plate to apply the glitter and tap off any excess. Once you finish your ornaments, you can return the unused glitter to the container. Just fold the plate to form a funnel and pour the glitter into the container.

Add Gold Glitter
Finally, you can add the gold glitter once the hot glue is dry. I added a small amount of the fine glitter to Elmer’s glue, but this is optional. If you want to add the glitter, stir with the glue on a plate. Then, using a small brush, apply the glue to the areas where you want to add the gold glitter. Next, sprinkle the glitter over the areas of glue using the same technique as the previous glitter instructions. Set aside to dry, keeping the glue area from touching any surface.
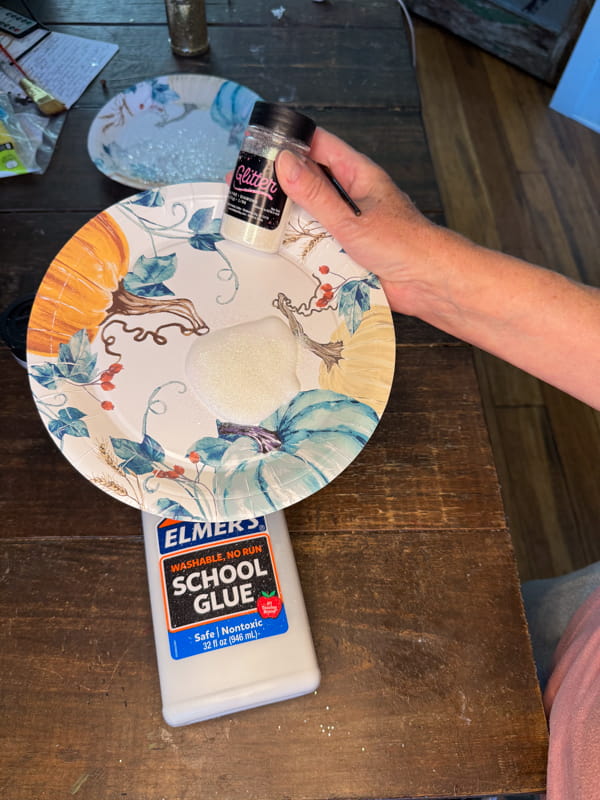

Insider Tip
I initially added hot glue to adhere to the gold glitter but didn’t like the appearance. Using Elmer’s glue worked much better. Although you need to allow the glue to dry longer, you get a neater look.
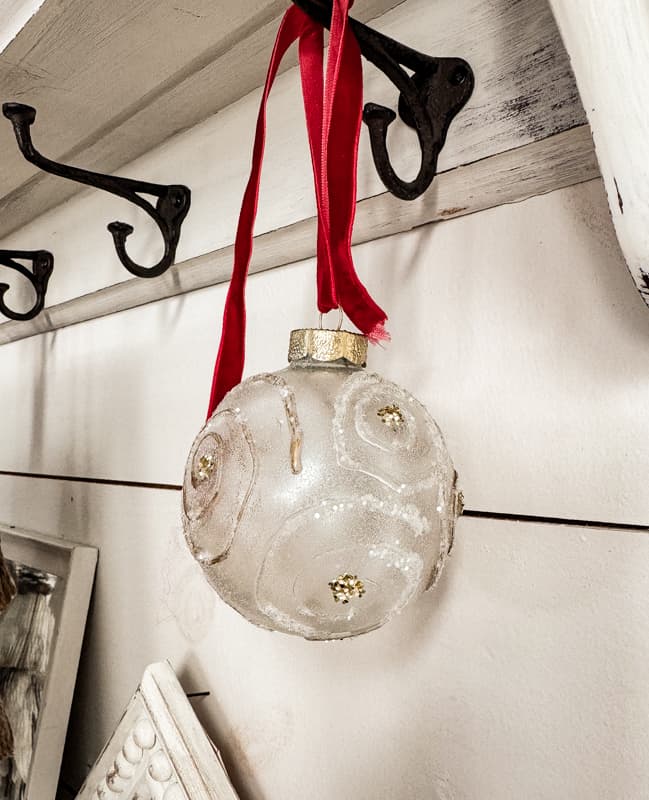
DIY Christmas Ornaments
Once I replaced the ornament caps, the gold accents on the ornaments really popped!
Since my tree isn’t up yet, I put the ornaments on a new small tree from Amazon. I’m really happy with the design and can’t wait to combine them with the vintage ornaments I have stored away.
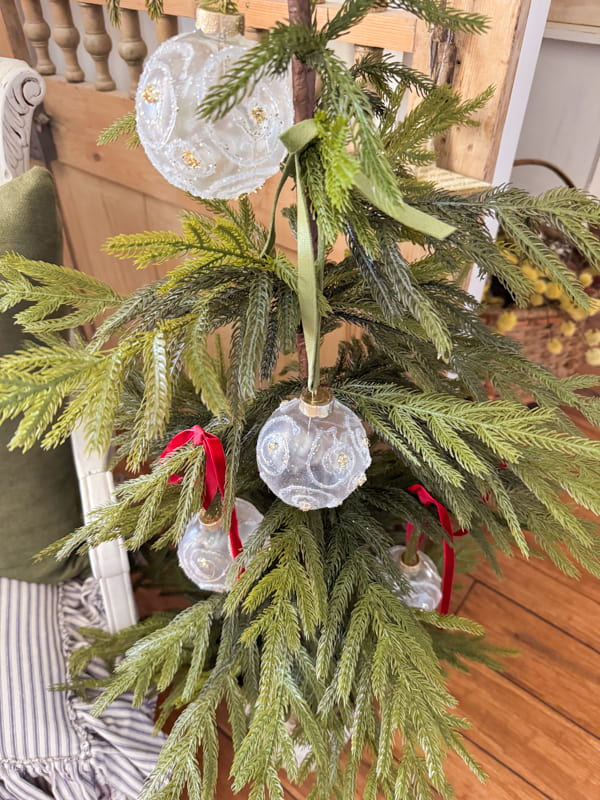
I’m deciding if I like the green or red ribbon best. Which do you prefer?
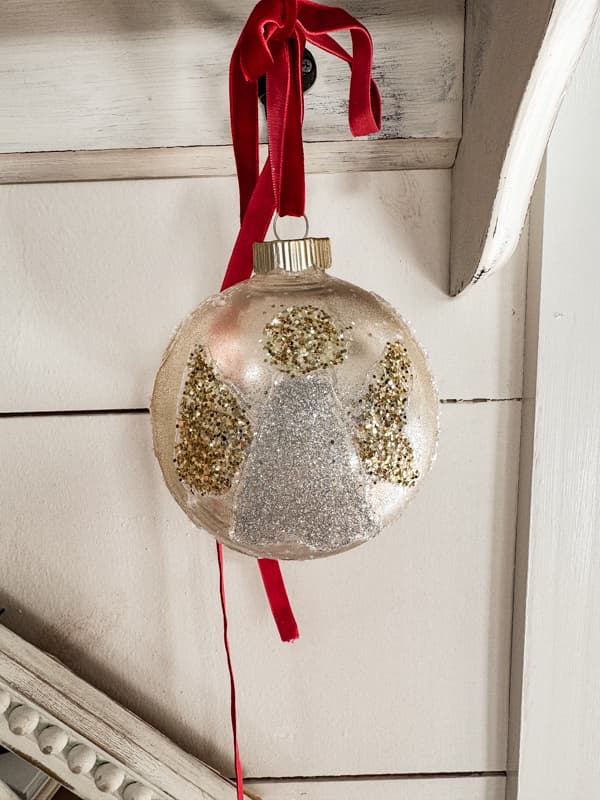
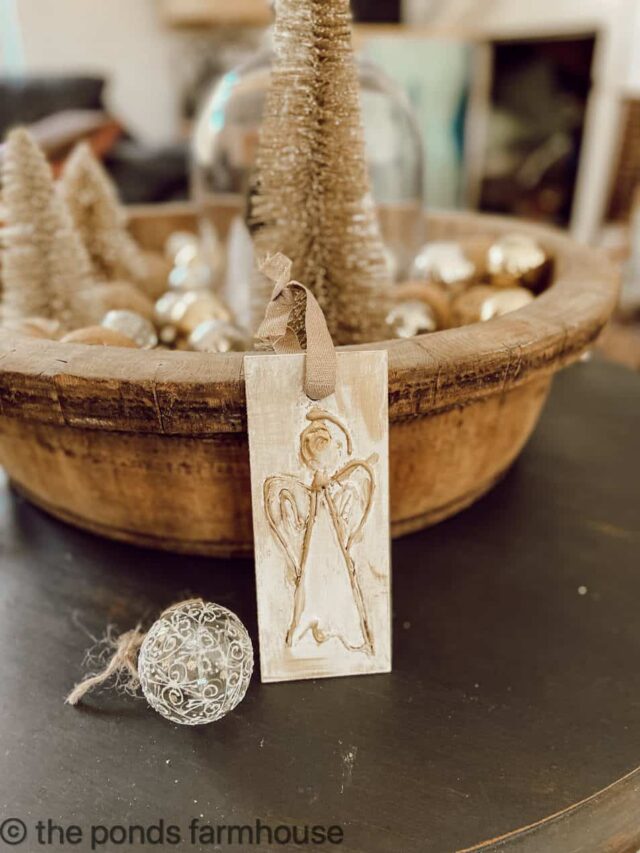
I also experimented with gold glitter spray paint instead of diamond dust and made one with an angel and a cross instead of the swirl pattern. The options are unlimited.
Related Articles
You don’t want to miss 3 Eco-Friendly DIY Ornaments for Christmas and the Wooden Architectural Salvage Ornament Tutorial. You may also enjoy Easy Wood Hot Glue Ornaments, which provide other unique ways to decorate with hot glue, as shown below.
Thank you for stopping by, and I look forward to sharing my next adventure with you.


These are beautiful, thanks for sharing!
Candy,
Thank you! I’m so glad you like this one. I appreciate you for following along.