Amazing DIY Christmas Greenery Tree Idea: Budget Porch Decor
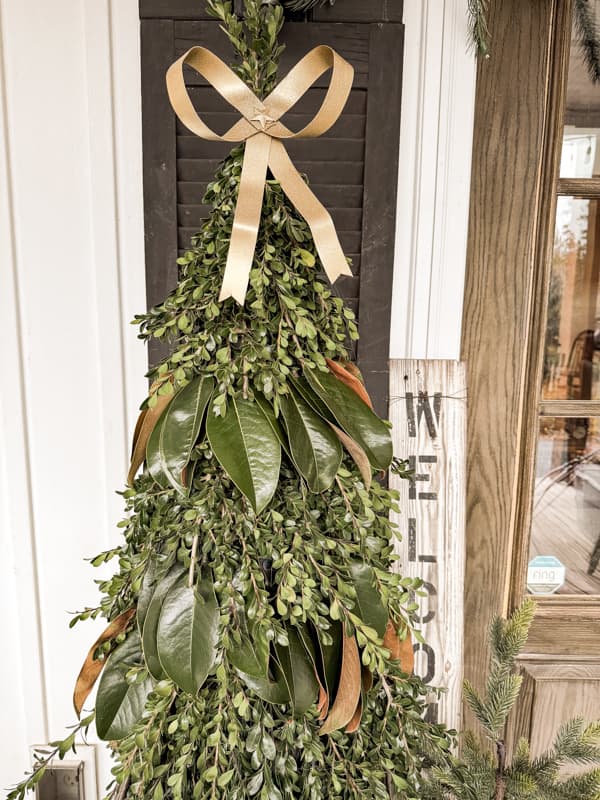
Would you like to wow your friends with a creative spin on Christmas porch decor this year? Consider a fresh approach with this stunning DIY Greenery Tree idea. This budget-friendly project is simple to create and will add a unique touch to your outdoor space. You’ll be amazed how a simple tomato cage can be elevated with fresh magnolia and boxwood greenery. Get ready to transform your porch with a beautiful topiary-style tree perfect for any porch planter. Let me show you how.
(Posts on The Ponds Farmhouse may contain affiliate links. As an Amazon Associate, I earn from qualifying purchases. See the full disclosure details here.)
Table of contents
Amazing Christmas Greenery Tree Idea
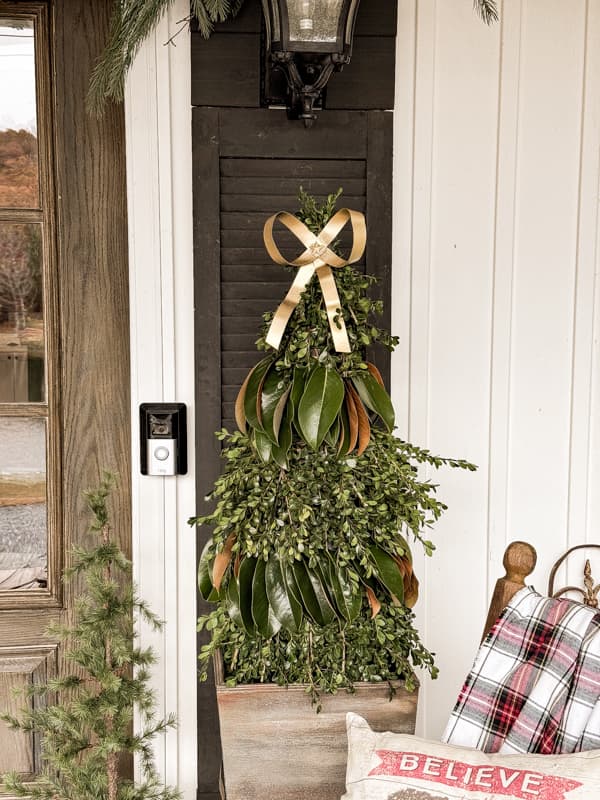
Y’all, I have made many Magnolia wreaths and small greenery topiaries, but I’ve never attempted to make a large greenery tree like this. When I saw some tomato cages at Walmart, I was inspired to give it a try. How much harder could it be? Well, with a few missteps, I accomplished the task of making two Boxwood and Magnolia Topiary Trees, and I’m amazed at how good they look.
Supplies
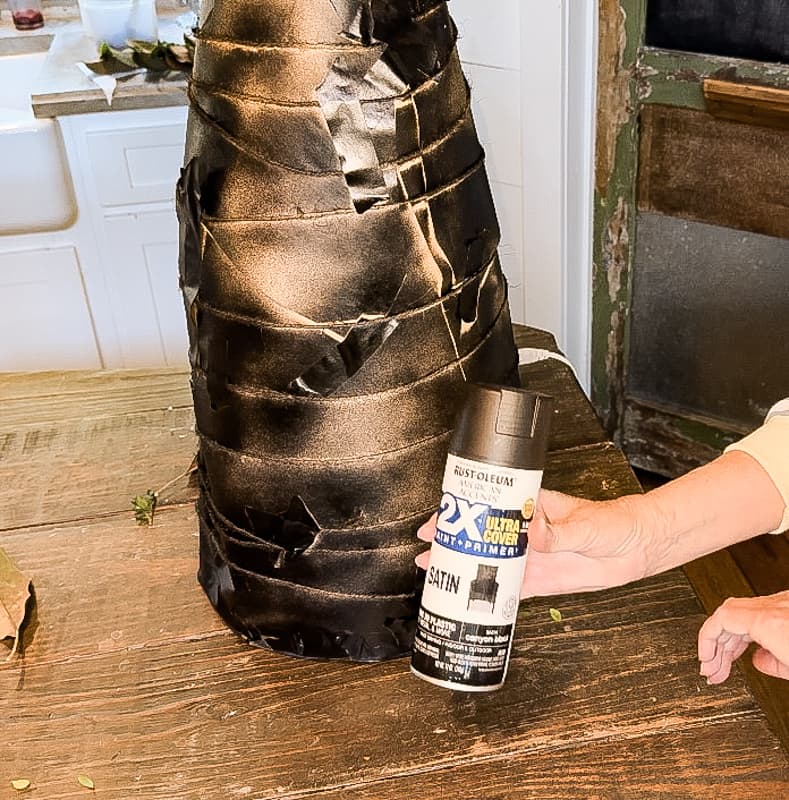
First, I had to determine what supplies would be needed to make the greenery trees. I have an abundance of fresh boxwood and magnolia, so that was easy. But how would I attach all that greenery to the tomato cages? I will begin by sharing a few of the lessons I learned. I used brown kraft paper and blue painter’s tape to cover the tomato cages. Although it worked well, the colors were not the best choice for adding the greenery. Therefore, I ended up painting them with black spray paint. It was quick and easy to do, so it was no big deal. But I could have used black paper and painter’s tape to avoid the spray paint.
I already had the brown kraft paper, blue painter’s tape, and a can of black spray paint, so I probably wouldn’t have spent the money purchasing the black materials. However, if you are ordering the supplies anyway, buying the paper and tape in black will save you one step.
Here is a list of everything I used to complete the project.
- 2 – metal tomato cages – if you are making two trees
- Lots of fresh boxwood and magnolia leaves
- Kraft Paper – If you have black kraft paper, you’ll save some time.
- Painters Tape – Did you know you can get black painter’s tape (who knew!)?
- Hot Glue Gun and Hot Glue Sticks
- Stuffing – I used old grocery store bags and some recycled poly-fill from old pillows for stuffing.
- Floral Tape
- Jute Twine
- Pruning Shears
- Hot Glue Finger Protectors
Step One – Prepare The Tomato Cage
I hate to say it, but the most challenging part of the project was covering the tomato cage. Now that I know what works and what doesn’t, it’s a simple process.
- The cage was too tall for the planters, so we cut the bottom row off with a hacksaw. You can also use wire snips.
- Then, I pulled the top prongs together and wrapped them with painter’s tape.
- I recommend covering the cage with kraft paper, beginning at the bottom and securing the paper with tape.
- Then, cut a piece of paper in a cone shape to wrap around the upper part of the cage. Secure all the edges with the tape.
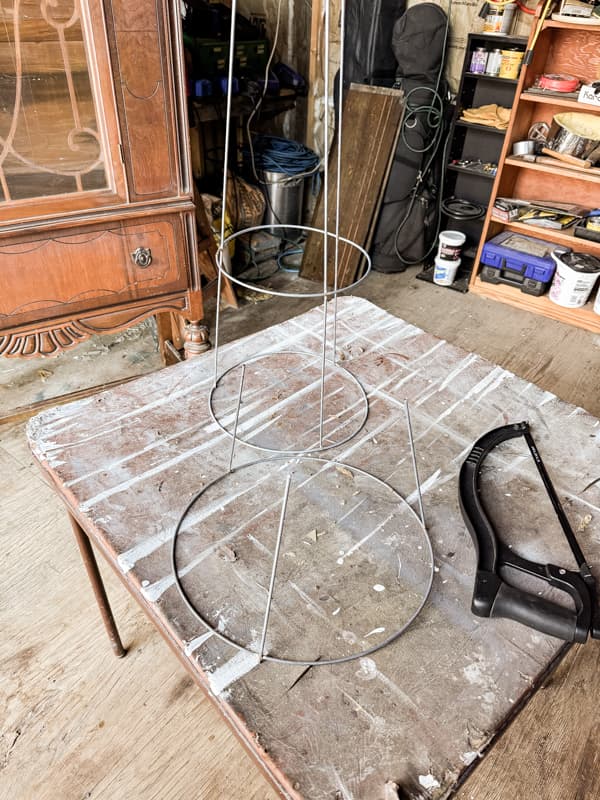
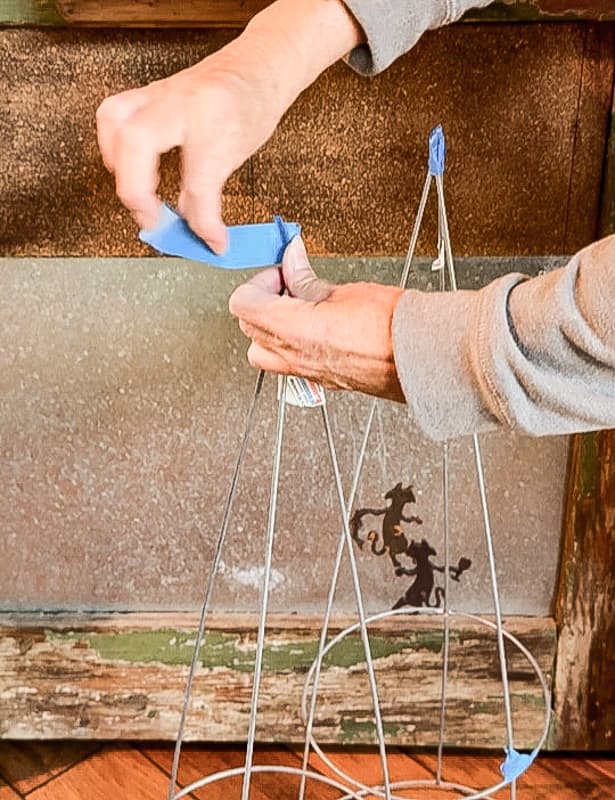
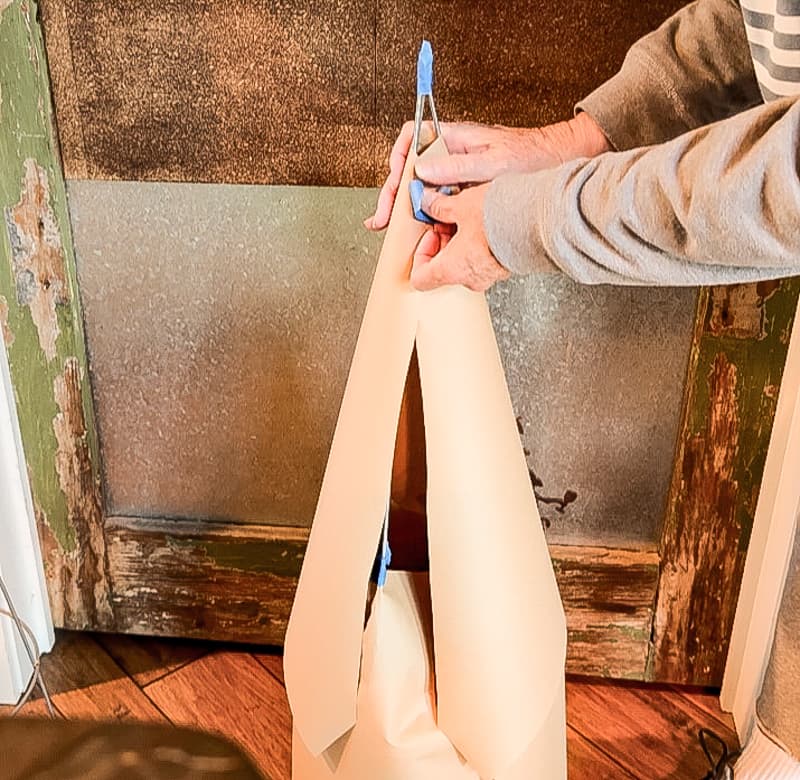
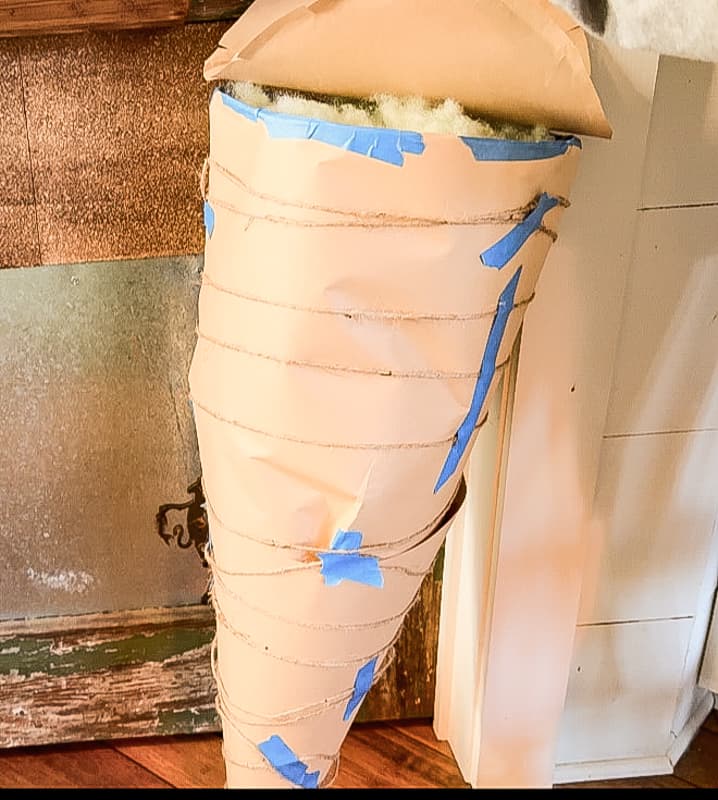
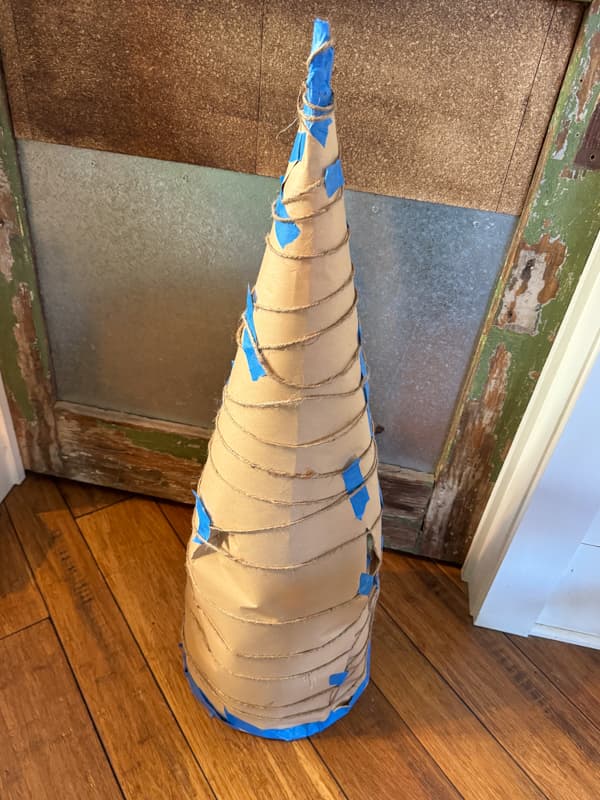
Next, tape one end of the jute twine at the top of the cage. Then, wrap the twine around the cage from top to bottom, using small pieces of tape to hold it in place as you go.
At this point, I became concerned with the stability of the paper wrapping, so I filled the inside of the cage with recycled grocery bags. When I ran out of those, I used some old poly-fill I had saved from some pillows. It doesn’t have to be packed tight, just enough to make the paper feel secure around the metal frame.
Finally, I added another piece of kraft paper to cover the bottom. Isn’t she lovely? LOL.
I’ve already told you that brown paper and blue tape don’t make a great background when adding fresh greenery. If yours looks like mine, take it outside and spray paint it with a light coat of black.
How To Add Fresh Greenery For Outdoor Christmas Trees
Now, it’s time to add the greenery. I’m using fresh boxwood and magnolia leaves for my outdoor greenery trees. You will need a good supply of both.
First, you will need to prepare your greenery. Cut the boxwood into small pieces with pruning shears. Remove any stems from the backside of the piece you are attaching to ensure it lies flat against the paper.
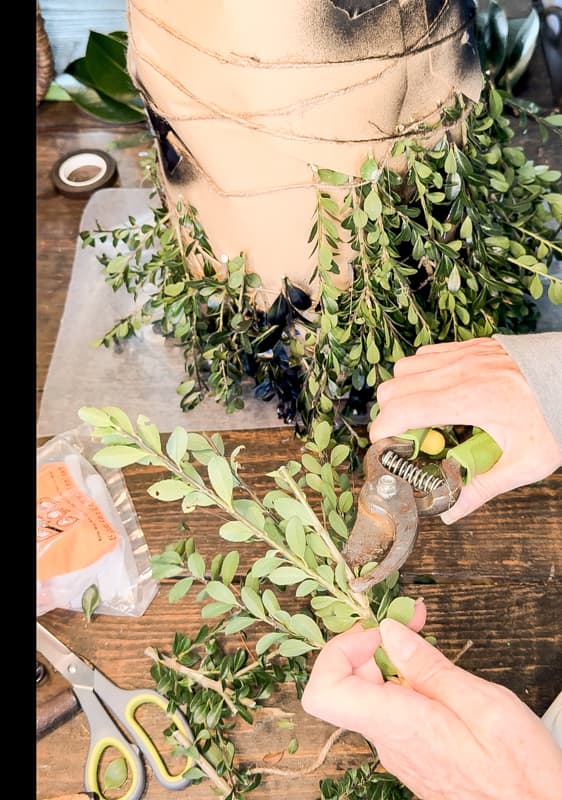
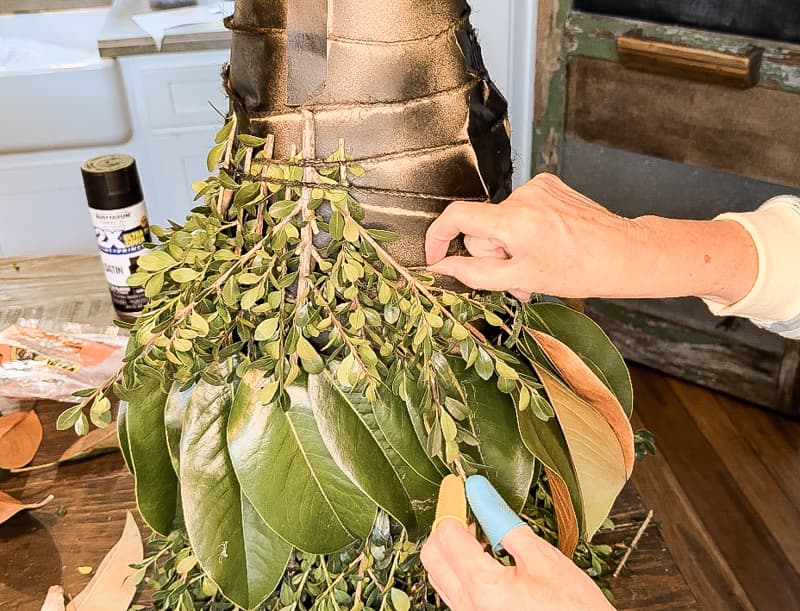
Begin along the bottom of your tomato cage, allowing the tops of the boxwood stems to rest against the table. Add hot glue to the backside of the boxwood stems, slide the ends under a piece of the jute twine, and add more hot glue if needed. As you add stems, side them together so you can’t see the paper behind them.
Note: you’ll notice these first images are from the first greenery tree before I realized I needed to paint it black.
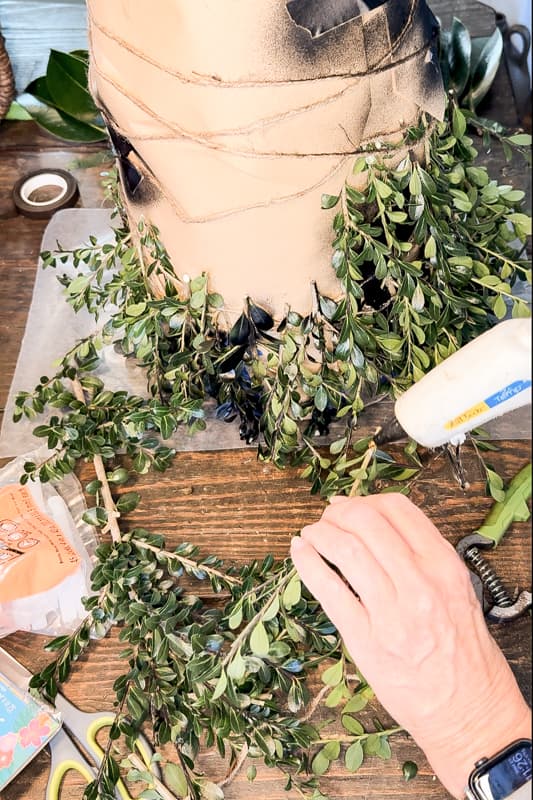
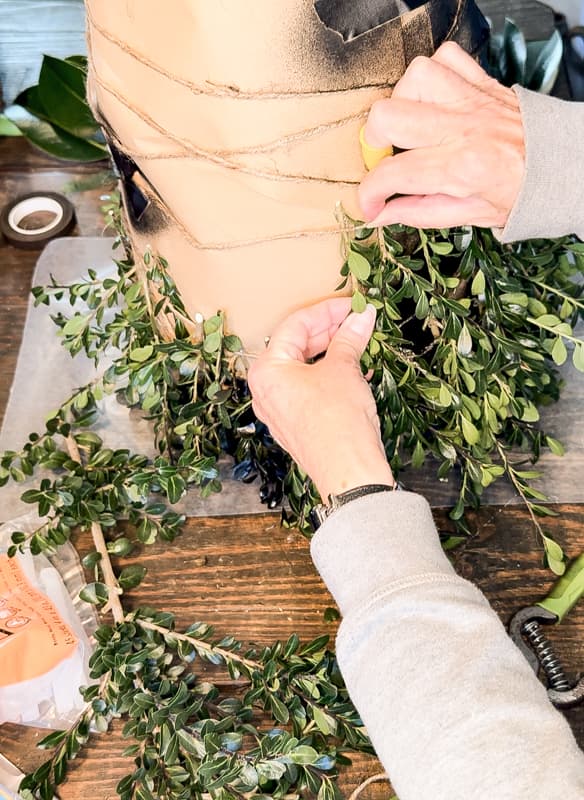
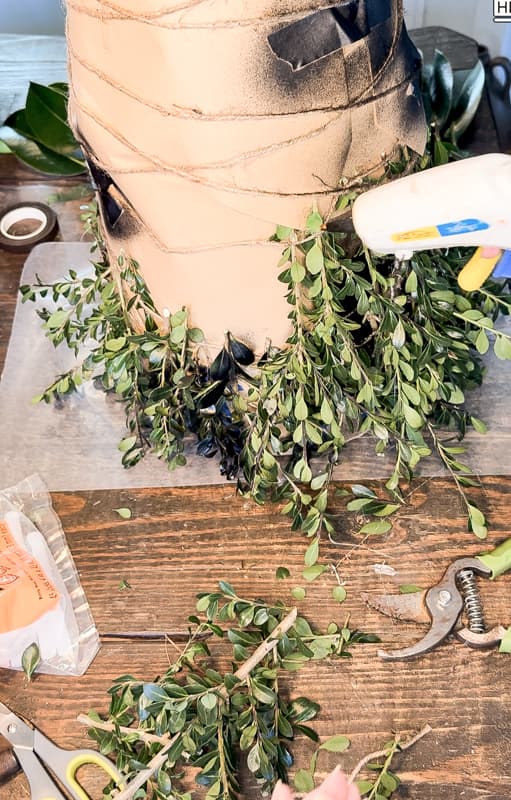
Once you have circled the tree, you will be ready to add a row of magnolia leaves.
How To Prepare The Magnolia Leaves
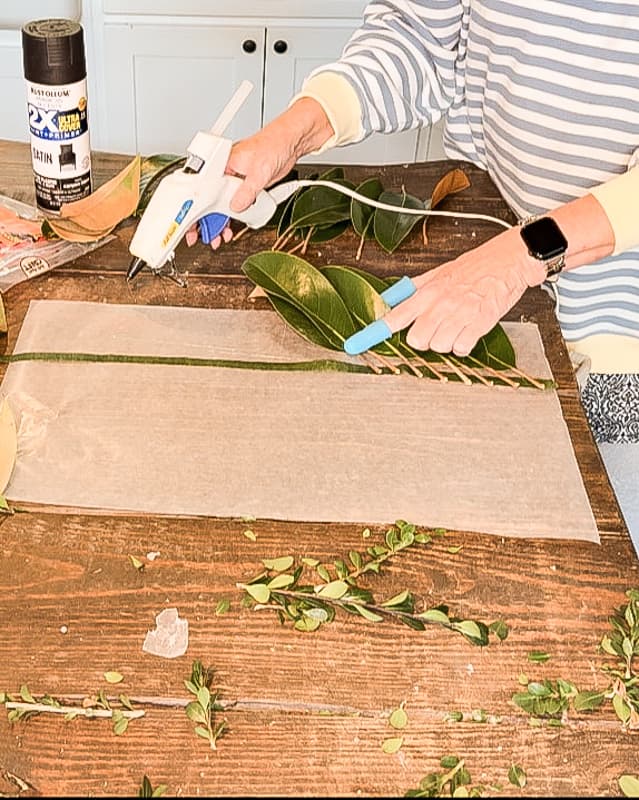
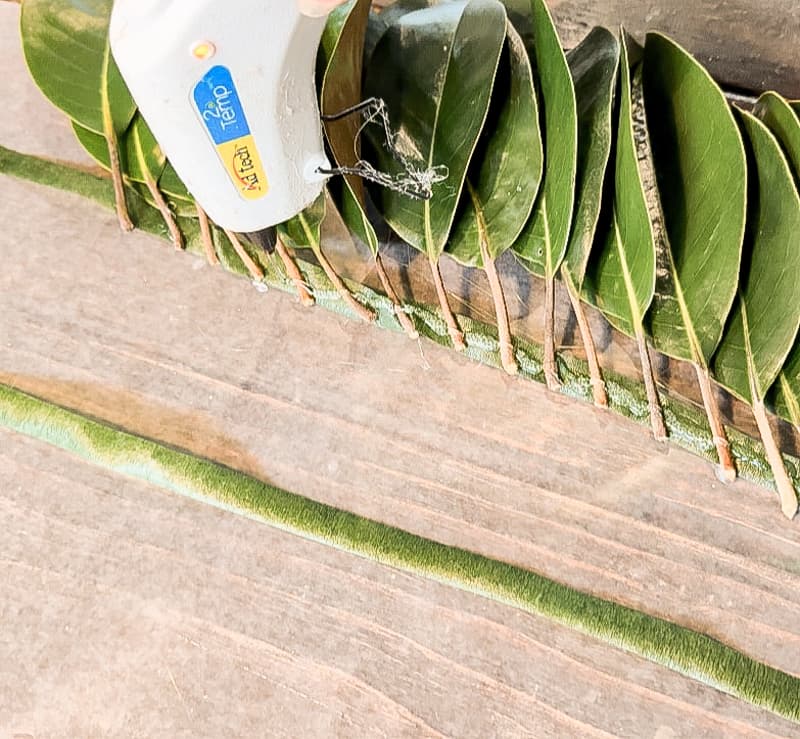
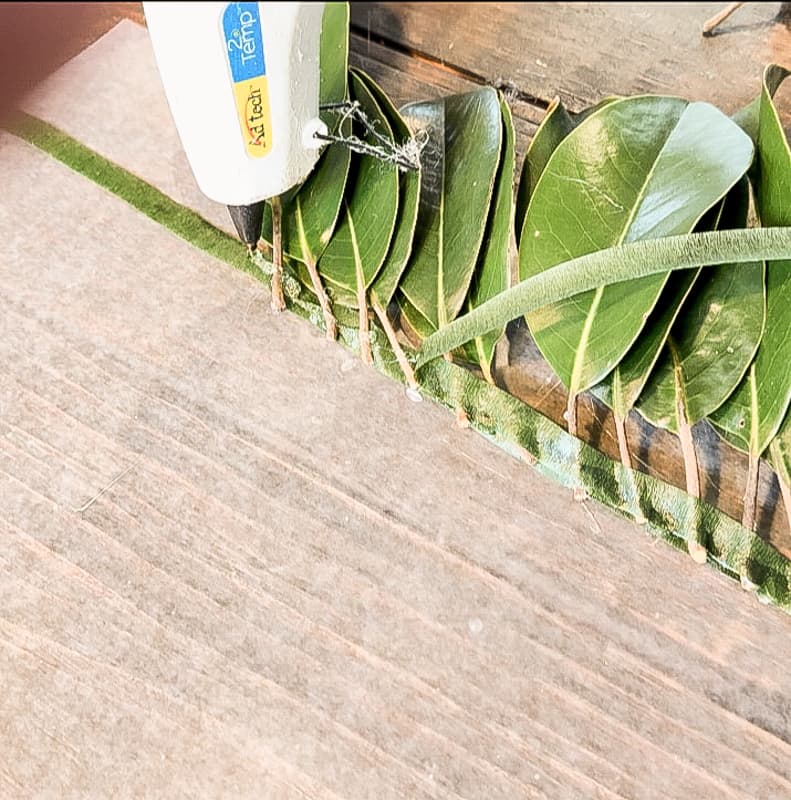
I knew that the magnolia leaves would be a challenge for this project. Adding hot glue alone would not work. So, I decided to add the stems to floral tape and then attach the floral tape with hot glue. Here’s how it is done.
- Lay a piece of wax paper on your work table.
- Cut two pieces of floral tape the same length.
- Lay one strip on the wax paper.
- Add hot glue to the back of each magnolia leaf stem and press it onto the floral tape.
- Overlap the leaves on an angle with the stems slightly apart.
- Use finger protectors to keep the stems pressed down onto the tape as you go.
- Once the tape is full, add hot glue over the top of the stems and tape.
- Cover with the other piece of tape, and using your protected fingers, press the tape between each stem to secure.
- Allow it to set until the glue is completely dry. Remove from the wax paper. If the paper is stuck in any area, cut or pull it away from the tape. It will be on the backside, so it doesn’t require complete removal.
This will secure the magnolia leaves to prevent them from becoming detached when added to the porch decor.
How To Attach Magnolia Leaves To Greenery Tree
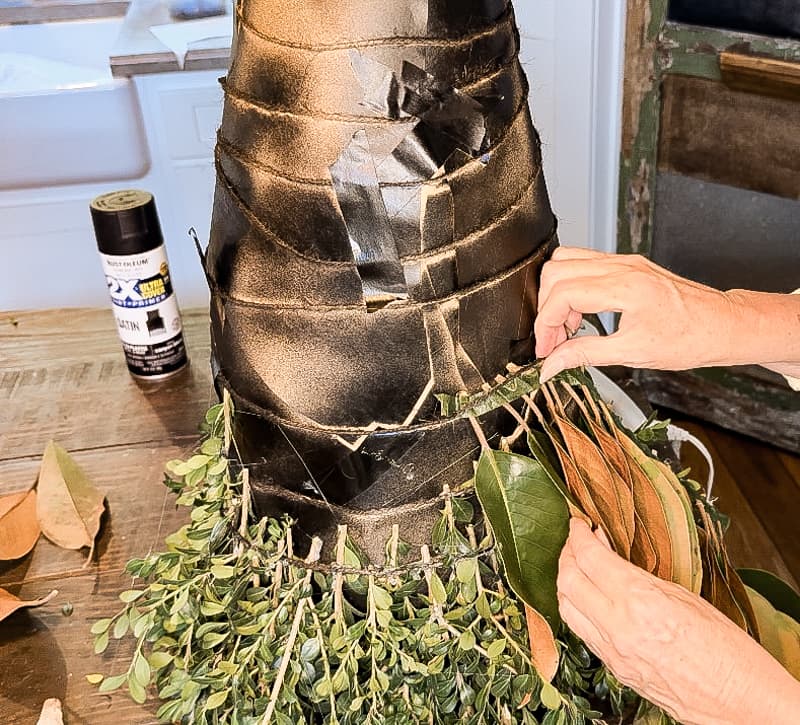
Use hot glue to attach the prepared magnolia leaves to the greenery tree. Measure where the tape will be attached, ensuring the leaves overlap the previous row of boxwood. I like to allow a minimum of one-inch overlap.
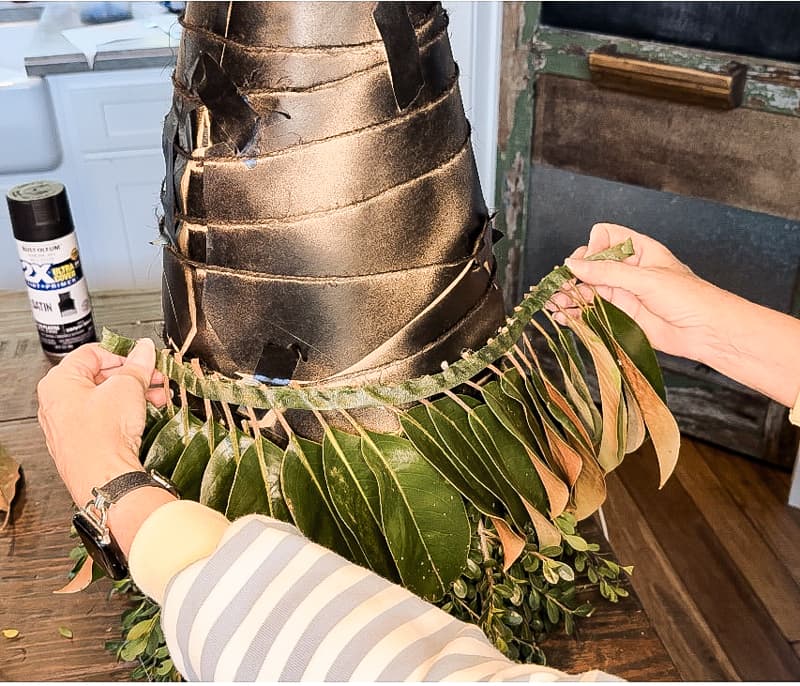
Then, apply the hot glue where the tape will be placed. Hold the tape in place with finger protectors until the glue sets. If the jute twine lines up, you can slide the end of the tape under it for a more secure attachment.
How To Finish The Outdoor Christmas Tree Topiaries
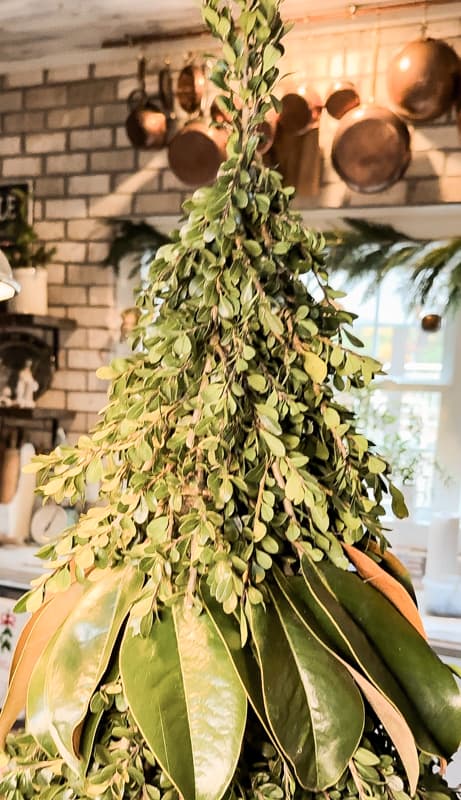
Continue by adding another row of boxwood and magnolia leaves. Finish with a row of boxwood at the top. Allow each row to overlap for best results.
To finish the top, add several small stems of boxwood pointing upwards at the top of the greenery tree. Secure with hot glue.
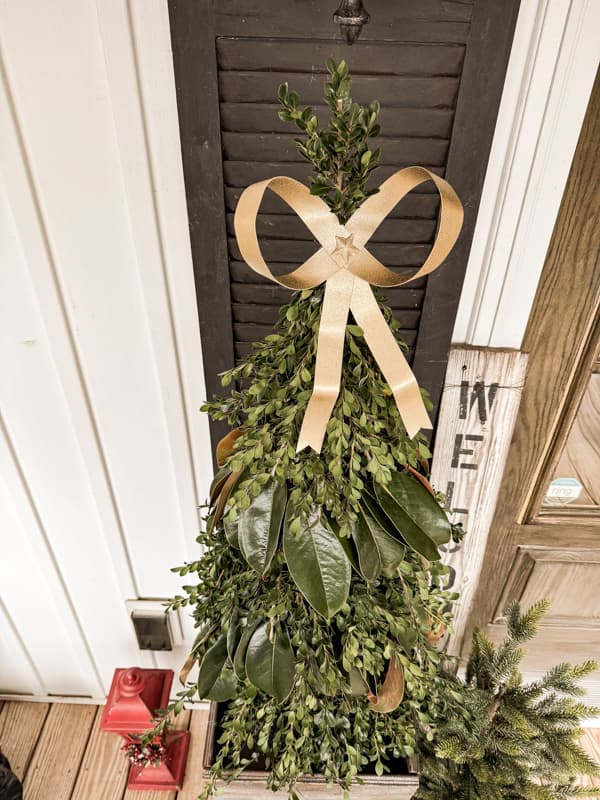
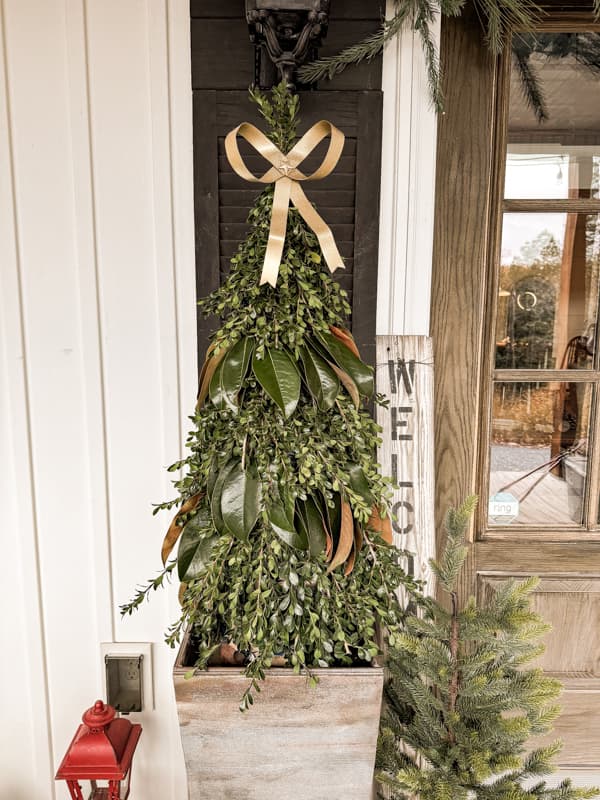
Do you remember the metal Christmas bows I made for my tree topper? This year, I made the extra ones to top these amazing greenery trees for my Christmas porch decor.
Add Trees To Planters For Porch Decor
It’s time to add the trees to the DIY planters to complete my porch decor. I used some bricks to bring the bottoms of the greenery trees to the top of the planters. I may add some additional boxwood inside the planter to fill in.
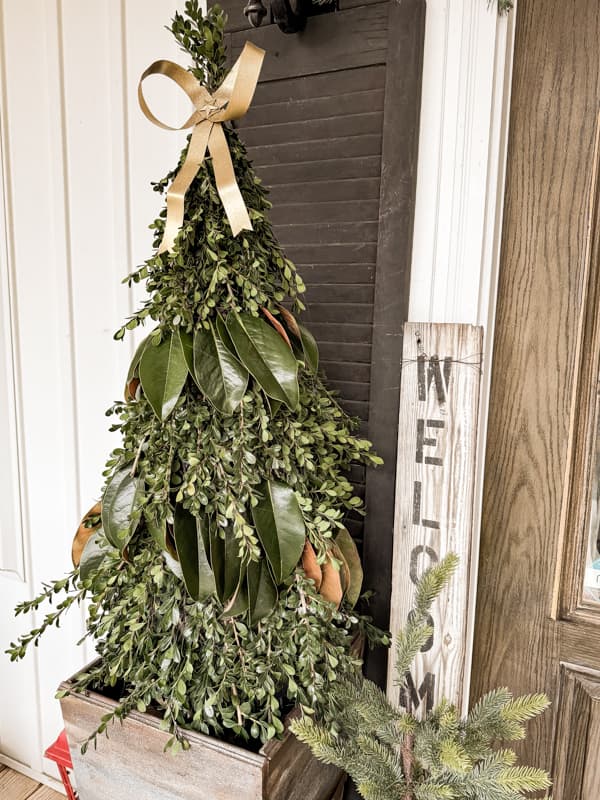
One thing I would do differently is add some weight to the trees. I am somewhat concerned about the wind blowing them over. As a precaution, I plan to attach some additional jute twine to the bottom of the trees and tie it around the bricks to weigh them down.
Each planter will be different, so you should consider its size and dimensions before beginning this project. This tutorial shows how we built our DIY faux galvanized planters.
More Outdoor Greenery Tree Options
As I made these greenery trees, I began to imagine more options that would be beautiful for the holidays. Here are a few of the ideas.
- The trees could be made with any greenery you have in your area. I think this tree would also be stunning with only boxwood attached.
- Small versions could be made quickly with styrofoam cones. You can see some options below under related articles.
- You can craft your cone shape using cardboard if you want a size between the Styrofoam cone option and the tomato cage.
- I already think a medium-sized version of these would be amazing on the mantel for next year—I’m just saying!
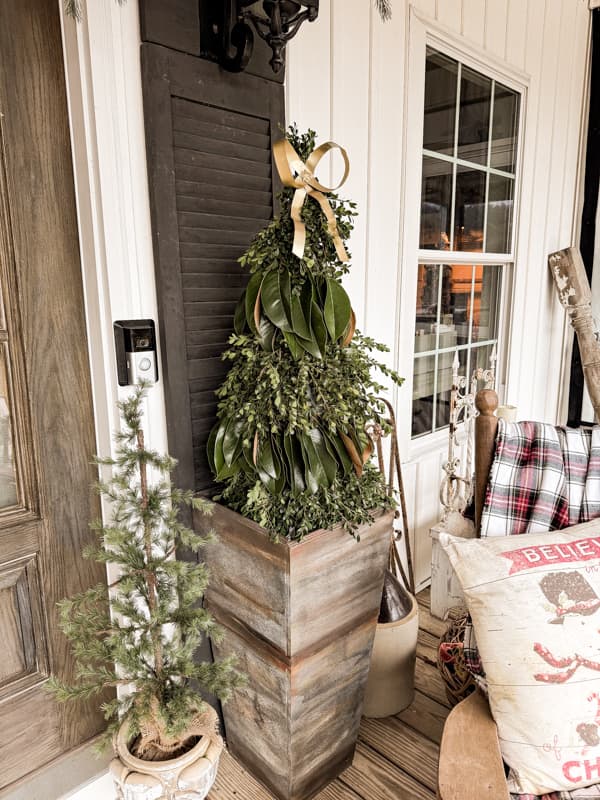
I love planning my porch decor for Christmas, and I’m so excited about how this year’s idea turned out. Although I made some mistakes, I’ve documented them so you can easily make your Christmas Greenery Trees without worry.
Related Articles
- Fresh Magnolia Wreath Tutorial
- Safety Tips For Foraging Natural Materials
- Fresh Cedar and Orange Topiaries
- Fresh Boxwood Topiaries
Video
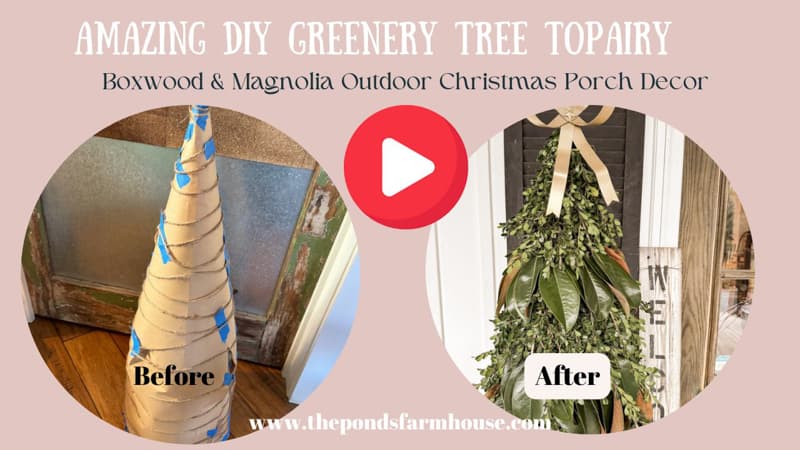
Thank you for following along today. Please let me know if you have any questions.





I would have to purchase all that greenery and it would not be worth it for me as I would not see it. Always go out my garage and my front door is at side if my house so only those coming to my place would see it!
Anne,
Yes, if you don’t have access to fresh greenery it would not be worth the effort. However, you may have neighbors who would be willing to share some clippings. I’m sure your guest coming to visit would love to see your beautiful creations. Have a bless holiday season.
Living in New England I would be concerned about the brown paper getting wet with either rain or snow. I think I will try wrapping the frame with 2-3 inch ribbon/fabric, as I do the pocket wreath I make every year. If the ribbon gets wet it won’t disintergrate. The pocket wreath is an easy way to make a boxwood wreath. No wire required.
Yvonne
That’s a great idea. My porch is deep and the tree’s are not exposed to the rain and snow. I do need to include that for those who would like to make this for an exposed porch or stoop. I appreciate your information.
Hey Rachel just a thought – could you place landscape pins to the bottom rim of the cages to stabilize the trees? Really like the look of the trees!
Andrea,
Thank you for your suggestion. It’s a possibility. I’d need to add something to the planters for the pins to attach to. So far, they are holding up with any additional weight. Thank you for taking the time to comment. I hope you have the best week.
These look like something I’d see in Charleston or Savannah, Rachel! I love how elegant they are and how they can be used throughout the season too. They’re just gorgeous! Hugs, CoCo
CoCo,
I’m so glad you like them. I’ve had them in my head forever, so glad I finally made them. Have the best day.