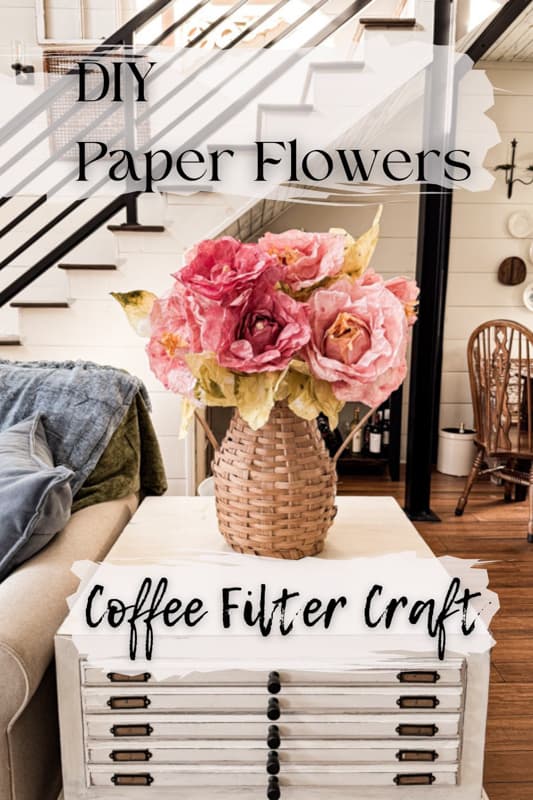
Craft Stunning Paper Flowers: Easy Coffee Filter Spring Craft
Want to add a touch of spring to your home without emptying your wallet? I’ve got the perfect DIY project for you! Remember those coffee filter cabbages we made? Well, we’re taking our coffee filter crafting to the next level with these stunning paper flowers. I’ve been seeing similar blooms in high-end boutiques, but as you know, they cost a fortune! Luckily, you can achieve the same gorgeous look at home for a fraction of the price. Ready to create your own budget-friendly spring décor? Let’s get started!
(Posts on The Ponds Farmhouse may contain affiliate links. As an Amazon Associate, I earn from qualifying purchases. See the full disclosure details here.)
How To Make Paper Flowers With Coffee Filters?
The idea to make a paper flower bouquet was inspired by the same boutique where I saw the paper cabbages I shared earlier. When stepping inside a high-end boutique, it’s easy to get carried away by all the beautiful decor and want to purchase everything in sight. Instead, I look for items that I could duplicate for less money. No, I can’t duplicate everything, and sometimes I splurge on something truly unique. However, these DIY projects allow me to decorate my home with a high-end look and still afford the occasional splurge.
So I made the DIY Coffee Filter Cabbages, and they were so successful that I began to look for a way to make paper flowers. I knew that the coffee filter technique would work with a few tweaks. So, let me show you what’s different and give you step-by-step instructions on making your gorgeous coffee filter flowers.
Supply List:
- Coffee Filters
- Folk Art Craft Paint – Cottage Rose
- Folk Art Craft Paint – Wild Rose
- Folk Art Craft Paint – Alfalea
- Folk Art Craft Paint – Yellow Ochre
- Craft Paint – Fuchsia
- Hot Glue Gun
- Bamboo Sticks (if you want to create a Paper Flower Bouquet and for the leaves)
- Glass or tin can to shape flowers
Step One – How To Shape The Coffee Filters
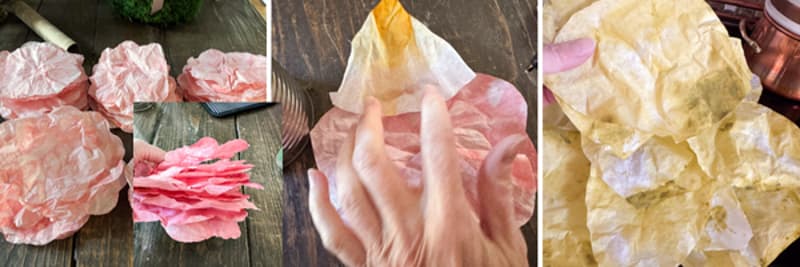
The first step is determining how to shape the coffee filters to resemble paper flowers. I made two sizes of flowers in two shades of pink. I also made a center for each flower with yellow ochre and leaves with Alfalea green.
How do you make the flower petals?
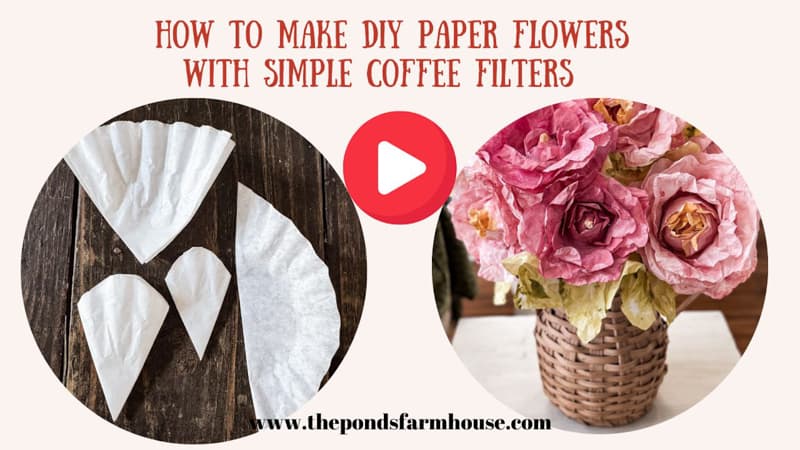
- Open a few coffee filters and fold them in half three times until you have a triangle shape. Only use a few coffee filters that you can easily cut once folded.
- Use sharp scissors to cut the top of the triangle in a half-moon shape. Now, your triangle will look like an ice cream cone.
- Open the filter and separate the layers; you’ll have a scalloped-edged circle.
- To make the smaller flower petals, do the same steps but cut the half-moon further from the top. Now, you have two sizes of scalloped circles.
See the images below for guidance. The first image shows two ice cream cone shapes, and the center image shows the opened scalloped edges.
How Do You Create The Flower Centers?
- To create the flower centers, open the filters and fold them in half twice.
- Cut the filter at the folded edges until you have several triangle shapes.
See the triangle shape at the top of the first image and what they look like individually in the last photo.
How To Make The Paper Leaves?
- Fold the coffee filters in half once.
- Cut the edges off the filters to form an oblong, half-leaf shape, like the right-hand image below in the first photo.
- Open the leaves and separate them.

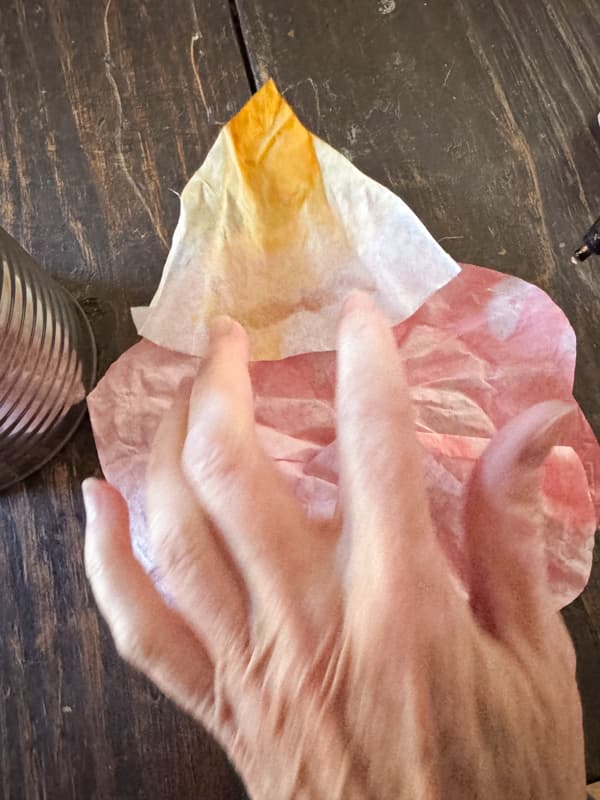
Step Two – How To Dye The Coffee Filters
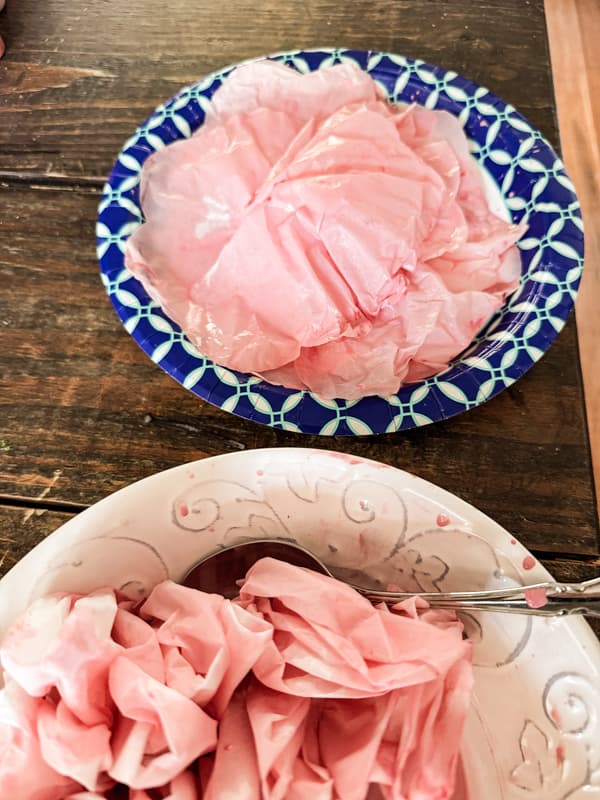
Next, to dye the coffee filters to look like flowers, determine the colors you want and use craft paint in those colors. You will need petals, flower centers, and leaf colors. Remember that the actual color will be much lighter than your paint colors. I used the colors listed in the supplies, but any colors you choose will look lovely.
I added craft paint to water in a small bowl to make the dye mixture and stirred until well mixed. My mixture was 3/4 water to 1/4 paint, and you don’t need a large amount; a little goes a long way! These are the four mixtures I put together for my DIY paper flowers and leaves.
- Light Pink Flower Petals for the larger flowers – Cottage Pink + Wild Flower Pink
- Dark Pink Smaller Flowers – Wild Flower Pink + Small Amount of Fuchsia
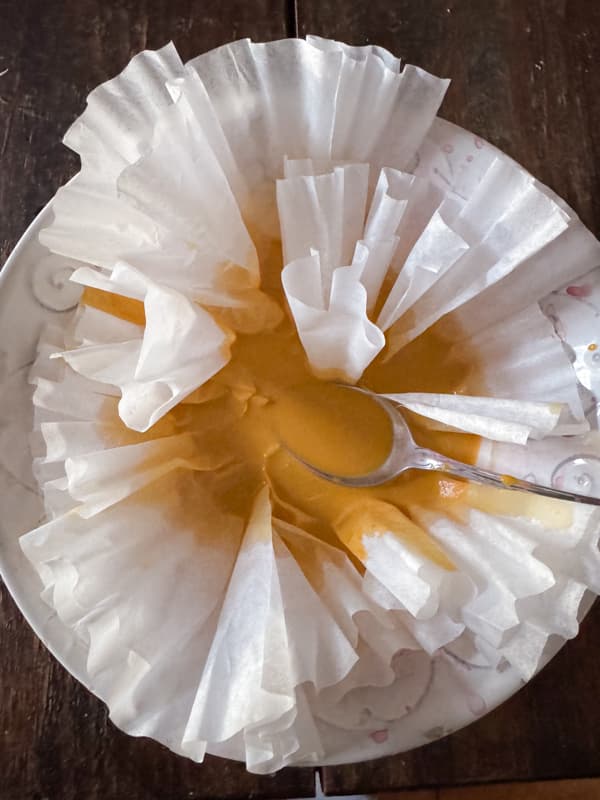
- Flower Centers – Yellow Ochre
- Leaves – Alfalfa green
Fold the coffee filter flower petals and place them in the dye mixture with the centers up and the outer edges in the dye. Let them set for a few minutes; the color will bleed upward the longer they sit in the mixture. Do the same with the leaf-shaped pieces. For the flower centers, dip the point of the coffee filter into the paint mixture and leave the wide part up.
Finally, after they have set for a few minutes, spread them onto paper plates. Allow them to stay crinkled and wrinkled so the paint will settle heavier in some areas.
Step Three – How To Dry The Coffee Filters?
You have a couple of options for drying the coffee filters. If you have the time and space, you can spread them out to dry naturally. As I have neither, I opted to dry them in the microwave. You will need at least two paper plates and want to dry them by color.
I placed 5-6 petals on each plate and microwaved them on high for 1 minute. Then, I removed them and rearranged them to dry for one more minute. Usually, two rounds of drying in the microwave are sufficient. You can spread them out to continue drying if needed.
Once they were all dry, mine looked like the image below: the large and small flower petals, the yellow centers, and the green leaves.
Insider Tip
It is not necessary to use the exact colors of paint I used. These are the colors I had on hand, but any similar colors will give you the same results. Since you are mixing with water consider making your own unique combination of colors.
I recommend wearing protective gloves when handling the wet coffee filters. After making the DIY Cabbages, I had green cuticles for days. LOL
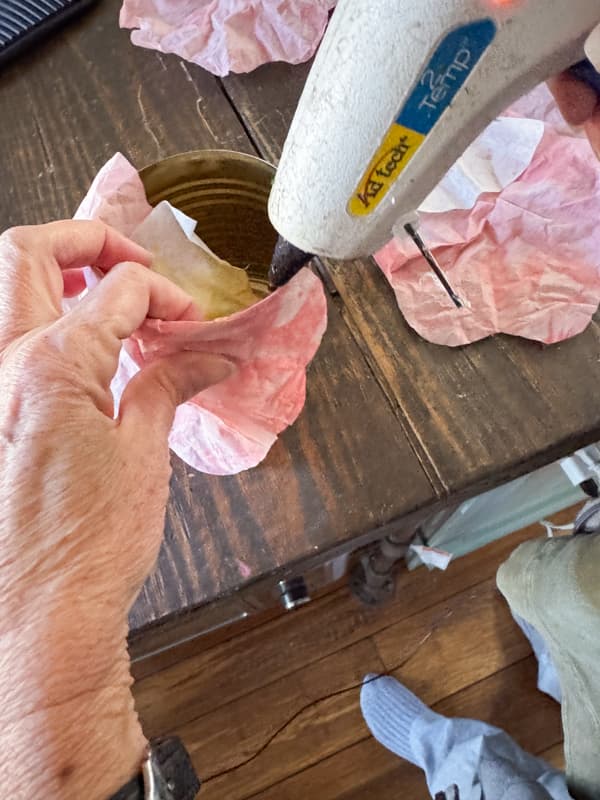
Step Four – How To Assemble The Paper Flower Petals
Now, you are ready to assemble the paper flower petals. I used two sizes of containers to assemble mine: a small tin can for the larger petals and an old glass for the smaller ones.
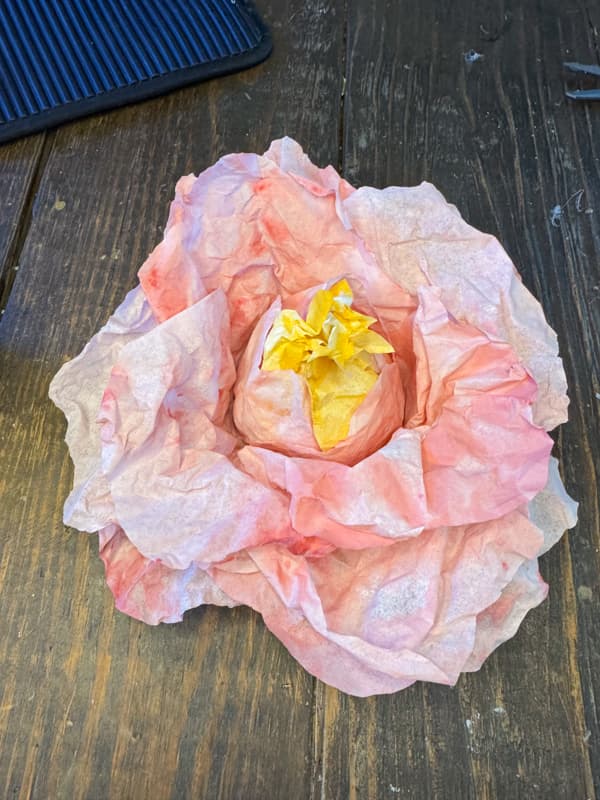
Before beginning, you must attach the yellow triangles to three or four flower petals to form the paper flower centers. Add a small amount of hot glue to the edge of the petal and press the wider side of it to the center of the adhesive. Ensure the yellow tips extend beyond the pink petal by approximately one inch.
Next, using the petals with the centers attached, begin to fold the petals around the container’s rim. Add a small amount of hot glue to the petals at the rim to adhere to the next petal as you go around. Add at least 3 to 4 petals with the yellow centers before continuing with the remaining petals. Ensure that the yellow tips are pressed into the bottom of the container. I used a total of ten petals for each flower.
Repeat this same process for the smaller dark pink flowers.
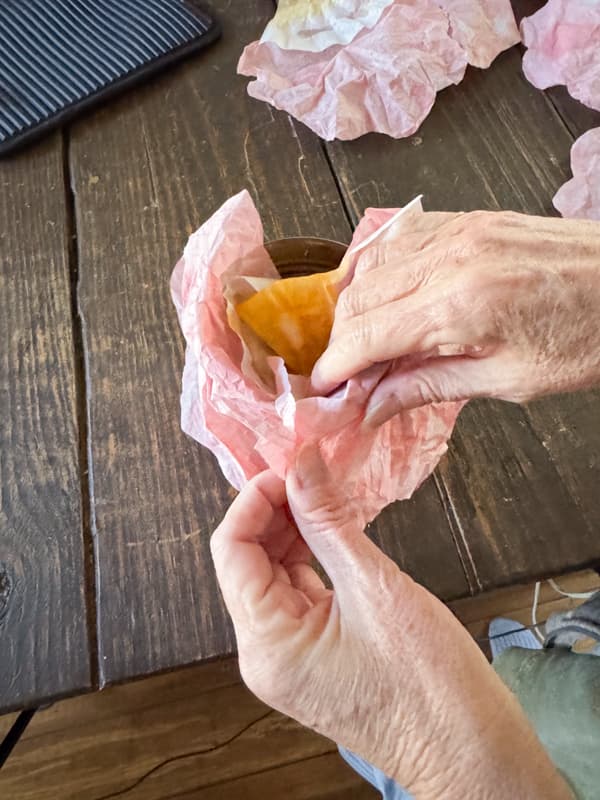
Finally, remove the coffee filter flower from the container. I used scissors to snip the ends of the yellow centers and pinched them together to wrinkle them. In addition, if your flower petals need fluffing, you can squeeze the flower to add more wrinkles and shape it by rolling the flower scallops outward.
Step Five – How Do You Create The Paper Leaves?
Next, I wanted to add some paper leaves to the paper flower bouquet, and here is how I created them.
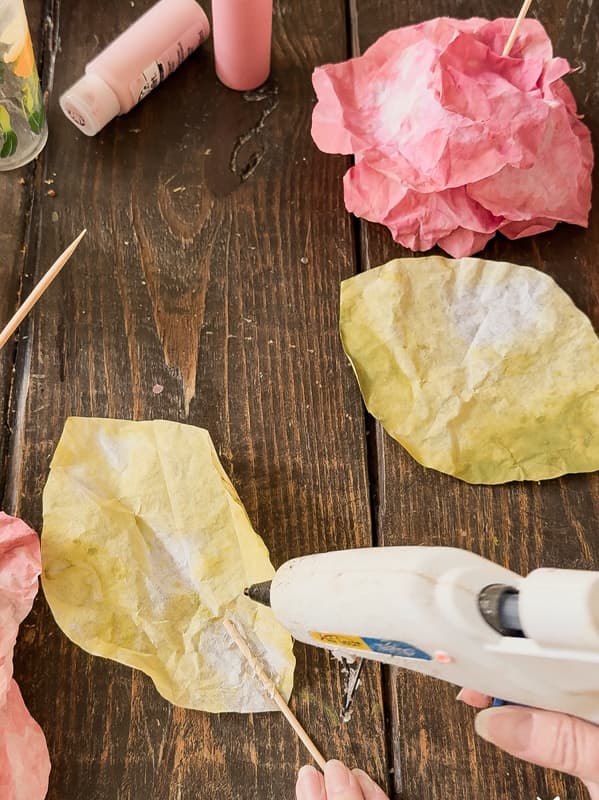
First, I folded the dyed leaves in half and made a crease. Then, I folded creases into the sides to look like leaf veins and added more wrinkles when needed. Finally, I used hot glue to attach a bamboo skew to the paper leaves. I made some with two or three leaves together.
NOTE: I also added some leaves directly to the flowers with hot glue. Then, I added skewers to the back of all the flowers to make a bouquet.
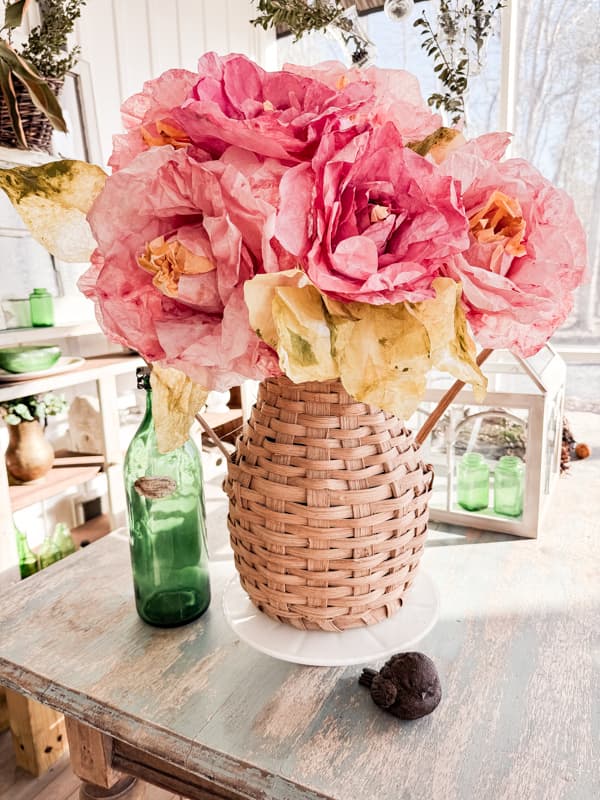
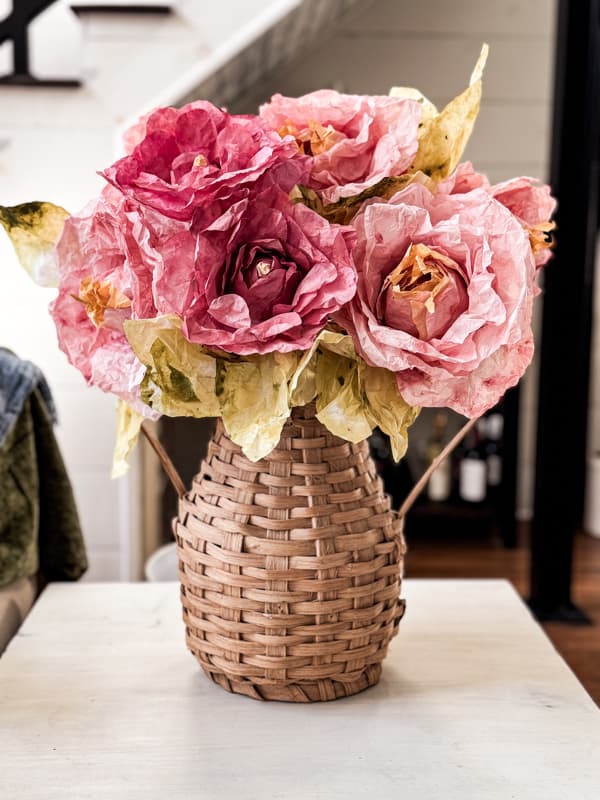
How To Make A Paper Flower Bouquet?
My first plan was to make a paper flower bouquet because I have a large handmade woven basket vase begging to be filled with these beauties. To make the arrangement, I first added a smaller container inside the basket and filled it with recycled plastic bags. Then, I added the leaves to the front of the container and the larger paper flowers. Working front to back, I filled the basket with the smaller flowers and leaves until the bouquet was arranged to my satisfaction.
Insider Tip
I like to use recycled plastic bags to secure stems in my faux floral arrangements. However, if you prefer, you can use styrofoam. This arrangement is loosely held together and will be displayed out of reach of prying hands. However, if you place it in a high traffic area of your home, you will want to use a more secure method to keep everything in place. I recommend styrofoam and possibly some hot glue to secure.
It looks lovely on the end table but will most likely be displayed on my Spring mantel. Stop by tomorrow for our Pinterest Challenge – Spring Mantel Inspiration.
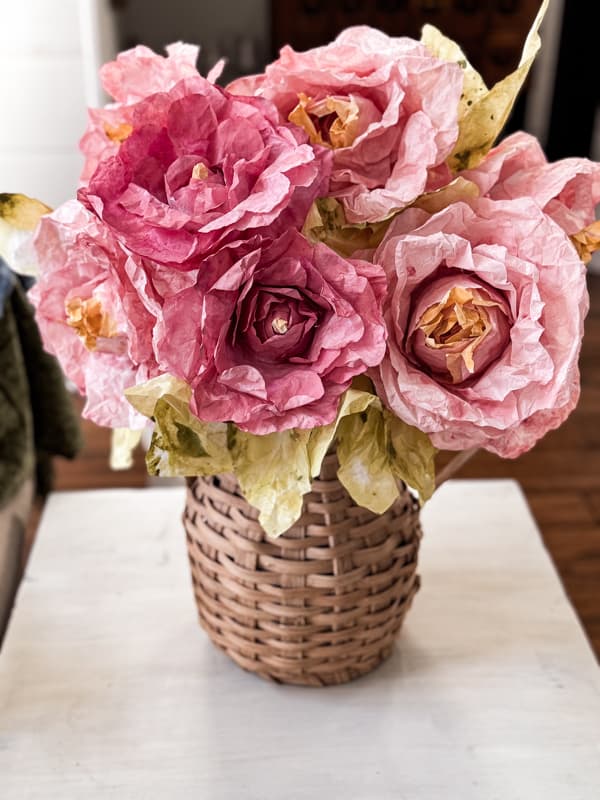
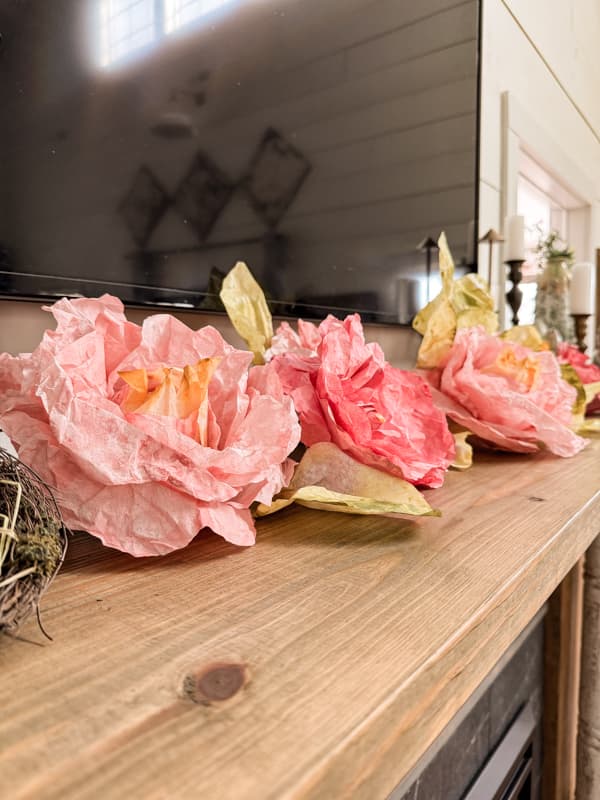
Options For Decorating with Paper Flowers
These stunning paper flowers look lovely, individually or grouped in a vase. Tuck one into a table vignette, inside a cupboard, or on a tray.

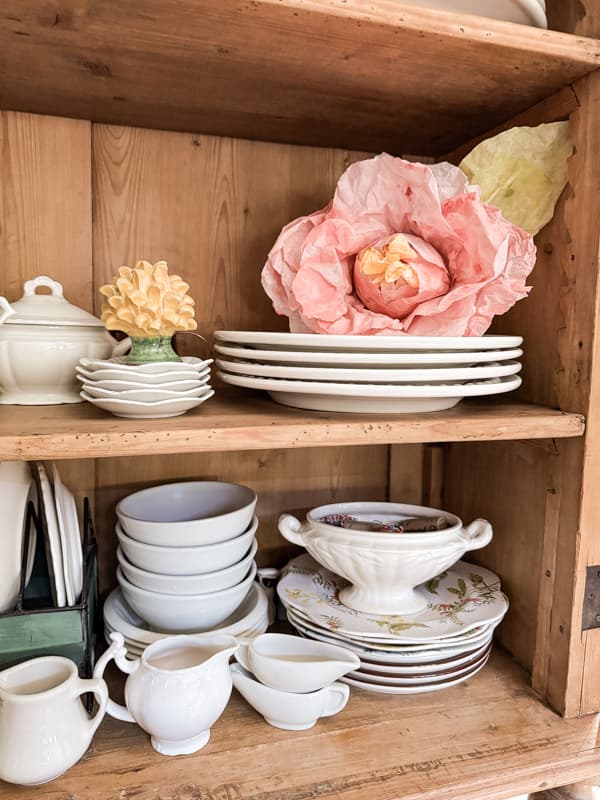
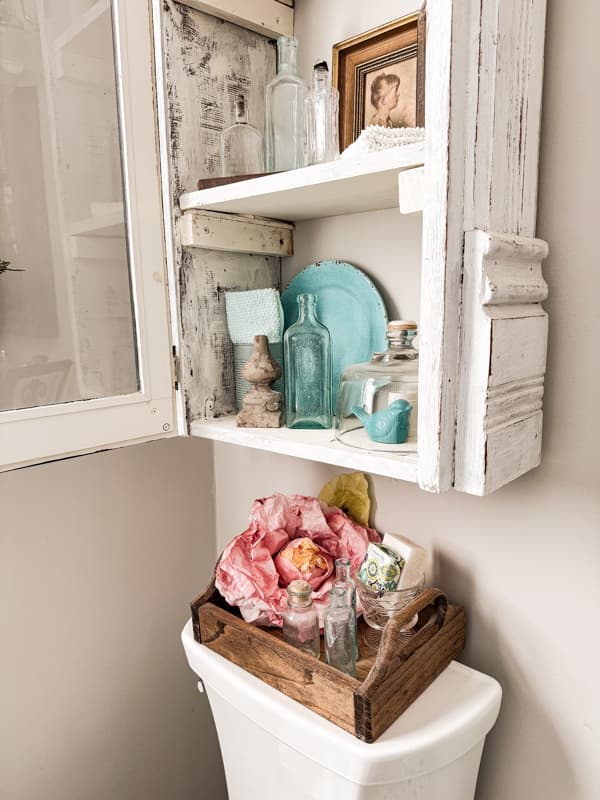
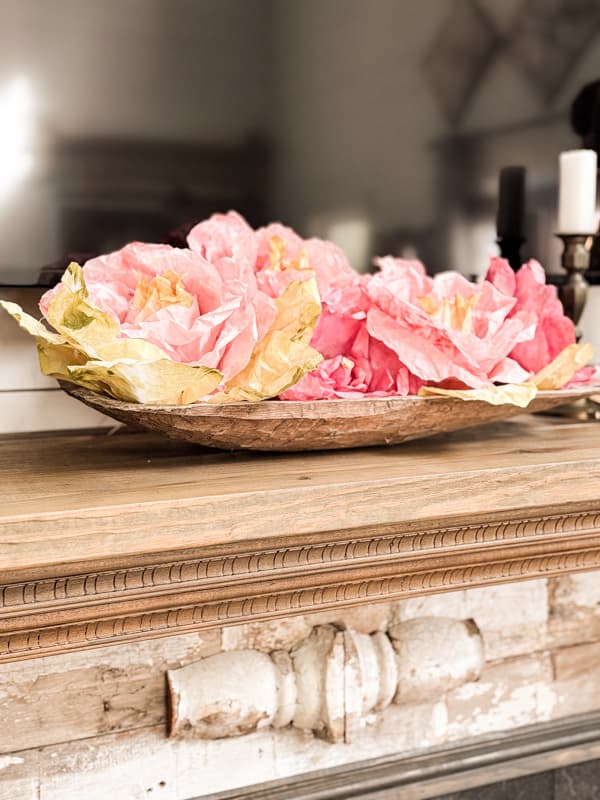
A small collection looks lovely displayed in an oblong dough bowl or spread without a container along a shelf or mantel. How would you display these lovely creations?
FAQ
Related Articles
Video
I hope you enjoyed today’s DIY project. Please let me know if you make any of my projects. I’d love to share a photo on my Sunday, Dirt Road Adventures.


I’ve had so many compliments on my coffee filter cabbages, I can’t wait to try these! I’ll let you know how it goes.
Lisa,
That is amazing! I’d to share a photo on my Sunday’s Dirt Road Adventures if you are willing to share.