Cordless LED Lamp Makeover: Designer Style DIY Tutorial
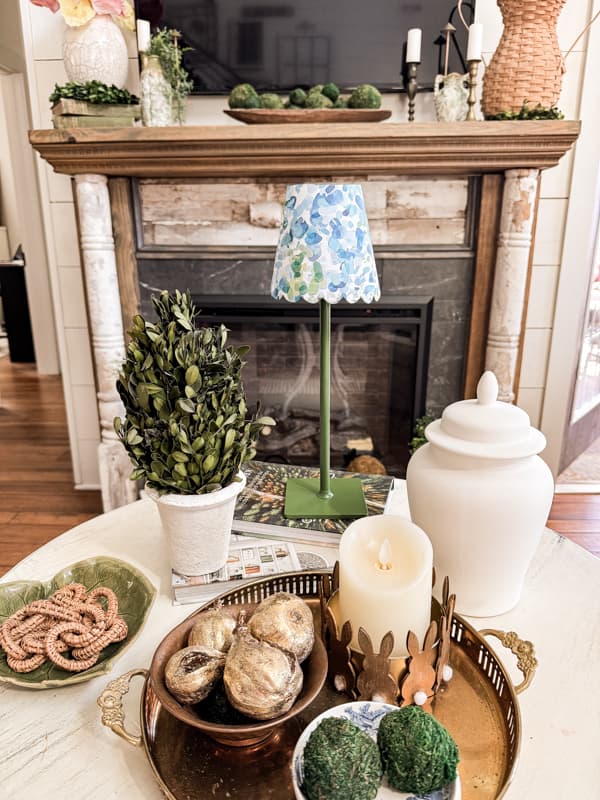
Everyone has jumped on the cordless LED Lamp trend, and who can blame them? They are so convenient and can be used anywhere. Designer rechargeable lamps are now popping up, but with much higher price tags. When I saw one for $159.00, I decided that my previously purchased black touch lamp could be updated with a new look. Let me show you how easy and inexpensive it is to transform a plain black lamp into a designer accent piece with a bit of paint and paper.

(Posts on The Ponds Farmhouse may contain affiliate links. As an Amazon Associate, I earn from qualifying purchases. See the full disclosure details here.)
Cordless LED Lamps
Like many, I jumped on these simple cordless LED Lamps as soon as I saw them. So, I have them scattered around the farmhouse and beach cottage. They are so easy to use, and since they are rechargeable and cordless, you can use them anywhere. Last year, I purchased two black rechargeable lamps for only $15.00 each for my bathroom vanity. However, I’ve used them on my mantel and other areas of the house. Since I’ve been updating my living room to include more blue, I was drawn to this lamp at a boutique in Wilmington. But since I had a $15.00 lamp at home, I decided to update it and save money. Here’s what I did.

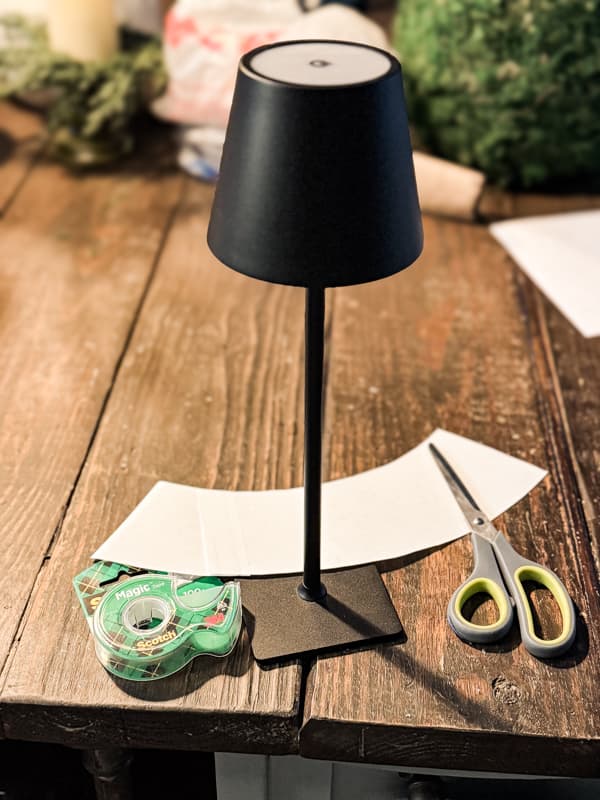
Supply List
- Cordless LED Lamp
- 1 piece of 12 x 12 inch decorative paper (scrapbook paper or heavier)
- Fast drying, non-drip glue
- Craft Paint – I used Folk Art Clover
- copy paper or craft paper to create templates
- Scissors
- Painters Tape
- Crystal Clear Acrylic Coating
How To Make A Paper Lampshade?
The first step is to find the paper you want to use for your lampshade. I went to Hobby Lobby’s scrapbook section and found one I liked for 69 cents. I needed a 12×12 inch sheet to avoid extra seams in the lampshade.
How To Create A Template For The Lampshade?
The next challenge is to make the lampshade fit. Here are the steps I took to ensure that the shade would be a good fit.
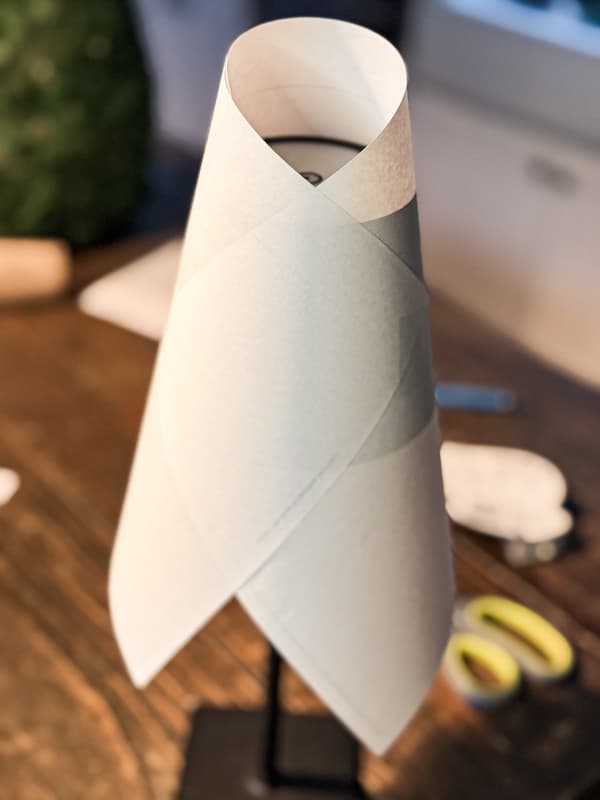
- The first thing I did was tape two pieces of copy paper together so that they were long enough to wrap around the existing LED lamp shade. If you have legal-size paper or craft paper, you can avoid this step.
- Next, I wrapped the paper around the shade, ensuring it covered all sides and tightly wrapped. Then, I taped the paper in place.
- Then fold the edges to form a crease at the top and bottom of the shade.
- Remove the paper and cut along the cease line to create a template. This template will be the exact size of the existing lampshade. Read more to see the scalloped version.
Optional Scallop Design Lampshade
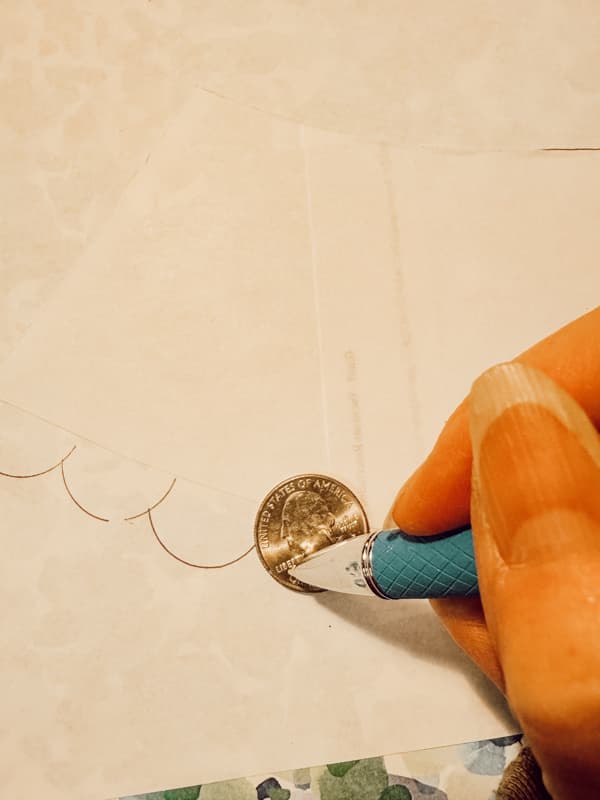
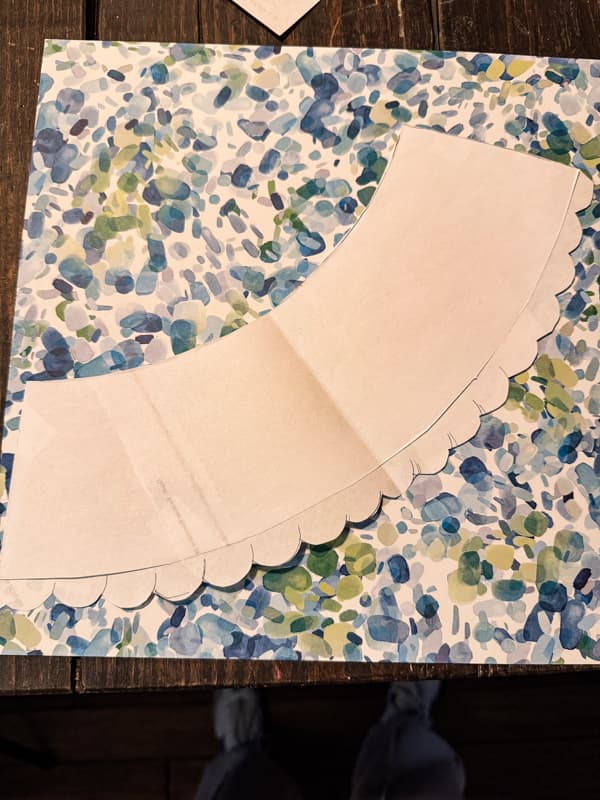
Scallop edges are all the rage in clothing design and home decor. Therefore, I wanted to duplicate the designer lampshade style by adding a scallop bottom edge. This required that I make a second template and here’s how I did it.
I taped the original template to another sheet of paper leaving room at the bottom to add the scallops. Then I used a quarter to trace the design onto the new paper. Once you have that complete, keep the tape in place and cut the new design from the second sheet of paper with scissors.
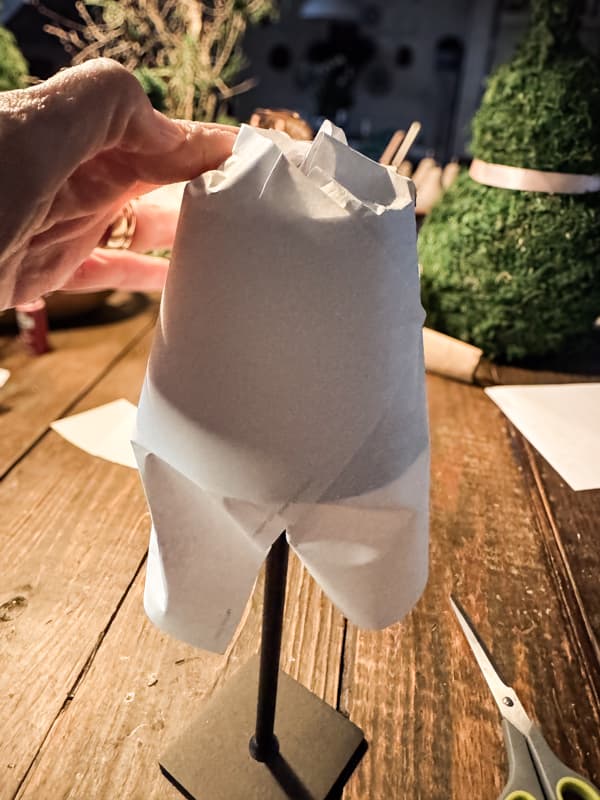
To create the decorative shade, attach the new template to the back side of the decorative paper and trace. Then cut the design with sharp scissors ensuring that you are cutting a smooth line.
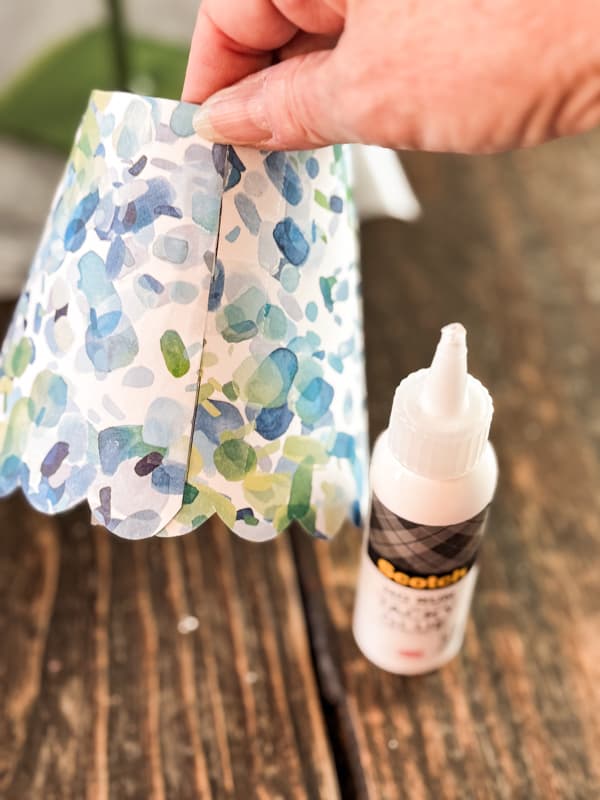
Now, double check the fit around the cordless lamp. Hold the shade in place and draw a line where the two ends overlap.
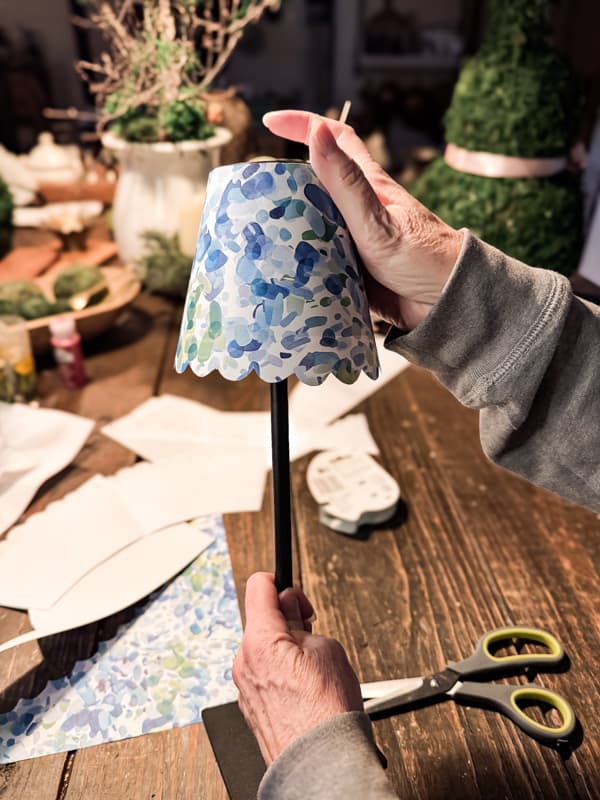
Finally, remove the paper and add fast drying glue to the outside of the line. Use a small amount of glue and bring it close to the line. Wrap the shade in a cone shape and attach the to ends together by overlapping and aligning the top edge with drawn line you made earlier. Hold in place until dry or add painters tape to hold.
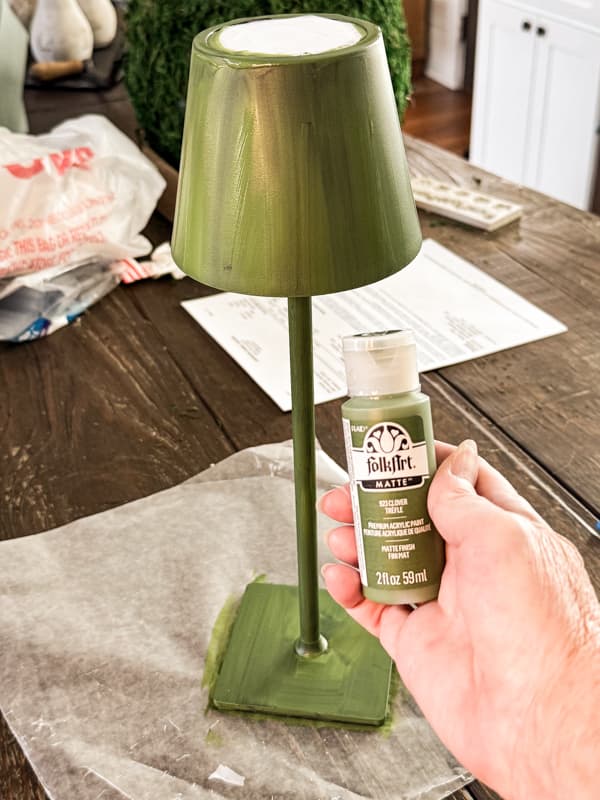
How To Paint Rechargeable Cordless Lamp?
Next, if you are like myself and purchased these lamps when the color choices were limited, you can easily paint the lamp any color you want. I decided to use a Clover green for mine because I felt it would be more versatile than the blue. I plan to make more shades to switch out seasonally and wanted a neutral color.
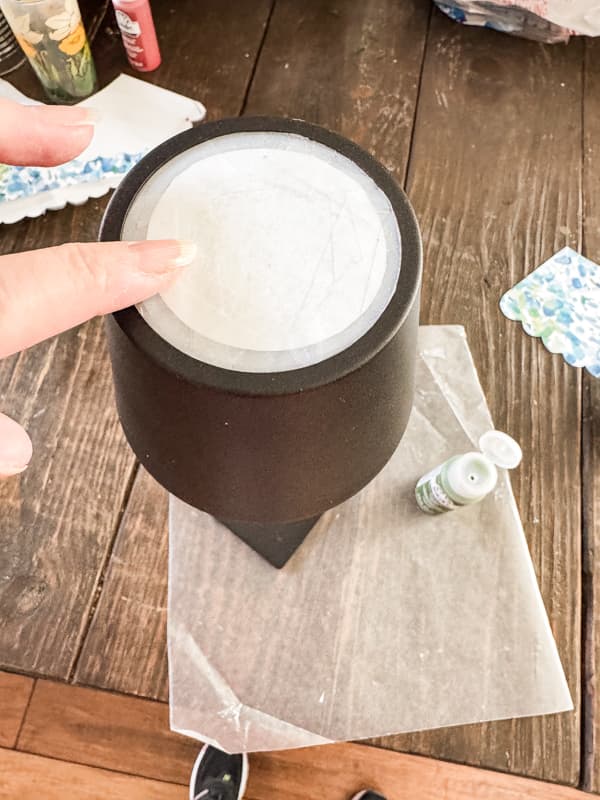
The first step is to cover the top of the light with paper and tape to prevent the new paint color from getting on the cover. I cut a piece of scape paper and then added tape around the the edges and cut it to fit. Then pressed the tape securely around the edges.
Next, I painted two coats of the green paint to cover over the black LED lamp.
Once that was dry, I used the clear acrylic sealer to protect the new finish.
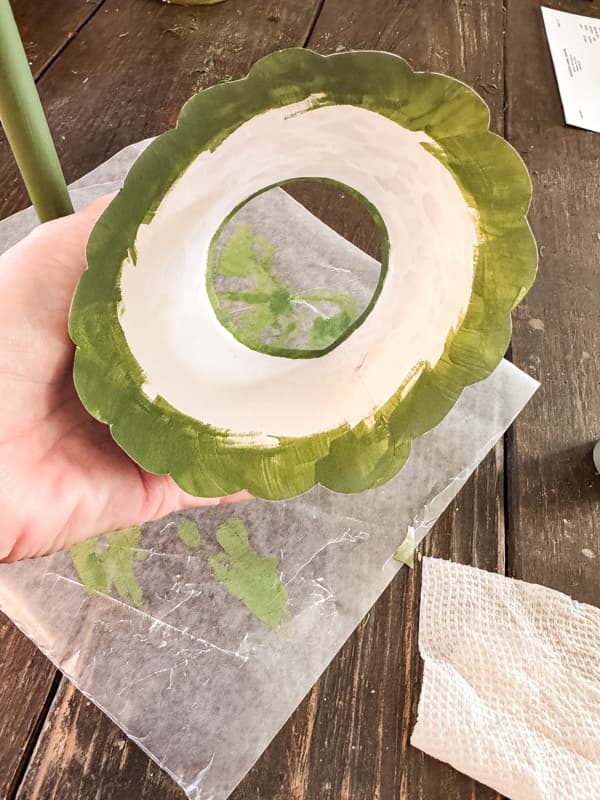
Once I had the lampshade on the cordless lamp, I realized that the white backside was still visible and unattractive. Therefore, I used a light coat of the clover green paint to paint the upper and lower edges of the shades inside.
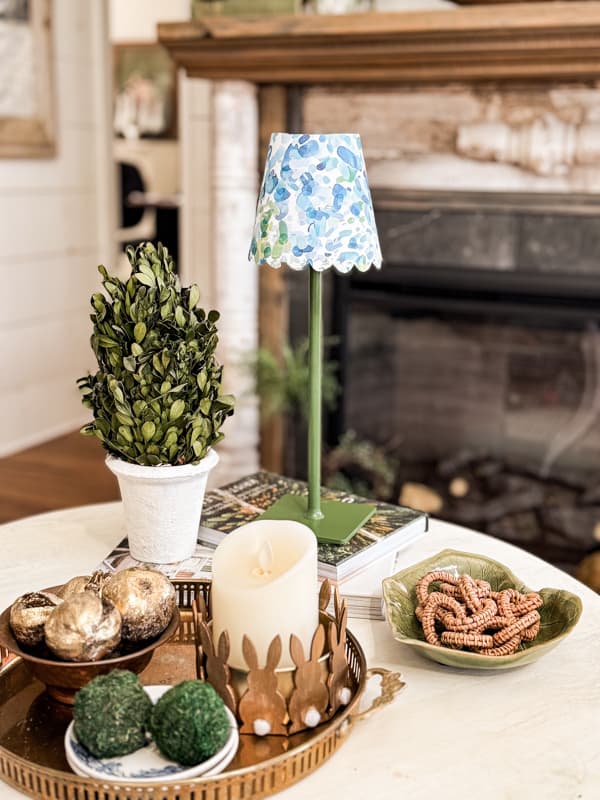
DIY Decorative Cordless Lamp
How do you like the transformation? This project cost me less than $2.00 and only took a few minutes to complete (excluding drying time).
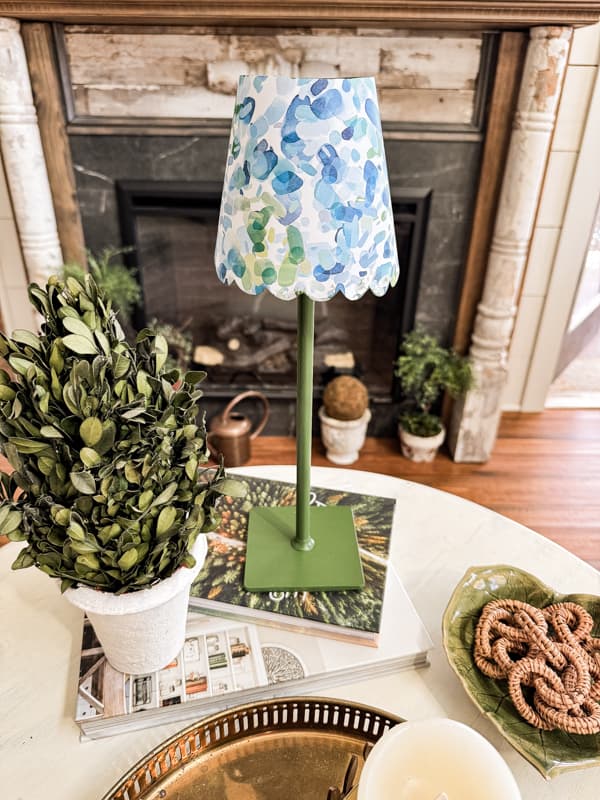
I plan to use the lamp on this side table to avoid having a cord visible. However, I’m considering a makeover for the other lamp and maybe using them on the mantel. What do you think?
Regardless, of where you add the updated lamp, it’s is sure to add a stylish decorative touch and no one will guess that it was a DIY project.
Resources: Shop This Post
Related Articles
- Ginger Jar Lamp Makeover: 3 Easy Steps
- No-Wrinkle Decoupage Lampshade Makeover
- Upcycle Old Lamp Shade With Pleated Fabric (No-Sew)
- DIY Flower Petal Lamps With Air Dry Clay
Thank you for stopping by today! Let me know if you make one and send me a picture. I love to share projects like this one on my Dirt Road Adventures every Sunday! I look forward to sharing my next adventure with you!


LOVE, LOVE,LOVE this! And so easy! Thank you!
Tess,
I’m so glad you like it. I just can’t believe how expensive these lamps are if they are more decorative. Let me know if you make one and I’d love to share a photo on my Sunday, Dirt Road Adventures.
Genius and so simple – I’m amazed by your ability to look at almost anything and say “I can make that for a lot less $$” and it always always turns out ! I’ll be doing this project for sure !
Thanks for sharing .
Marilyn S.
Marilyn
You are so sweet and I appreciate your words of encouragement. Can’t wait to see what you create. I’d love to have photo and I’ll share it on my weekly Dirt Road Adventures.
This is SO GOOD!!! You are genius. Totally rad and high end looking lamps now!!
Rachel,
Thank you so much. I can’t wait to make more replaceable shades for these lamps.