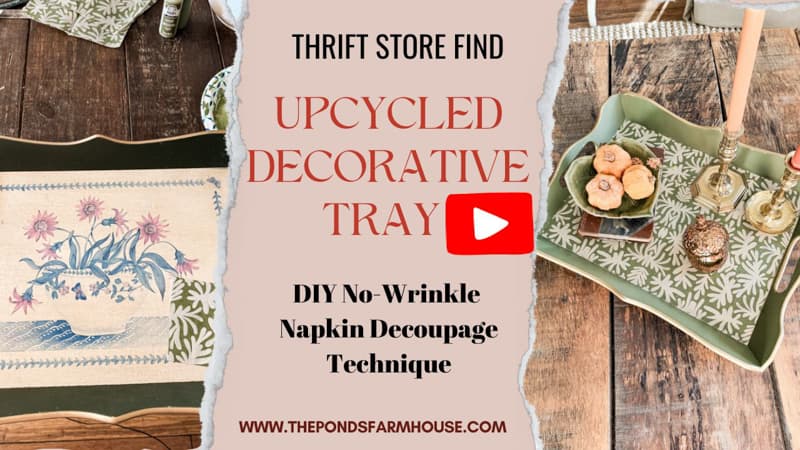
Upcycle A Thrifted Decorative Tray In Minutes With Napkin Decoupage
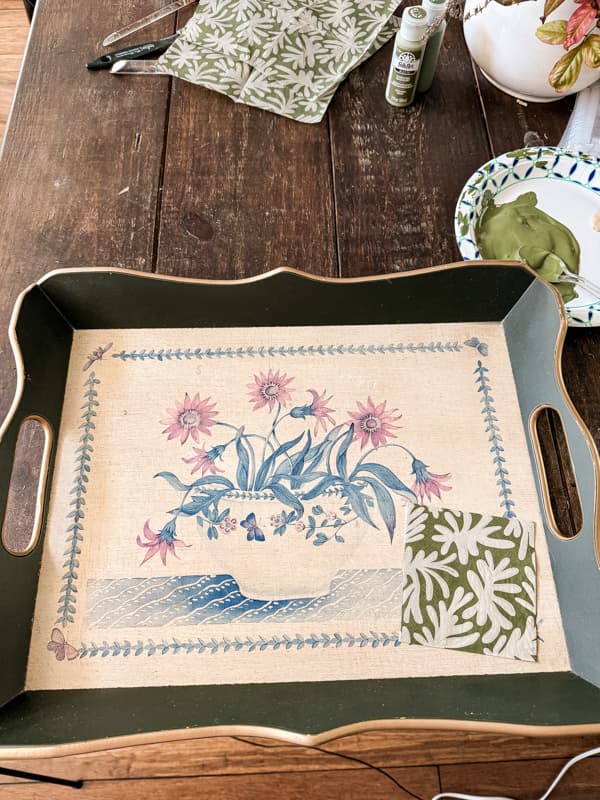
Do you ever find great decorative trays that could use a little updating? You will be amazed at how easy it is to upcycle a thrifted decorative tray with a no-wrinkle napkin decoupage technique. I found a great deal on this green and gold decorative wood tray, perfect for the holidays. It was in good shape, but I was not fond of the decorative base design. I recently found some great green and cream-colored paper napkins and decided they would be perfect for upcycling the thrifted decorative tray. Let me show you how!
(Posts on The Ponds Farmhouse may contain affiliate links. As an Amazon Associate, I earn from qualifying purchases. See the full disclosure details here.)
Table of contents
Inspiration for Napkin Decoupage
I love finding great napkins, and there are so many wonderful patterns. A few weeks ago, I found these napkins at a boutique in Morehead City. I immediately decided I’d use them in my Christmas decor this year. When I saw this $4.00 tray with the green and gold, I knew I had my first project for the holidays.
How To Upcycle A Decorative Wood Tray
This is an easy upcycle project because the decorative wood tray was in good shape. However, I wanted to update the paint color to match the decorative napkins I planned to use. Plus, it was necessary to paint over the design detail in the bottom of the tray. So, the first thing I did was compare the napkin to my craft paints to find a match. Then, I gathered my supplies.
Supplies and Tools
Here are the supplies and tools I used to upcycle the decorative tray. Although each tray will be different, you can easily match the colors if you have your napkins.
I used cream paint for the tray’s bottom and green that closely matched the green on the napkin.
- Cream and Green Craft Paint
- Antique Gold Rub N Buff (to touch up the edges of the tray.)
- Paper Napkins – I found these napkins in a boutique, so I don’t have resources – Sorry!
- Mod Podge
- Mini Heat Press – (For a no-wrinkle napkin decoupage project.)
- Small Paint Brushes
Step 1 – Paint
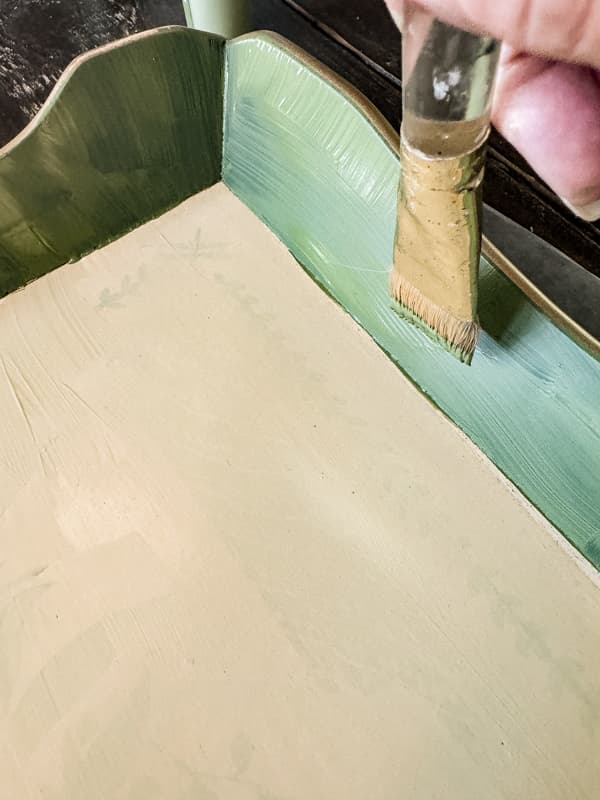
First, I painted over the decorative bottom of the tray with cream-colored paint and used green paint to update the outer edges of the tray.
It took two coats of each color, and you will need to allow time for the paint to dry. If your tray has a gold rim, avoid covering the gold with your paint if possible.
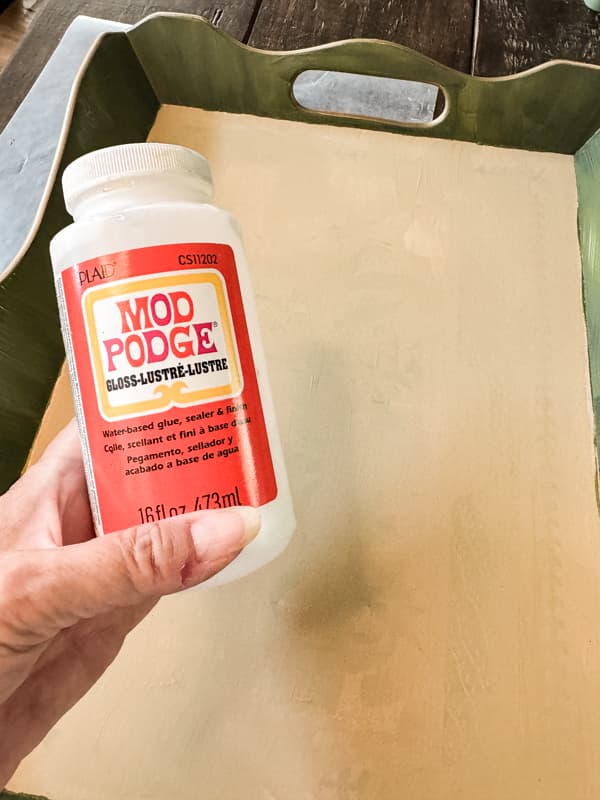
Step 2 – Mod Podge
After the paint is dry, apply a coat of Mod Podge over the cream paint at the bottom of the tray. Once again, allow it to completely dry.
Step 3 – Apply No-Wrinkle Napkin Decoupage
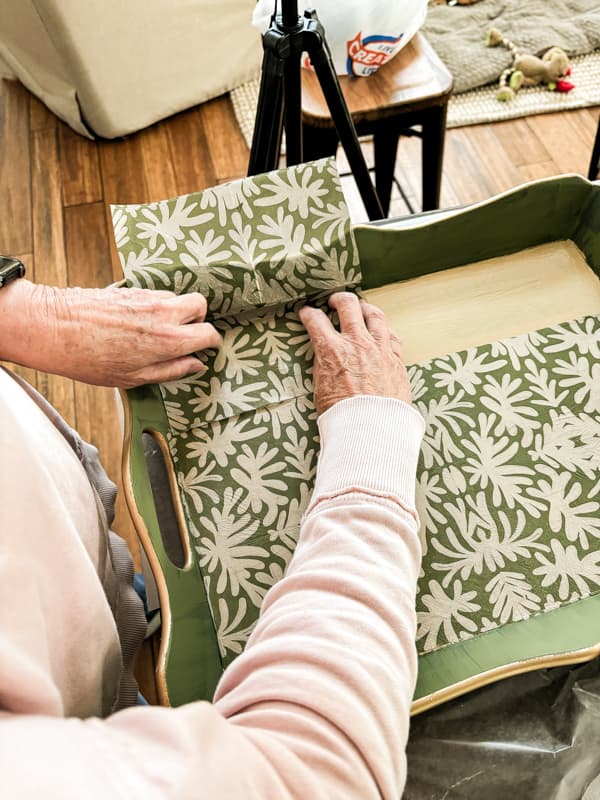
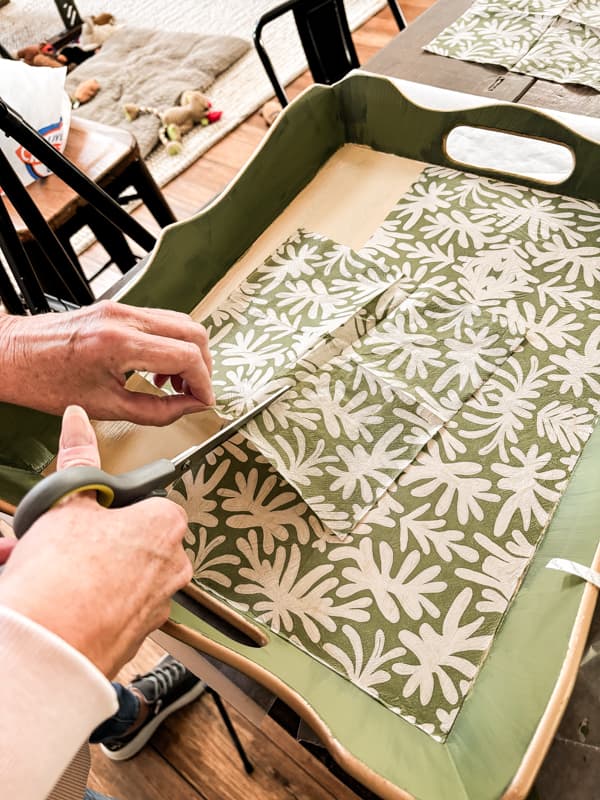
Now, you are ready to apply the napkin to the bottom of the tray. Begin by separating the napkin layers. For this project, you only need the decorative top layer. Use a piece of tape to pull the layers apart. Use caution, as the napkin layers are delicate.
Then, cut the napkin to fit the inside of the tray. Try to align the pattern so that the seams are less apparent.
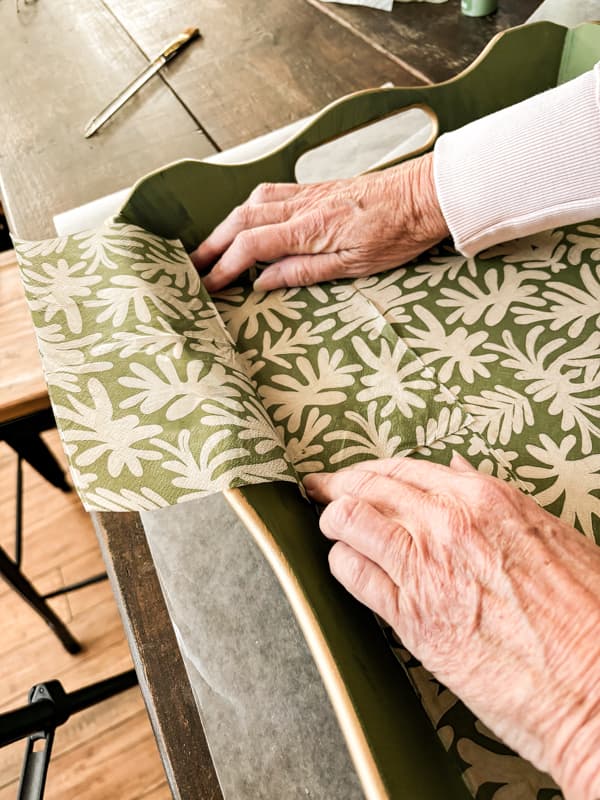
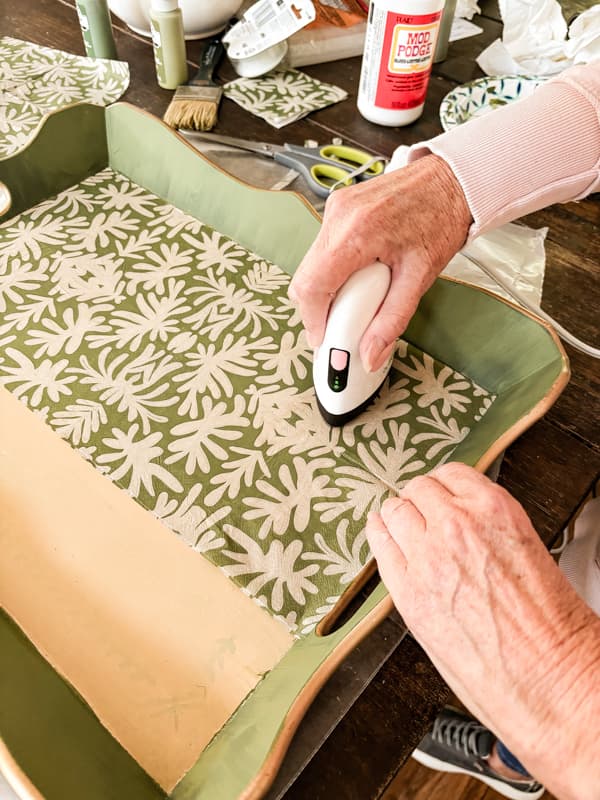
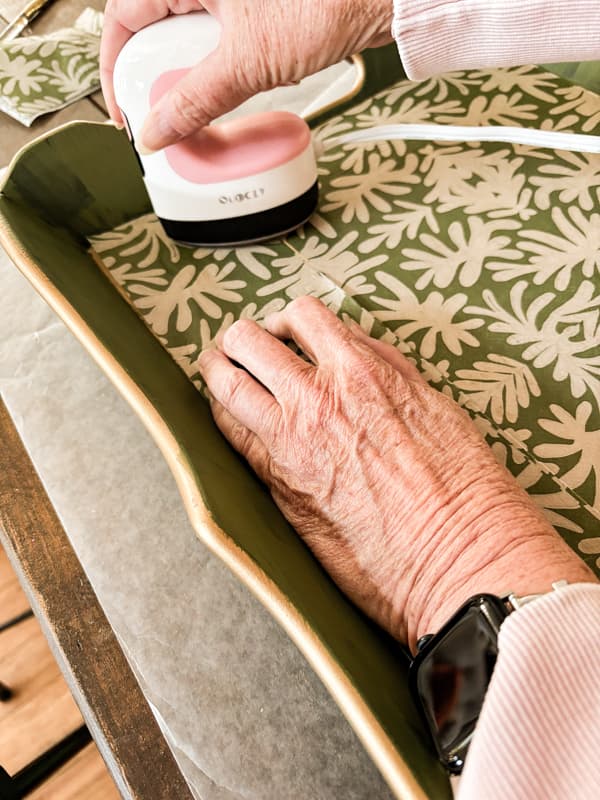
Once you have your napkin cut to size, you can begin adhering it to the tray’s bottom. Begin at one corner and spread the napkin flat on the tray. Use the mini heat press to activate the Mod Podge by pressing the napkin. Work outward from the corner until the entire piece is glued to the bottom.
Add one piece at a time as you continue to cover. Be sure to press the corners and edges as you go.
Insider Tip
Do not try to overlap the napkin using the heat press technique. Cut your napkin edges to butt up against each other without overlapping. This will ensure that the napkin adheres appropriately to the Mod Podge. This is the same technique used for the DIY Lampshade Makeover: No-Wrinkle Napkin Decoupage Guide I shared several weeks ago.
Step 4 – Touch Up With Rub N Buff
The final step is to touch up the decorative tray’s gold edges. I added a small amount of antique gold Rub N Buff to the paper towel and rubbed it over the edges.

Step 5 – Decorate With a Wooden Tray
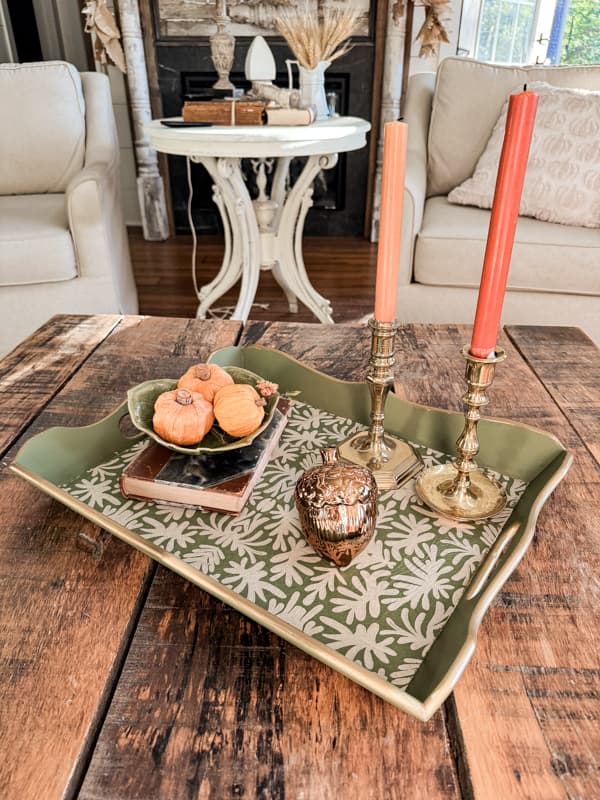
That’s it! Now it’s time to decorate with your wooden tray. Don’t you love how easy this upcycle was?
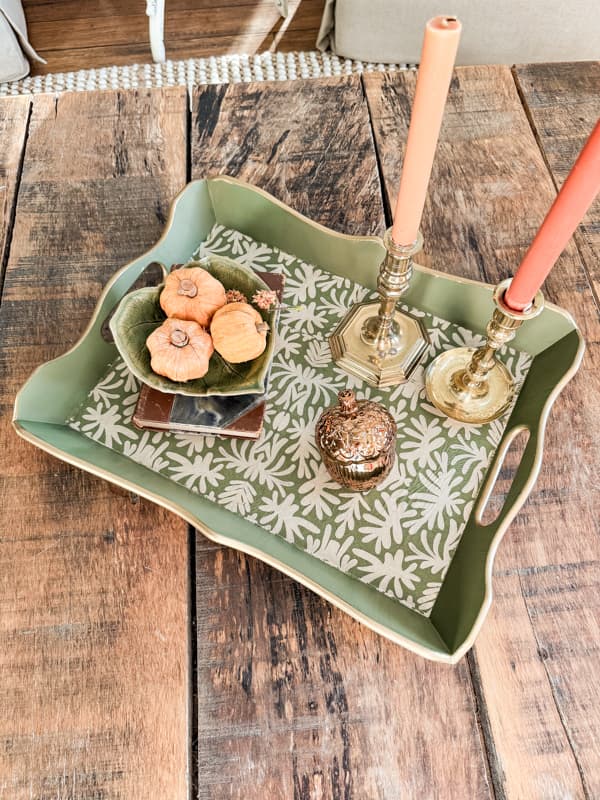
Although I planned this napkin decoupage project for the Christmas holidays, I couldn’t resist styling the tray with a few fall touches.
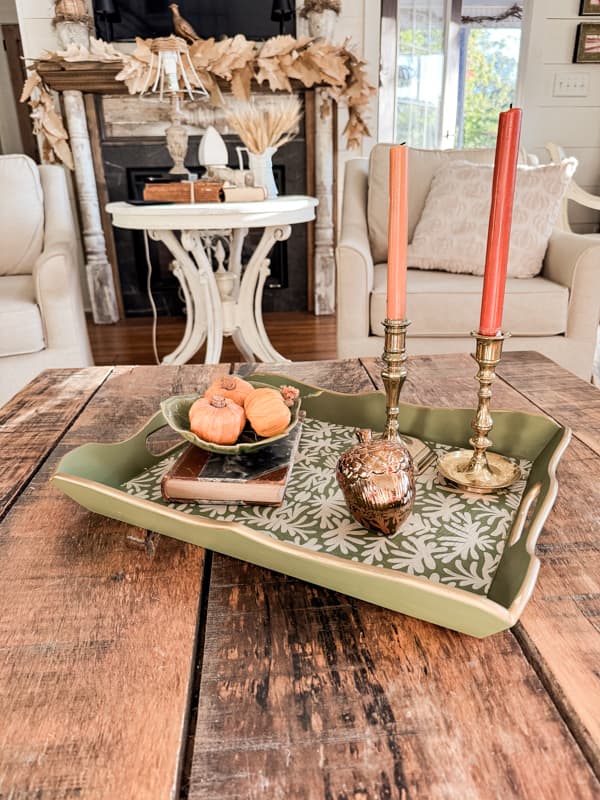
This napkin design will work year-round, depending on the other decorations you add to the decorative tray.
Insider Tip
If you plan to use your tray to serve food or beverages, I recommend adding a plexiglass cover over the decorative napkin. Water will ruin your creative design. I don’t recommend sealing over the napkin with polyethylene sealer as you will risk the napkin wrinkling. If you want to seal over the painted areas, adding the sealer before adding the napkin to the tray will be best.
Related Articles
Did you like this project? Check out these related articles.
- DIY Lampshade Makeover: No-Wrinkle Napkin Decoupage Guide.
- Napkin Decoupage Dollar Tree Pumpkins
- DIY Anthropologie-Inspired Decorative Trays On A Dollar Tree Budget
- DIY Decoupage Candlestick Holder
Video
Thank you for stopping by. Stay tuned for another napkin decoupage project using these same napkins. I look forward to sharing my next adventure with you!


I love upcycling trays but have never had much luck decoupaging them because of the wrinkles. I am going to try this no wrinkle procedure but can you tell me where i would source the plexiglass from? I love your creative ideas and Christmas is always my favorite.
Cheryl,
I’m so glad you found this helpful. Lowes Home Improvement and Home Depot both have plexiglass and if I’m not mistaken both can cut it to size for you. I know my Lowes does that. You don’t need a heavy weight glass, so ask for the lightest weight available. Good luck.